• home
  • galleries
    • client favorites
    • interiors + brands
  • blog
  • tutorials
  • about
    • meet stephanie
    • featured work
    • why film
  • session details
    • newborn sessions
    • family sessions
    • interiors + brand sessions
    • studio sessions
  • Menu

Stephanie Bryan Photography - Raleigh Newborn and Family Photographer

  • home
  • galleries
    • client favorites
    • interiors + brands
  • blog
  • tutorials
  • about
    • meet stephanie
    • featured work
    • why film
  • session details
    • newborn sessions
    • family sessions
    • interiors + brand sessions
    • studio sessions

5 tips for product photography

March 29, 2017 in tutorials

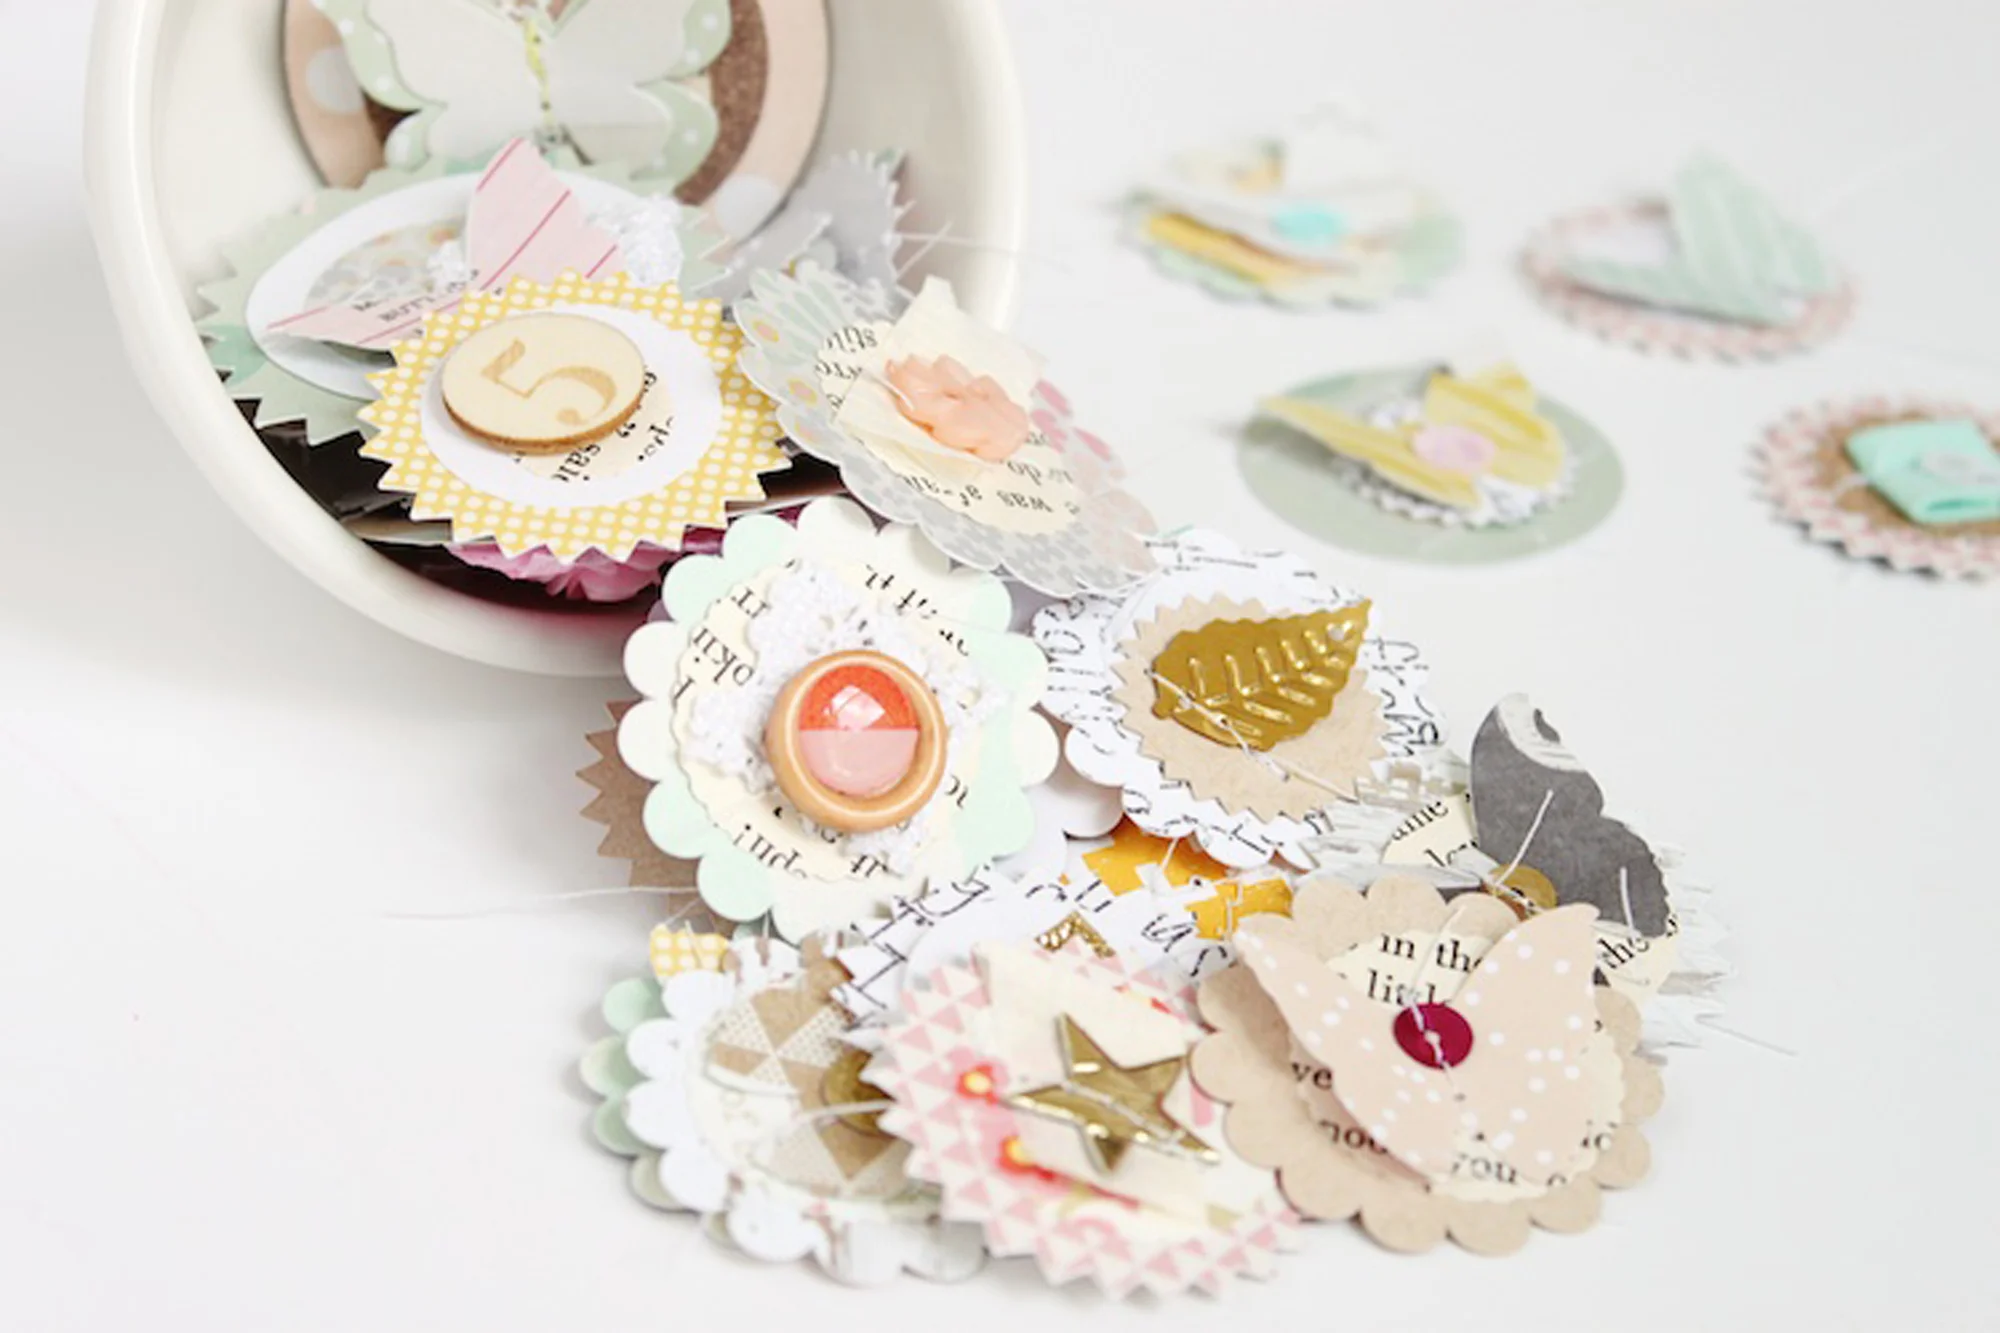
Whether you have a blog or post regularly on social media, you are showcasing something when you post a photograph. Maybe it's your family, or new bedding...or your favorite book or best cup of coffee. Maybe you do sponsored posts or help promote your favorite products on Instagram! The key to these "product" photos is making them stand out and shine. Here are some of my top tips for stepping up your product photography game.


1. Start with a clean base.

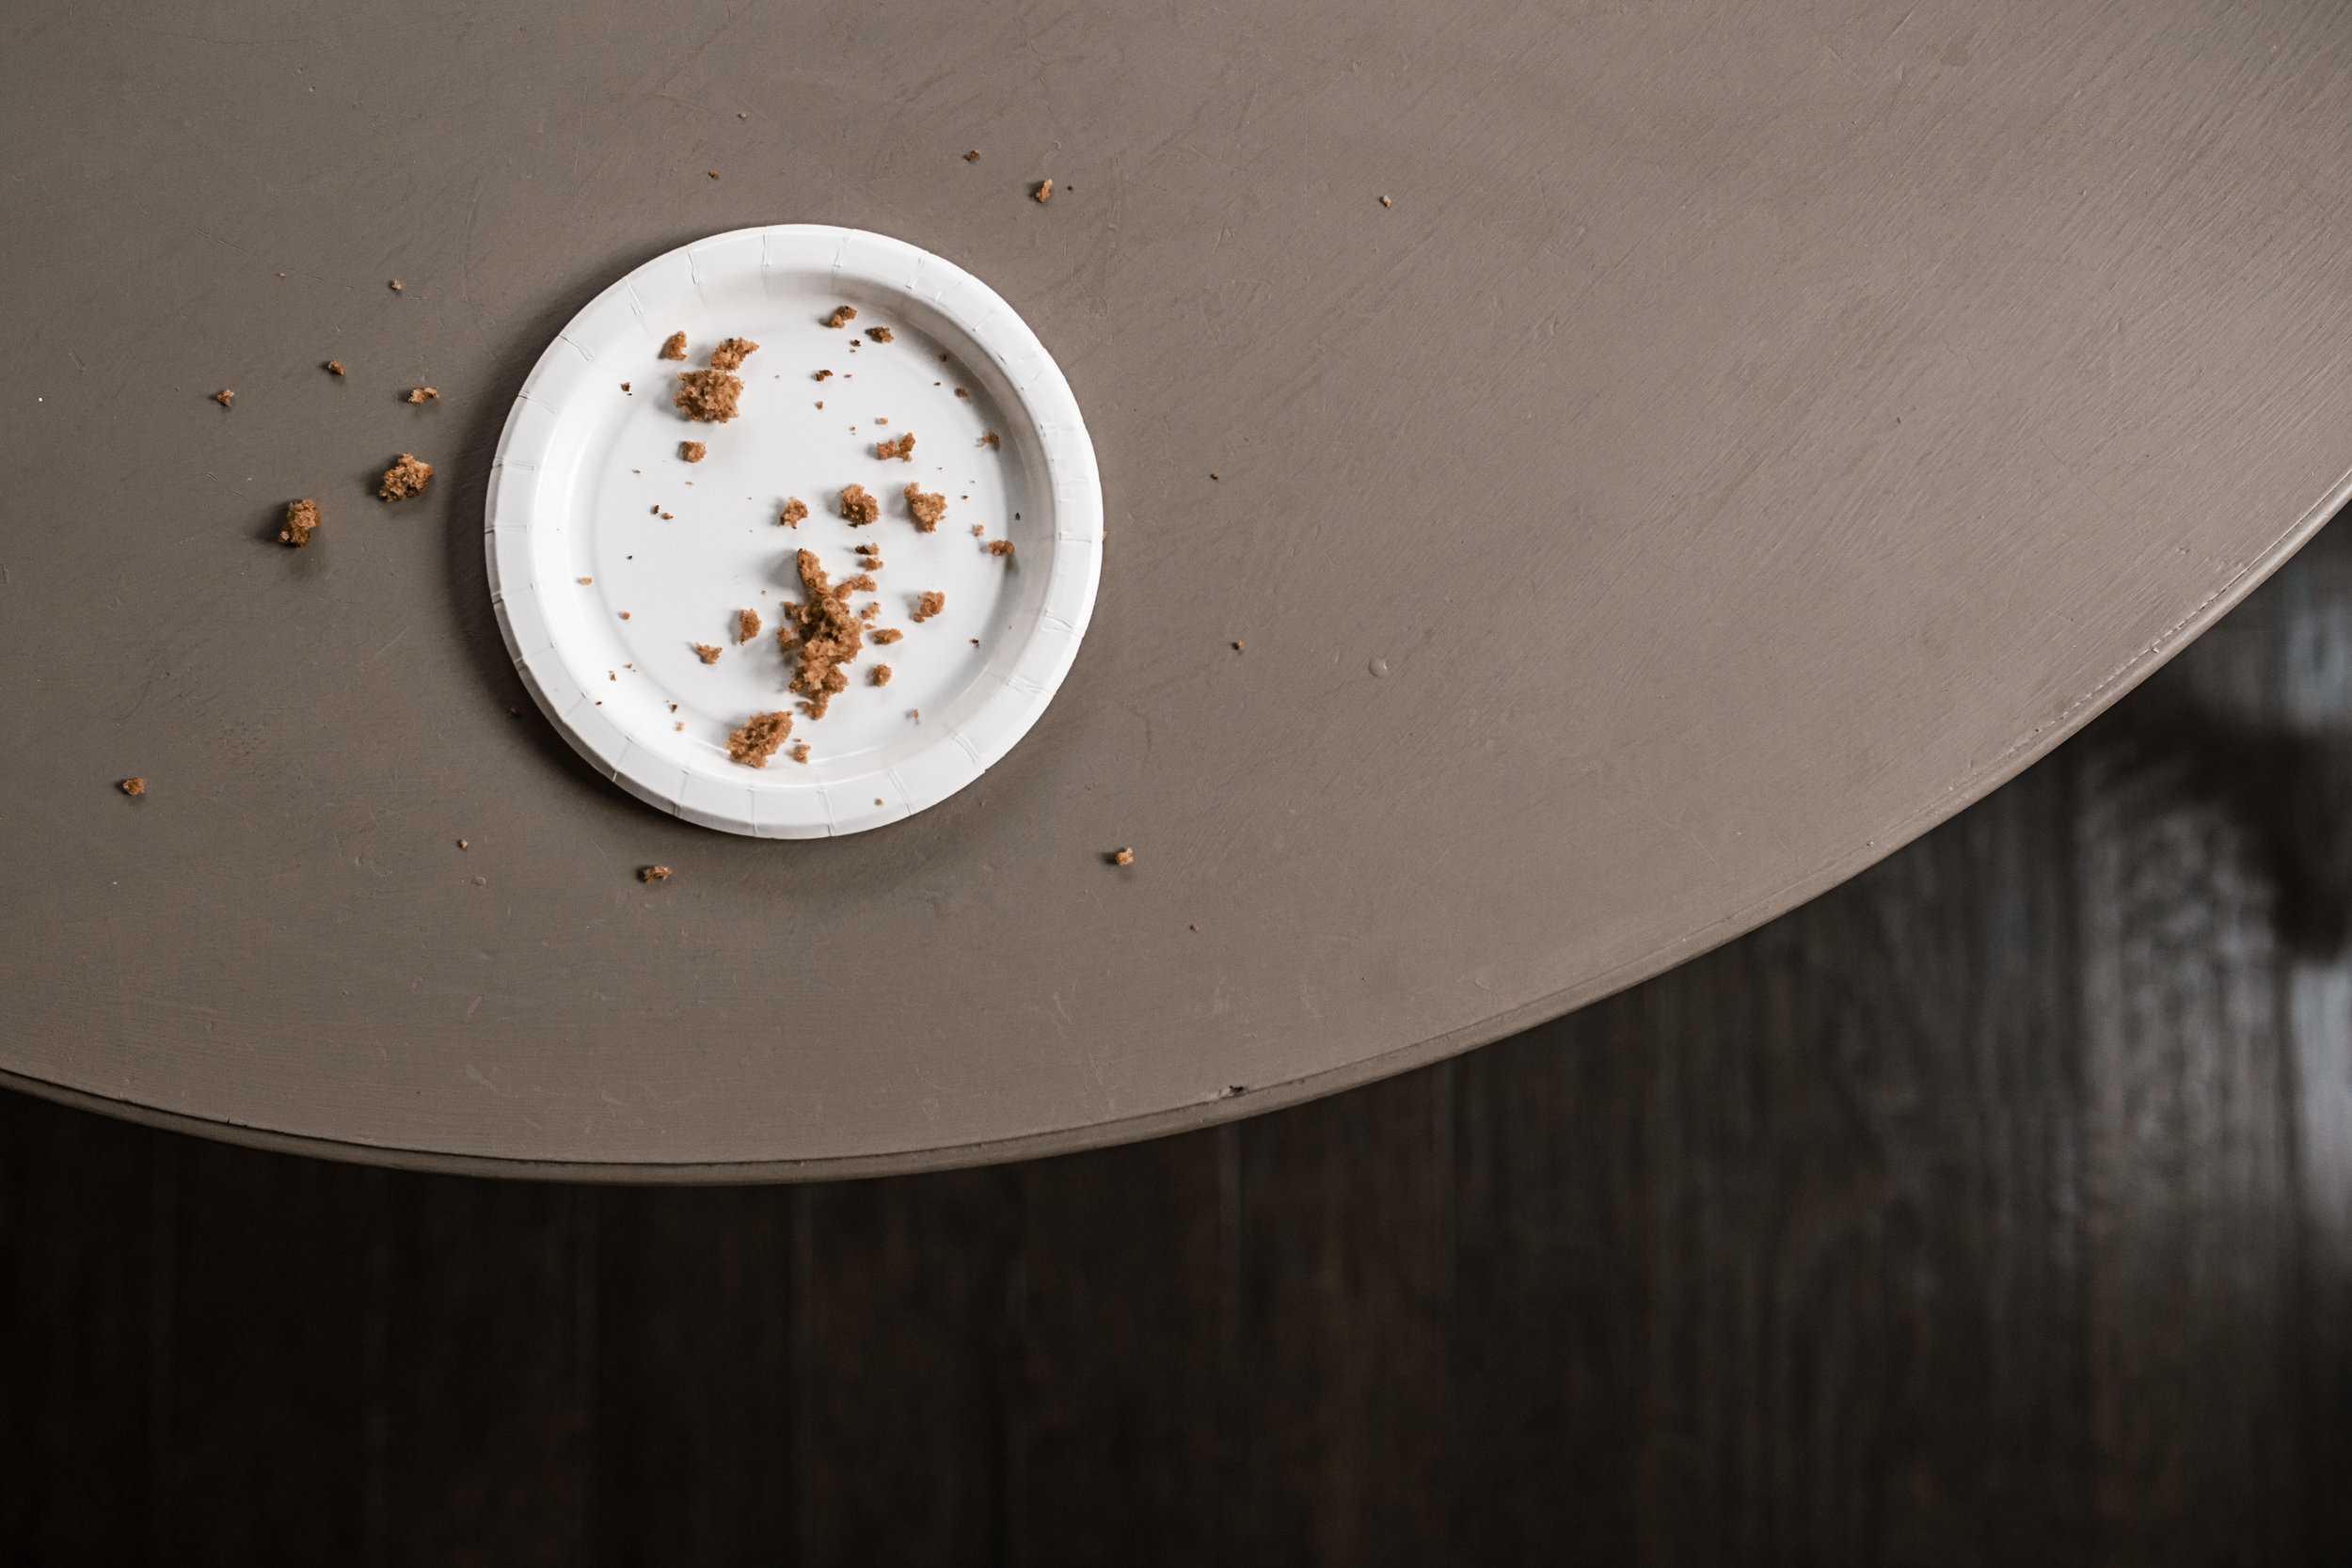
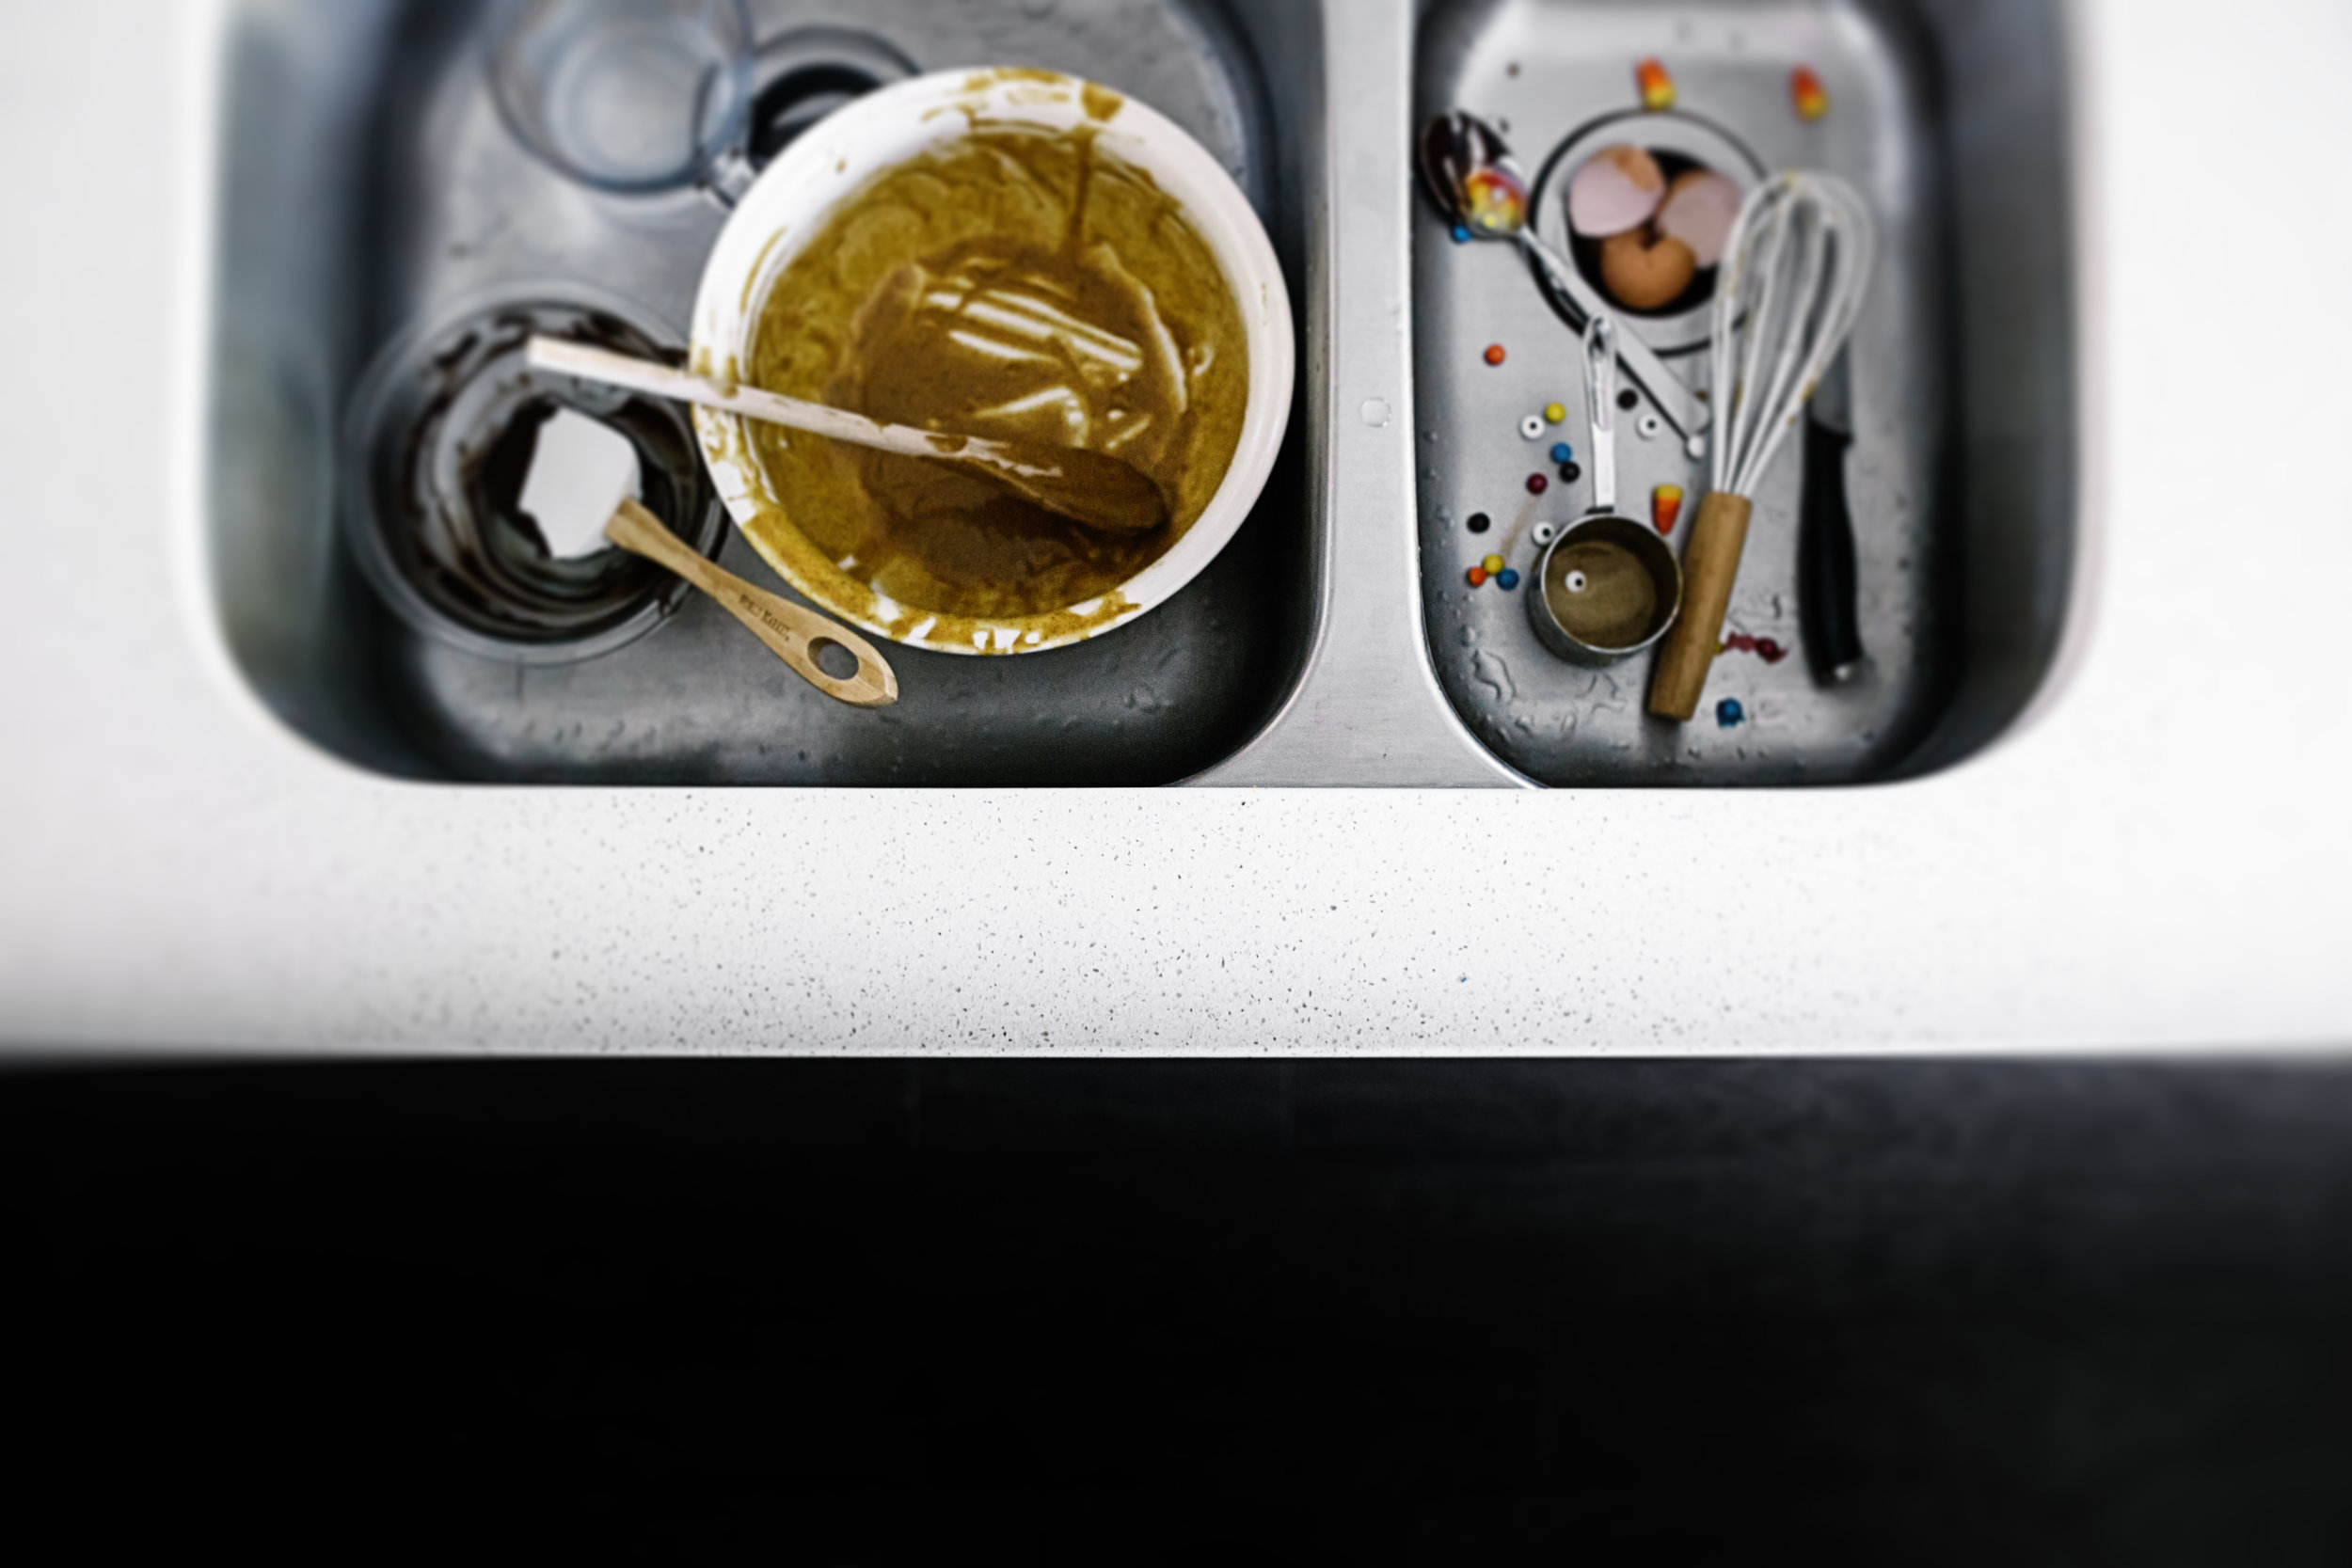
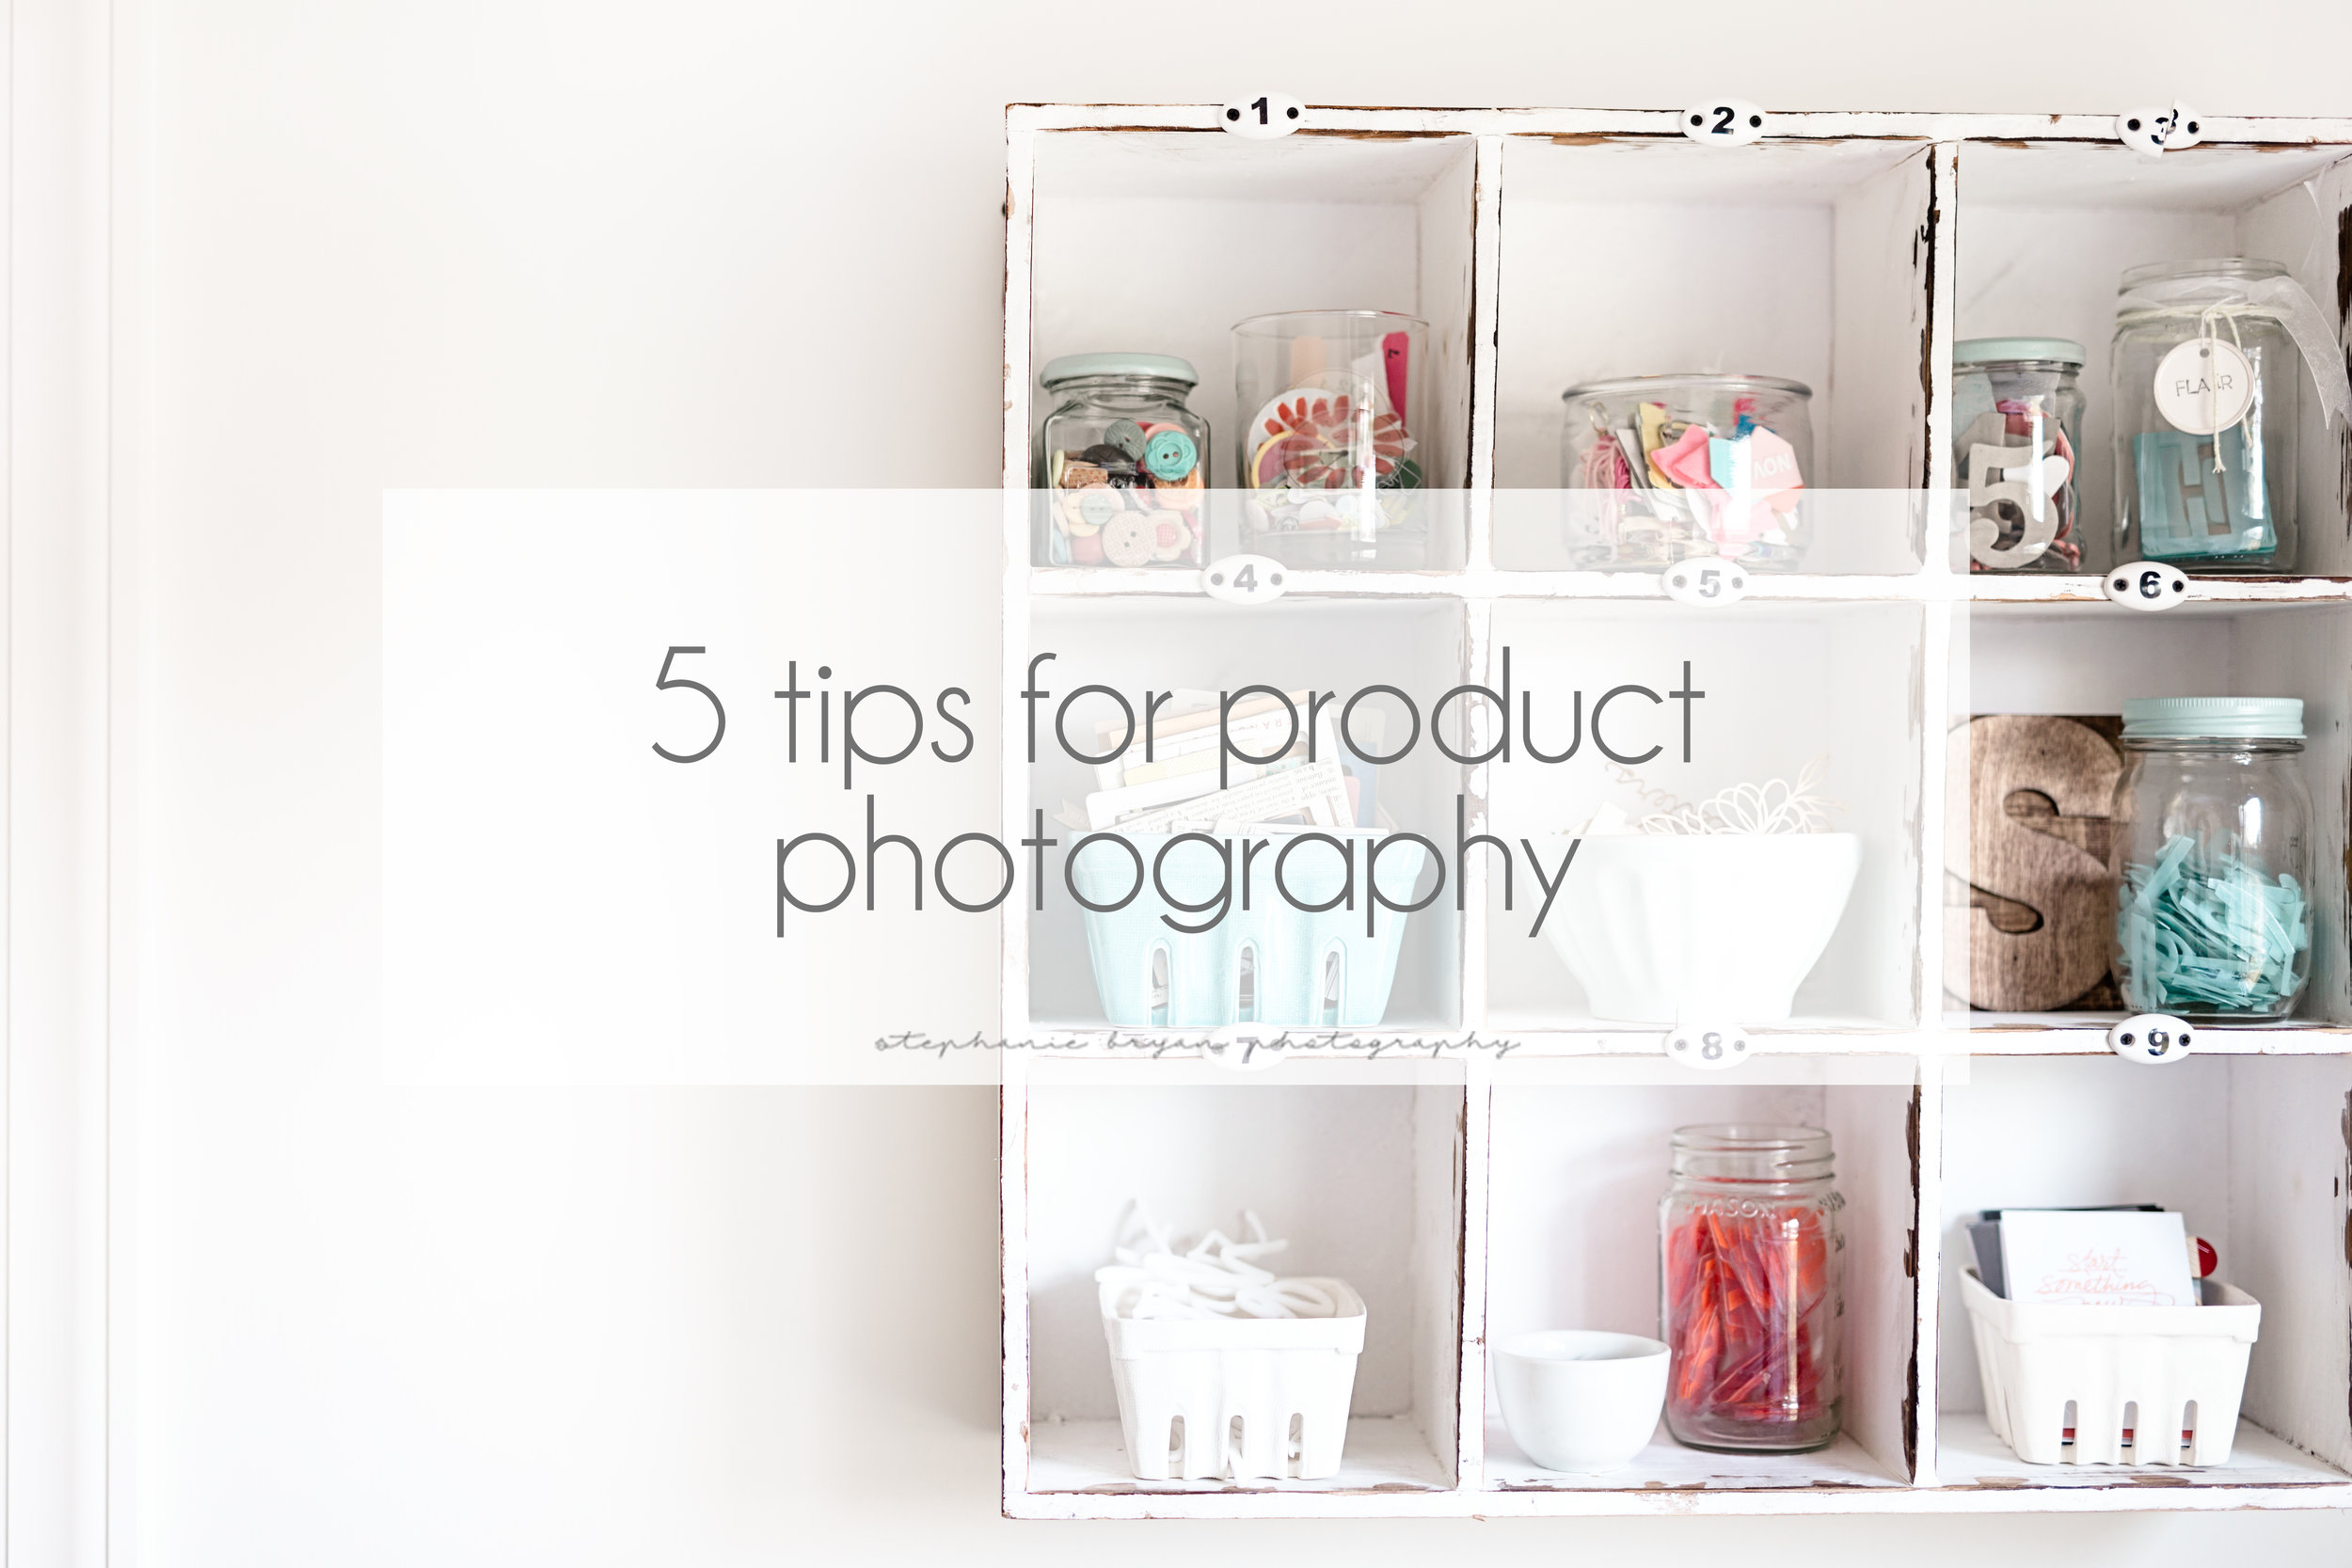
My "clean base" is usually a white surface. I painted my office desk white just for this purpose and I also keep a few foam poster boards handy to use as my background as well. A clean surface can be anything from your wooden floors to your marble counter tops. You don't need to go out and purchase a ton of background surfaces for this purpose at all. Look around your home and see what you've got (wooden floors, cutting boards, tile floors, counters, desktops, rugs, blankets...). If you are looking plain and simple, I recommend the cheap foam poster boards from Target or the craft store. These babies literally cost pennies and they work perfectly to create a good starting base for your products!

2. Use a reflector

When I'm shooting products, I typically always start with a clean base and then prop up one of my handy white poster boards alongside my products to help act as a reflector. This reflector helps minimize weird shadows cast on my surface and adds more light to my products. You can totally use a photography reflector here as well if you have one. I've just found that it's easier to keep my poster boards stacked together and then "build" kind of a frame around my products to guide my light. 

3. Shoot in natural light during the middle of the day if possible

Natural light is a must for product photography (unless you're working in a studio where you can manipulate the lighting to your liking). I like to stage and shoot my product shots during the middle of the day when the sun is above my house and harsh light isn't streaming into my window. If you pay attention to your house, you will notice the color of the light changes throughout the day (just like it does outside). I like mid-day because the lighting is more neutral in color and I always set my white poster boards up close to a window (making sure my boards are not in of any harsh light or shadows). 

4. Use a tripod

I'm pretty sure my head or face might be crooked because rarely do I get a straight, level shot when shooting looking down. Using a tripod and live view mode on my camera has been a game changer for any product photography I do. I shoot WAY less + get it right more often. By using a tripod, I also don't have to worry about my shutter speed or possible camera shake. 

5. Plan it out...just a little

Before you even begin to shoot your product, try to envision the end result. Are you looking for something clean and simple? Colorful and bold? Knowing where you want to end up will help you get there faster and will keep you from wanting to pull your hair out as you shoot. I start with an idea in mind and then gather any additional props or objects I want to add into my photo. Adding a little color to your photo can really make your image pop and stand out. Simple props (candles, flowers, fabrics) can accent the main product without taking over the entire image. I am also a BIG fan of lines and composition, so I am frequently rearranging/tilting/moving my objects until I'm happy with the set up. 


Tags: tutorial, photography tips
Comment
Stephanie Bryan Photography - How to use leading lines to enhance your images

How to use leading lines to enhance your images

March 28, 2017 in tutorials

Nothing quite makes my photographer heart go pitter patter like a well composed image. I love symmetry + lines + framing + all that jazz. Using leading lines in your images draws your viewer in and helps add depth and dimension. Follow these tips to enhance your images using lines! 

Lines, lines everywhere!

I am always on the lookout for leading lines when I'm composing my images. If I can make a line "lead" to my subject, than I sure will. These lines help to guide the viewers eye to main focus of the image and can really make your subject pop from the frame. Leading lines are ALL around you and just knowing what to look for can change your perspective altogether.

Use your surroundings

Once you start to look for them, you will likely start to see lines everywhere. I use doorways, hallways, stairs, bridges, roads, trails and more as my leading lines. I am always trying to figure out how I can use the lines around me to help frame my subject or lead to my subject. 

Change your perspective

When composing your images, try to make your lines point TO your subject. By changing your perspective and shooting viewpoint, you can add in more depth and dimension to the image. In the photo above, I photographed my kiddos on a swinging bridge, but made sure I had enough of either side of the bridge to add in a little depth to the image. The sides of the bridge and the wooden slats draw your eye right to them. In the image below, I shot looking down on my son and used the curtains and lines of the windows to lead down to him. 

So go on out and look for those leading lines. How can you use them to enhance your subject? 


Tags: tutorial, photography tips
Comment
Stephanie Bryan Photography - 5 tips for creative framing

5 tips for creative framing

March 27, 2017 in tutorials

Creative framing can make a subject pop right out of the photo. I am always on the lookout for fun framing options both inside out home and when we're outdoors adventuring. Framing draws the viewer into your subject and helps to isolate then from the surrounding environment. It can take your composition from ho-hum to WOW! And it also adds to the overall storytelling element of your photo.  

Once you start looking for framing you will see opportunities EVERYWHERE. For real. Just keep your eye open to your surroundings and keep these five tips in mind! 

1. Fill the frame

Filling the frame can add more depth and interest to your framed subject. In the two photos above, I was standing a good distance from my daughter to make sure I would have the surrounding walls/trees in my photo to use as a framing element. If I were closer to them (more like a portrait photo), the framing would not have been as obvious.

2. Think about the foreground and background

Keep both the foreground and background in mind and use them to tell your story. In the photo below, I framed my son within my daughters arm. To me, this photo tells a few different stories... It shows how small my son is in relation to my daughter; it shows how my son is always copying what my daughter is doing, and it also conveys how adventurous and daring these two are. By shooting looking up at them, I was able to keep the background minimal and was able to frame my son. 

3. Keep it simple

A minimal background or a simple framing will enhance your photo and draw the viewer to your subject. Try to eliminate any objects/areas that don't directly tell your story. These elements will distract from your overall framing. I use both the content aware and clone tool in Photoshop if needed to help remove any unwanted objects. 

4. Use shapes

Shapes are everywhere and once you start looking, you will start finding framing options wherever you go! Circles (mirrors), squares (windows), rectangles (doors, hallways) are just a few of the shapes I use within our home.

5. Pay attention to your surroundings

Keep your eyes open for framing opportunities in your environment, such as doorways, mirrors, windows, hallways, etc... Since I document our everyday, I am always looking for new ways to capture the same old, same old. Framing is usually my go-to when I feel "stuck" on my Project 365! 

And there you have it! Framing is SUPER simple and I promise you will start noticing framing opportunities as soon as you start looking! Framing is an awesome way to improve your composition while also pushing yourself creatively! 


Tags: tutorial, photography tips
Comment
Stephanie Bryan Photography - Best of February 2017

Best of February 2017

March 25, 2017 in personal photography

Moving right along on my Project 365! The process of this project has definitely gotten easier and has become less stressful. The thought of HAVING to capture something every.single.day almost sent me straight into panic mode when I started in January, but now that we are more than two months in, it's just part of my day now.

I knew when I set out to complete a 365 I needed to approach this as something FUN rather than a chore. (And side note - it totally felt like a chore those first few weeks, just FYI.) It took me a good solid month before I could step out of my comfort zone and be free of the "I have to capture a perfect shot" mentality. Photography is an art and it definitely takes a ton of patience. I know that not every shot is going to be amazing, but that the whole of them all together will be absolutely AMAZING. 

I love looking back through our month and seeing the sum of everything. This project is SO worth it and remember it's still not too late to start. Heck - you can start in November if you want! There are no rules to capturing your everyday! 

Follow this link to see all of my Project 365 photos.

Tags: personal
Comment
Stephanie Bryan Photography - Raleigh Maternity Photographer

Mama-to-be Amber | Raleigh Lifestyle Maternity Photographer

March 24, 2017 in maternity photography, client sessions

Just a few more weeks until this sweet mama-to-be meets here little baby boy. Her little adventurer is going to be loved to the moon and back. And I'm pretty sure his little nursery will soon become his very favorite place to play. There is no detail left undone in this darling nursery! And mama Amber is an amazing designer (not to mention an amazing photographer), so most of the artwork you see, she designed herself! So talented!

Thank you, Amber, for inviting me into your home and allowing me to capture your "right now". I can't wait to snuggle on your sweet baby boy! xo


Tags: lifestyle family photography
Comment
Stephanie Bryan Photography - 3 reasons to embrace the mess of childhood

3 reasons to embrace the mess of childhood

March 23, 2017 in tutorials

I will admit that I love a neat and tidy house. I like things clean. I thrive off of order and tidiness. Almost everything in my house has a place and try every single day to make sure things are back where they belong. I keep my counter tops clean and the all of our clothes in the hamper. I make up beds as soon as feet hit the floor, so yeah...obviously, I like things clean.

But...sometimes I feel like I'm missing out on the mess and creativity of my children so I'm slowly learning to embrace the mess and enjoy these little moments of childhood. If you struggle with "messes" and crave order, then here are my three reasons to embrace the untidiness and enjoy this phase of childhood!


1. Time is fleeting.

One day I know I'm going to wake up and their stuff isn't going to be all over the place. Their messes will be contained to their room where they probably will prefer to hang out. Their toys will be replaced with gadgets and gossip. This phase of childhood is so fleeting and I've decided to embrace the mess and enjoy my kids "leftovers" and I think you should too!

2. It's not really a "mess".

I'm trying to remind myself that what I see and find strewn about our house isn't actually a "mess". It's our life. It's the way my children play or it's their age. My son isn't tall enough to stand at the counter and reach the sink. His little hands aren't strong enough to squeeze out the toothpaste neatly. He tries, bless his heart. But his "mess" is because of his sweet age. 

3. You will appreciate the small things.

I will forever be thankful for my camera because it allows me to see my world from a different perspective. The "snapshot" of our day lets me really take a good look at our life and all the little bits + pieces that make up our day. These images captured are return tickets to our past, and while it make seem like a mess, I'm learning to appreciate these little things and to accept them as they are. 

When's the last time you stepped back and EMBRACED the mess of childhood, rather than rushing to clean it up? Have you ever grabbed your camera and looked at those details through the lens before tidying up? If you haven't, I challenge you to do just that! Walk around your home. See the messes and piles and toys and try to capture those "leftovers" now, for soon those leftovers will be gone and replaced by something different.


Tags: photography tips
Comment
Stephanie Bryan Photography - How to make lightroom presets

How to make your own lightroom presets

March 22, 2017 in tutorials

I'm a self-confessed editing addict. I do enjoy editing. BUT - I like creative editing and fun edits and playing around with unique colors and layers and stuff like that. When it comes to everyday editing (like my Project 365) and editing "like" photos, the simpler, the better! I would much rather be out shooting, than indoor behind my computer editing!

One of the ways I've simplified my editing process is by creating my own Lightroom presets. I have a love affair with presets and just may very well be a "hoarder" of presets. I don't use them all, but I sure do love seeing what they do for my images. (You can read about my favorite Lightroom presets and how I make them work for me in this blog post). But I also like to create my own personal presets. I typically do this for almost every client session or set of images where a good number of photos were taken in similar lighting and similar backgrounds. I find this greatly reduces my editing time and you can't beat that!

I put together a short video showing you a quick edit of a photo and how INCREDIBLY easy it is to create your own presets!! Check it out below!

Creating your own presets is a major time saver when it comes to editing! I have a few of my own presets I use pretty regularly, and then also routinely create new presets with client and personal photos! The most important thing to remember when creating your own preset or when using a purchased preset is that SOME tweaking is probably necessary. Occasionally I'l have that one click preset that's magic, but for the most part, I am playing around with my sliders to get the image where I like it! 

Subscribe now + get my Lightroom Preset FREE

Want to grab the Lightroom preset I created in this video?? Sign up for my newsletter and it will magically appear in your inbox (well...it's not really magic, but let's just pretend, m'kay??).

We respect your privacy.

Woo hoo! You just made my day! 

Thank you for subscribing to my newsletter!


Tags: photography tips
3 Comments
Stephanie Bryan Photography - 5 tips for light and airy photos

5 tips for light and airy photos

March 21, 2017 in tutorials

I don't think I have a "favorite" type of photo. I love deep, dark, moody photos as much as I love light and bright photos, but I do think my "go-to" is light and airy. I've been shooting that way for as long as I can remember and it's kind of engrained in me when I go to compose my images. If you're wanting to give your images a boost and make them a little lighter and brighter, here are my tips for achieving that look!  


1. Use natural lighting only.

The first step to really make your images bright and airy is to make sure you are using natural light only and that you have a decent source of light. It's not impossible, but it will be a lot harder to achieve a "light an airy" photo after the sun has gone down. I love shooting my subjects close to, in front of or beside windows. North facing windows give off beautiful light (because the sun never really shines directly into them), but I'm a big fan of any kind of window. Pay attention to your surroundings and house and notice when the light is yummy! That's where you want to snap your photos! 

2. Declutter your surroundings.

I'm not saying to hire a maid to come and clean your house (although that would be nice, right?), but picking up and moving "stuff" out of your shot is going to make your focal point stronger. Just push the shoes, clothes, toys, etc. off to the side. I promise it will make all the difference!

3. Open your aperture as wide as possible. 

If you're not sure what aperture is, check out this post! 

Opening your aperture as wide as possible is going to let in as much light as possible. Just remember that the wider open your aperture is, the narrower your depth of field is, so less of your frame is going to be in focus. For me, I typically keep my aperture about f2.2 or 2.8 for indoor photos so more of my subject/photo is in focus. 

4. Bump up your exposure compensation.

If you're not sure what exposure compensation is, check out this post!

When I'm shooting indoors, my exposure compensation is usually at +0.5 to +1.0. Even though I might be in a room where there's pretty light in my house, there isn't as much light as would be outdoors, so I like to bump up my exposure compensation a little to give my photos a brighter feel. Remember that increasing your exposure compensation is going to affect your shutter speed, so pay attention to those numbers to make sure you don't end up with a blurry photo. 

5. Post processing adjustments.

Even after I've opened my aperture as wide as possible (to let in as much light as possible) and increased my exposure compensation, I almost ALWAYS tweak my photo in Lightroom to make it even lighter and brighter. I typically will bump up my exposure a little, increase the contrast (to help my subject pop from my frame) and then play with my highlights and shadows. Tweaking these areas can make a huge difference when it comes to your photo!

Light and airy photos are easy to achieve if you have good lighting and know how to manipulate your camera settings to work in your favor! If your typical style is dark and moody, push yourself to try something different. I love combining both aspects in my work (both professional and personal). While I do consider my "style" more light and bright, I love to push myself creatively and try new things!! That's part of the photography process for me and I love it!


Tags: photography tips
5 Comments
Stephanie Bryan Photography - A guide to the rule of thirds

A guide to the rule of thirds

March 20, 2017 in tutorials

When it comes to photography, how your compose your image is just as important as your image itself. A good composition draws the viewer in and helps to tell your complete story without any words needed. A good "rule" to follow when envisioning you image is the "rule of thirds". Today, I thought I would touch on composition using this rule and how it can really make your images pop. (But remember - all rules are meant to be broken, so we'll cover that too)!


What is the rule of thirds?

The rule of thirds is a method of composing your image into a third of your frame. Ever notice when you go crop your image (or maybe even when you look through your camera's viewfinder) that a nine-square grid helps guide you? (Check out the image below...). This "grid" divides your image into thirds and is super helpful in both composing your image (before you shoot) and cropping your image (in post-processing).


How to use the rule of thirds?

When composing your image (or setting up your subject in the frame), you will want place them along one of the intersecting lines. My viewfinder doesn't have the grids, so I always just eyeball it when setting up my shot. And just in case you were wondering - NO! My kids (and probably my clients too) could care less about pretty light or composition. I am the one moving, angling and running around to compose my shot. I do rely on my grids for cropping in post-processing and typically always follow the rule of thirds (unless I don't - which I will explain in a sec!). 

By placing your focal point or subject where one of those lines intersects, you are creating more "blank space" in your image and are drawing your reader in to what you are capturing and helping to tell your story. Remember that there are several different options when it comes to composing your image using the rule of thirds! Don't feel restricted to the far right or far left only. You can also compose your image using the horizontal grid lines along the top and bottom of the grid as pictured in the two images below.

Have multiple subjects or want to fill your frame? No problem! Use the guides to place them along both sides of your grid. Notice in the image below how my daughters eye is just about at the top left intersecting line and my son follows the guide line along the right of the frame. 

**Note - I can't remember exactly, but I'm pretty sure I cropped my image to follow the rule. Photographing kids is like wrangling cats in a shower, so I'm pretty doubtful that I it was this "spot on" straight out of the camera!**

These images show various ways to compose your images using the rule of thirds. My go to is probably either the far left or far right. I LOVE blank space (and you can read all about how I use it here), so placing my focal point to the left or right gives me good room around my subject and helps them pop from the frame. 

When to break the rule of thirds?

Ok! So now that you know all about the rule of thirds, let's talk about when it break it!!

My answer to that is - WHENEVER YOU WANT TO! Yep! I'm a BIG fan of knowing the rules, but I'm also a big fan of breaking them. Photography may be an art, but it's also a passion and being creative is part of the process. If you want to place your subject smack dab in the middle - go for it! If you want your focal point to be all over the place and keep your viewer guessing, by all means, DO IT! Don't feel stuck to the rule of thirds when it comes to composing your image. It's a good rule to know and can definitely help tell a more complete story, but give yourself the freedom to do whatever your heart desires! 

While I use the rule of thirds a lot, I also break it a lot as well! I LOVE framing, so if I see an opportunity for framing and can place my subjects in the middle of something, I definitely do! I'm also a big fan of negative space (read more about that here), so I often find myself placing my focal point at the bottom or top middle of my frame.

So there you have it! The rule of thirds! It's great for composing your images and if you're new to photography and are trying to up your A-game, then definitely keep it in the back of your mind as you're setting up a shot! Learn the rule - and then learn when you love to break it! 


looking for more inspiration + tips?

Tags: photography tips
Comment
stephaniebryanphotography_experimenting_with_prisms

Experimenting with Prisms - Click It Up A Notch

March 18, 2017 in collaborations, tutorials

When it comes to my personal photography, I am always pushing myself creatively.  I love trying new things, experimenting with unique elements and getting creative with objects to add unusual effects to my photos. Prisms are so fun and easy to use and are a great affordable option for experimenting! Stop by my guest post over at Click It Up A Notch to read my 4 tips for experimenting with prisms!


looking for more inspiration + tips?

Tags: tutorial
Comment

Understanding white balance

March 17, 2017 in tutorials

Understanding white balance and how it effects your image is another crucial part to this whole photography process. If the white balance of an image is off, skin tones might look weird, whites could have blue, grey or yellow color casts and the overall "feel" of the image will likely be too warm or either too cool. 

What is white balance?

White balance is the balance of colors within your image and removal of any color casts so that whites will be a true white. What happens is your camera's sensor reads the temperatures of the illuminated colors and attempts to "neutralize" the colors by either adding in warmth or removing warmth. The human eye naturally adjusts whites to look white regardless of the type of light you are in, however, your camera just isn't that smart.

Adjusting your camera's white balance

Most DSLRs have a few different options when it comes to setting and adjusting white balance. The default setting is auto, or AWB, which will try to "neutralize" the temperature in your image to make the whites a true white. If you aren't happy with the colors in AWB, you have three options!

1. Adjust your white balance according to your light source. . You can do this in your camera settings options by selecting "white balance" and then toggling to your preferred lighting preset (daylight, shade, cloudy, tungsten, flash, etc...).

2. Manually set your white balance by using a grey card, Expodisc or true white object. To do this, you will need a grey card/Expodisc or an object that is truly white and you will want to use the light that is in your scene. After you focus and shoot using your grey card/Expodisc, set the "custom white balance" using the image captured. With this method, you will have to reshoot and change your white balance if your lighting changes. 

3. Set the color temperature (Kelvin). If you want to be more precise with your white balance, you can numerically assign a temperature (Kelvin). Below is a Kelvin chart of the various temperatures and how the the color of the light changes as the temperature changes (and a side note here - I totally just made this myself according to how I interrupt Kelvin. It's definitely not exact.).

The light around us is constantly changing throughout the day and just paying attention to the light can be a tremendous help in determining how to set your Kelvin. Ever notice the sky is orange and golden at sunrise and sunset or blue during high noon on a clear day? If so, then you are already halfway there to understanding Kelvin. Dialing your Kelvin higher is going to add more warmth to your image, while inversely, dialing your Kelvin lower is going to add more coolness to your image. How much to change your Kelvin is going to depend on the light source. By changing your Kelvin settings according to the color temperature, you can help to "neutralize" the colors making your colors more true to their natural shade. 

To keep things simple, I try to remember: 2800 (sunrise/sunset), 5200-5500 (indoor photos), 6500-7500 (overcast sky, shade).

stephaniebryanphotograph_kelvin.jpg

How to determine which white balance is right for you

It really is a personal decision when it comes to white balance and deciding which one is best for you. Before I even understood what Kelvin was, I shot in auto ALWAYS. And I was totally fine with that. I knew I was going to have to warm my images up in post-processing and since I always shoot in RAW, that really wasn't a big deal. I know a whole slew of photographers who keep their white balance on AWB and are good to go.

Personally, I do a mix of Kelvin and AWB depending on where I am the light around me. I took the time to understand Kelvin and I know how I changing my color temperature can affect my images (which I totally think you should do!!). That was step one. When I had a good understanding of Kelvin, I felt comfortable using AWB as I wanted. If I am working with lots of natural daylight and the light is pretty consistent and not changing, I will change my Kelvin settings and keep my camera on the same setting for the entire shoot. I also prefer Kelvin in tricky lighting situations, like lamplight, dusk, sunset and sunrise. I like having control of my white balance when the light might be different than just "normal daylight". In the photo above, I used Kelvin to find a good color temperature for the light source in my image (lamplight). However, if I'm somewhere and the lighting is changing every other second (like clouds rolling over, moving from room to room in client's homes), I might stick with AWB. It just depends on the lighting I'm in and how much time I'm going to have to change my settings. I do have both a grey card and an Expodisc, but I've found that I prefer using Kelvin for consistent lighting, or using AWB when the lighting is constantly changing. 

Clear as mud, right??? :)

I promise it gets easier to understand the more you practice! Like always, I suggest just grabbing your camera and playing around with the different white balance settings, custom white balance and Kelvin! Practice on a still object and change your settings. See what happens when you use the various white balance presets....then change to Kelvin and see how the color temperature changes as the Kelvin changes. You'll be a white balance pro in no time! 


looking for more inspiration + tips? 

Tags: tutorial
Comment
Stephanie Bryan Photography - 3 reasons you should switch to back button focus

3 reasons you should switch to back button focus

March 16, 2017 in tutorials

Are you using back button focus (BBF)? It's a game changer when it comes to nailing focus and once you switch to BBF, I promise you won't go back.

What is back button focus (BBF)?

In a nutshell, back button focus is moving your focus button to the back of your camera. On it's default setting, your focus and shutter button are combined together in your front shutter button (the button you push half way to lock focus, then click the rest of the way to snap your photo).


Why should you switch to back button focus?

I was doubtful when I first read about BBF and it did take me a few days to get used to it, but I would never go back to having my focus and shutter buttons combined! Today I'm going to convince you to try it out!  

3 reasons for switching to back button focus

1. More accurate focusing

I'm sure you've had a time or two where you locked focus with your focus/shutter button + snapped your image, but your subject moved and the focus was missed altogether, right?? By reassigning your focus to a button on the BACK of your camera (the AF-ON button on back upper right of your camera), these two functions will work independently and you can easily change/re-focus/move, etc... without having to worry about your shutter button. This gives you full control over both your focus and shutter buttons and you can more accurately nail your focus.

2. Switch between single and continuous focus

With back button focus, you can easily switch between single focus (or locking your focus on your subject) and continuous focus (focusing on your subject for a period of time). When you have your subject in your frame, just focus on your subject (by pressing the BBF button) and the focus is locked. Obviously you would use this type of focusing on a still subject or a subject with minimal movement. For continuous focusing, press and hold the back button focus. The focus will lock on your subject and will track them as they move....which takes us to reason #3 (which is my favorite)!

3. Track a moving object

If your kids are like mine, they are always on the move! Always running, always jumping, sprinting at me, racing away from me.... With BBF, I can lock my focus on them and track them as they move, helping to get a more accurate focus. All I have to do is lock my focus, hold down the BBF button and snap away. The camera will track their movement and will refocus as they move closer or away from my camera. If you are using the default focus/shutter button option, you will have to continuously press your shutter button down half way and then try to snap your photo as they are moving. Some times you might catch that movement, but more times than not, your subject will move during that "in-between" moment and the focus will be off. 

Let's experiment!

If your camera is still set up to the default focus/shutter button system, grab a moving body and have them run towards you. Try to nail the focus of their movement for 8-10 frames (basically just snap away as they run towards you)! Chimp your images to see how many seem to be in focus. THEN - pull out your manual (or google the instructions for your camera type) and giving it a try. Now take that wild, crazy kid outside and have them run at you as you hold down your BBF and snap away for 8-10 frames. Chimp your images and see how many are in focus. Hooked yet??


looking for more inspiration + tips?

Tags: tutorial, photography tips
Comment

Understanding your camera's focus modes

March 15, 2017 in tutorials

We're covering the various modes of you camera this week and today we are moving on to the different auto focus modes you can select from in your camera settings. 

Accurate focus can make or break a photo. I love a soft, dreamy focus as much as the next person (see the largest image below), but 99.9% of the time I want my images in focus and sharp. I can only think of a handful of times where I purposefully wanted a blurred photo and those shots I did using manual focus anyway (Christmas light bokeh, etc...). All of the "soft focus" photos I have or share were just missed focus gone right (womp womp). 

Most DSLR camera's offer three different auto focus modes: one shot (AF-S), AI Servo (AF-C) + AI Focus (AF-A) and today we're going to learn which each of them does and how to select which one might be right for you!

What are the focus modes?

1. One shot (AF-S)

One shot (or AF-S) auto focus is your basic auto focus. You press your shutter button half-way (or BBF) and the focus is locked. The focus point will not change again until you release the shutter or if you BBF, you press your button again. 

One shot auto focus is perfect for landscape photos or images where your subject is still (buildings, parked cars, sleeping children).

2. AI Servo (AF-C)

Al Servo (or AF-C for Nikon users) is a continuous focusing mode and constantly tracks a moving subject, refocusing as needed. You cannot focus and recompose in this method as the focus will continue to track your subject (assuming that it's moving). This focusing mode is perfect for squirmy little toddlers, kiddos who just refuse to sit still, pets, action shots and more. 

3. AI Focus (AF-A)

AI focus (or AF-A for Nikon) is mix of both one shot focusing and AI Servo. As you are focusing, your camera will transition between these two modes. If you are on this mode and your subject is still (or has just very slight movement), your camera will focus as if it's on the one-shot mode. As soon as your subject starts moving, the focus will continuously track the object and will transition to AI Servo to maintain focus (or attempt to maintain focus). 

Which focus mode should you use?

The type of focus mode you use will depend on what you are photographing. If you photography lots of landscapes, still life, portraits, one shot might be your better option. If you are like me and are constantly chasing two kids (and a dog) around trying to just get ONE GOOD PHOTO, then AI Servo is definitely going to be a better option. If you do a little bit of both still life + active subjects, then maybe AI Focus would be your go-to. For me, I keep my camera set on AI Servo. My subjects are ALWAYS moving (they seriously never stop), so I feel more comfortable knowing my camera will likely track their movement as it occurs. 


looking for more inspiration + tips?

Tags: tutorial, photography tips
Comment

Understanding metering modes

March 14, 2017 in tutorials

A few weeks ago I covered everything you needed to know to make move to manual mode. Part of the growth process of photography (for me, at least) is continuing to learn as much as I can. Ever since I made the financial plunge and purchased a "BIG" camera, I made a vow to learn the ins and outs, and ups and downs, of it's settings, functions, modes and what not. There is SO much that goes into taking a photo. It's more than just a "point and click" situation and I think my personality type is very much "but, why does it work that way??" rather than "oh, ok...I'll do that". In order for me to understand it, I have to know it inside and out AND I have to be able to explain it (both to myself and others). This week on the blog, I'm going to be tackling more in-depth features of your camera (metering, focus modes, white balance....) so get ready!! It's going to be awesome! First up is metering!


What is metering?

Metering is essentially how your camera's light sensor measures reflected light, which helps determine how your photo should be exposed. The meter doesn't necessarily measure the light as we see, but it measures HOW the light is reflected and the sensor basically tries to keep all tones balanced (not too dark, not too bright). A good example of here is taking a photo in the snow. Have you ever taken an image in the snow with a pretty white background and your image came out super underexposed and way too dark?? That's because the white of the snow is very reflective and tricks the sensor into thinking the scene is brighter than it is (and in turn, underexposes your image). Good thing we're going to learn all about metering modes, right?

What are metering modes?

Almost all DSLRs offer a few different options when it comes to metering modes. These metering modes help tell your camera's sensor about HOW you want your image to be exposed. The three most common modes are: evaluative (or matrix) mode, center weighted mode and spot metering.

1. Evaluative or matrix metering mode

Evaluative metering mode is going to assess almost ALL of the reflected light in your frame (as seen by the image below) and try to achieve a balanced exposure for the entire image. Depending on your camera, this metering option most likely reads the light from a few different areas from your scene to get as "accurate" of a reading as possible. If the light across your scene is nice and even, then this mode will likely be spot on. If your subject is in the sun, but everything else is a shadow, it will likely be way off. A good thing to remember is that your camera is just a tool. It can't look at the scene at hand and make an educated guess about how the image should be exposed. It's making a guess by evaluating the light (and often time it's a pretty good guess....but then other times, it's pretty wrong).

2. Center-weighted metering mode

Center-weighted metering evaluates the light in the middle (or center portion) of your frame. As you can see in the image below, the middle part is the main focus of this metering option. The outer edges are still evaluated, but the majority of the "exposure" metering is given to this middle, center area.


3. Spot metering mode

Spot metering tells your sensor to evaluate the reflected ight at a SINGLE point in your frame. As you can see in the image below, only a very small portion of my son's check would be metered (and honestly, that circle I added is probably too large of an example - it really is just a small pixel-sized area that's evaluated). Most camera's will let you move this spot metering point, although some offer only just a few points in their range, from which you must select. In this case, you would meter/focus and then re-compose your shot for accurate metering. 

Spot metering allows very precise pinpointing when it comes to what area you want properly exposed. If you want to retain the detail of the sky in your frame, then you would meter for a lighter spot in the sky (to keep your brights from being too bright). If you are shooting during the golden hour and you want your subject to be properly exposed, then meter a mid-tone in their skin (which is going to likely blow out your sky). 

How do you choose which metering mode is right for you?

Determining what metering mode works best for you is going to depend on what type of images you take and how the lighting falls across your frames. There really is no right or wrong when it comes to metering modes. It's more of how those metering modes are going to affect YOUR images. If the majority of your photos are taken in even lighting situations, I would think sticking with evaluative (matrix) metering would work out just fine (which is your camera's default setting). If you are a product photographer and take straight on images with the main item typically in the center of your frame, center-weighted metering would likely work out a-okay. And if you're light varies or you love shooting in high contrast lighting, spot metering is probably your best bet.

For me, I stick with spot metering 99% of the time. I like being able to pick the EXACT spot I want metered instead of relying on my camera to evaluate the reflected light for me. By selecting the area I want to be properly exposed, I'm able to get my settings just right and my image more like I envision it. This keeps me from overshooting and also saves a TON of time when it comes to post-processing.

Do you have a metering mode preference? I highly recommend playing out with them all to see what works best for you!! 


looking for more inspiration + tips?

Tags: tutorial
3 Comments

Around our clocks - 5pm

March 13, 2017 in personal photography

Happy Monday, friends!

The "Around Our Clocks" blog circle continues and today we are all sharing a glimpse at what our 5:00pm looks like. Five o'clock is an "in-between" time for us most days. We are just getting home from school and unwinding a little before homework and dinner. Both of mine usually gravitate towards coloring, books, legos or the trampoline (of course!). 

Before daylight savings time (anyone struggling today????), the sun is just starting to set at the front of our house around 5pm. The light always streams into both Anna and Drew's room and I can usually catch the most beautiful flare coming in through their windows! On this particular day, Anna was making a card for a friend and I was able to catch her in that gorgeous light! 

Thanks so much for stopping by today! To continue on the "Around Our Clocks" blog circle, click on over to Christina Biasi's blog to and see what her 5pm looks like!


8 Comments

The Bloom Collective - Texture

March 11, 2017 in personal photography

The prompt this week at The Bloom Collective is all about texture. Texture can add so much depth and interest to an image and for my photo this week, I really had to push myself to capture something other than a close up shot! I wanted to show texture in an environment and how the texture around a subject can help to frame them. In this image, my two kiddos are standing in the rain at the river surrounded by lots of bushes, rocks and dirt (and of course rain). The texture from the falling rain is my favorite, even though it's fairly minimal. Be sure to stop by The Bloom Collective to check out the rest of this week's gallery. Happy weekend, friends! xo

Tags: personal
Comment
sunset_collage1.jpg
sunset_collage2.jpg
sunset_collage3.jpg

A sunset stroll with my babes...

March 10, 2017 in personal photography

At least once a week I try to drag my two (or three if my husband is home) out for a sunset adventure. We are all SUPER homebodies, so being at home is easy and natural, and leaving sometimes seems like a chore of just too much trouble. BUT...once we're out of the house and adventuring as that golden glow lights up the sky, my batteries are recharged and everything seems right in the world. I crave light and sunsets and just being outside. Fresh air is good for the soul, and although it may seem like pulling teeth to get my two off the trampoline and in the car, it's worth it EVERY.SINGLE.TIME. Here's to more sunset adventures with my babes.... xo

Tags: personal
Comment
Stephanie Bryan Photography - How to create a photoshop action

How to create a Phototshop action

March 09, 2017 in tutorials

I edit in both Lightroom and Photoshop and finding ways to simplify my workflow and editing is always a priority. I do love editing and can easily spend hours playing with just one photo, but things that I do to every single photo (sharpen, convert to sRGB, reduce noise), I like to create an action to make my process just a little easier. Creating an action in Photoshop is so super simple + such a time saver for editing! Here's how to make your own! 


stephaniebryanphotography_photoshopaction.jpg

1. Click the new action option in your actions panel (labeled #1 in the image above). A pop up box will open and here you will name your action and select "ok" to confirm.

2. Click the red "record" button in your actions panel to start recording your action (#2 above). 

3. Run the steps of your action on your current photo. All steps will be recorded so make sure you are completing only the steps you would like to be a part of your saved action. 

4. Click the "stop" button (#4 in the image above) to end recording your action. 

And voila! You will have your action saved! Wasn't that super easy?? Creating actions is such a time saver for processes that you repeat on every photo! 


looking for more inspiration + tips?

Tags: photography tips
2 Comments
Stephanie Bryan Photography - 5 inspiring photography books

5 inspiring photography books

March 08, 2017 in tutorials

I love a good book. Any kind of book, really. But photography books are some of my very favorite. I never tire of looking through these books and they are always the first place I turn when I need a little inspiration. Here are my top 5 inspiring photography books.

1. Capture the Moment: The Modern Photographer's Guide to Finding Beauty in Everyday and Family Life - Written by Sarah Wilkerson, CEO of Clickin Moms. This book is, hands down, my favorite photography book. The images are real life, everyday photos and throughout the book Sarah includes tips for achieving similar photos. Camera settings for the photos are also provide, which I always find incredibly helpful. Reading the book is  kind of like getting a 1:1 mentor session.

2. Expressive Photography: The Shutter Sisters' Guide to Shooting from the Heart - With it's unique and emotional images, this book is fantastic for sparking your creativity. Tips for composition and lighting are also included throughout the book.

3. The Design Aglow Posing Guide for Family Portrait Photography: 100 Modern Ideas for Photographing Newborns, Babies, Children, and Families - I'm a BIG fan of Design Aglow and have always been drawn to their clean style. This guide offers styling and posing tips, as well as technical approaches to portrait/family photography (which can easily be applied to everyday photography).

4. Humanity: A Celebration of Friendship, Family, Love & Laughter - There is so much life in this book. Real life. Real laughs. Real love. It's a very moving and introspective book that always evokes a desire to really capture my everyday. The raw, real everyday.

5. A Beautiful Mess Photo Idea Book: 95 Inspiring Ideas for Photographing Your Friends, Your World, and Yourself - This book should be called "the best of the best of Instagram". The photos are colorful, fun and little bit funky. While this book doesn't really include tips or recommendations for recreating similar photos, it definitely sparks your creativity and makes you look at your day/life in a new (and colorful) way.


looking for more photography tips + inspiration?  


follow on instagram

I’m working on our family’s big ole 2019 album today and as I’ve been going through all of my photos (usually crying and getting lost in memories wondering how my babies grew up so much in just one year 😩😭....), I notice that so m
You had me at baby belly.....💕 And if you wanted to snag a motherhood session, there are just TWO spots left! I’m counting down the days until I get to spoil all you amazing mamas.
Motherhood portrait sessions are live and over half of the spots have sold out already! 💕 I love my mamas and babies (of all ages) so very much. Our children are our hearts and soul. But being a mama is hard work. It's work that's selfless and usual
Woohoooo! Coming tomorrow - registration for the 4th Annual Motherhood Sessions. There is absolutely nothing better than getting mamas and her babies in front of my camera. I love these sessions with my whole heart. Sessions will take place in the st
Belly laughs are the best. 💕
There’s just no place quite like home.
Baby love. 💕
Gimme all the baby giggles. 💕
follow
Tags: photography tips
Comment
Stephanie Bryan Photography - 5 reasons to document a day in your life

5 reasons to document a day in your life

March 07, 2017 in tutorials

Need a reason to document a day in your life?? I've got FIVE good ones for you today and I bet you will be charging your cameras and cleaning off your memory cards in about 2 seconds flat if you make it all the way to the end of this post! 

If you've been wanting to record a day in the life, now is the time! I've captured and recorded a single day for the past five years along with Ali Edwards (and on my own a few times) and the photos and memories are some of my very favorite. But the pictures....oh.my.gosh. They make me cry the ugly cry every.single.time. As much as I would like to think I remember everything, I just don't. Waaahh. I hate it, but it's true. We just can't remember it all, so thank heavens for cameras and notes and the stuff of life.


1. Life goes so quickly. 

Oh man does it ever. You know the saying "the days are long, but the years are short"? So very true. It feels like just yesterday my son was in his crib sucking on his 400 pacifiers. Now he's in kindergarten + I have a second grader. Life just moves to fast and you kind of have to record it to keep up. The things you think you'll remember this year will soon be replaced with memories from next year and the after that and so on. Taking a moment to record the here and now is incredibly priceless. Just scroll back through your photos and you'll see what I mean.

2. You can view your world from a different perspective.

Fun fact. At least once a day I yell and scream at my kids under my breath (obviously...I'm not THAT mean). Yep… At least once a day. Spilled milk, skidmarks in underwear, and messes everywhere are enough to make me batty most days. Looking at your life through the lens, however, gives you a new perspective on things. It gives you a minute just sit back, observe, and laugh about these moments that will soon be long gone and long forgotten. I'm not saying that it's any less obnoxious when that second glass of milk spills on the floor, but at least my camera gives me a reason to enjoy that moment and record it!

3. You become a part of the picture.

If you're snap happy like me, you are usually behind the camera, not in front of it. I'll be the first one to raise my hand and admit that I don't like being in front of the camera. I feel awkward and weird and ugh... it's just bad. But I know that my kids could care less, and down the road these will be the photos we all cherish, so I make a conscious effort to stick my happy face in some photos every once in a while. Use a project like this to make it happen. These are great opportunities for us to remember to let our hair down and get crazy with our kids. 

4. Things stay the same, but different at the same time.

It always surprises me every year I complete this project that many things stayed the same, but with a new life. Anna has been an avid book lover since she was a teeny, tiny, cute, little, skinny baby. Her love for books has never changed. Every year I take part in this project I snap a picture of Anna reading some type of book. I love how that one aspect of our lives has stayed the same, but has evolved in so many different ways. This project is a great way to celebrate those little things of life. The things that are the same. The things that make us who we are. 

5. You create a time capsule of your story.

Everyone has a story to tell. Everyone. Good, bad, ugly, silly… You have a story to tell! So tell it. Grab your camera, snap away, and document the memories of your days. Then do it again the next year! I promise you won't regret it. Ever ever ever. 


looking for more tips + inspiration?


I’m working on our family’s big ole 2019 album today and as I’ve been going through all of my photos (usually crying and getting lost in memories wondering how my babies grew up so much in just one year 😩😭....), I notice that so m
You had me at baby belly.....💕 And if you wanted to snag a motherhood session, there are just TWO spots left! I’m counting down the days until I get to spoil all you amazing mamas.
Motherhood portrait sessions are live and over half of the spots have sold out already! 💕 I love my mamas and babies (of all ages) so very much. Our children are our hearts and soul. But being a mama is hard work. It's work that's selfless and usual
Woohoooo! Coming tomorrow - registration for the 4th Annual Motherhood Sessions. There is absolutely nothing better than getting mamas and her babies in front of my camera. I love these sessions with my whole heart. Sessions will take place in the st
Belly laughs are the best. 💕
There’s just no place quite like home.
Baby love. 💕
Gimme all the baby giggles. 💕
follow
Tags: day in the life, photography tips
2 Comments
Prev / Next