• home
  • galleries
    • client favorites
    • interiors + brands
  • blog
  • tutorials
  • about
    • meet stephanie
    • featured work
    • why film
  • session details
    • newborn sessions
    • family sessions
    • interiors + brand sessions
    • studio sessions
  • Menu

Stephanie Bryan Photography - Raleigh Newborn and Family Photographer

  • home
  • galleries
    • client favorites
    • interiors + brands
  • blog
  • tutorials
  • about
    • meet stephanie
    • featured work
    • why film
  • session details
    • newborn sessions
    • family sessions
    • interiors + brand sessions
    • studio sessions
Stephanie Bryan Photography - Raleigh Lifestyle Newborn Photographer

Baby Amelia | Raleigh Lifestyle Newborn Photographer

March 06, 2017 in newborn photography, client sessions

Gimme all the babies.

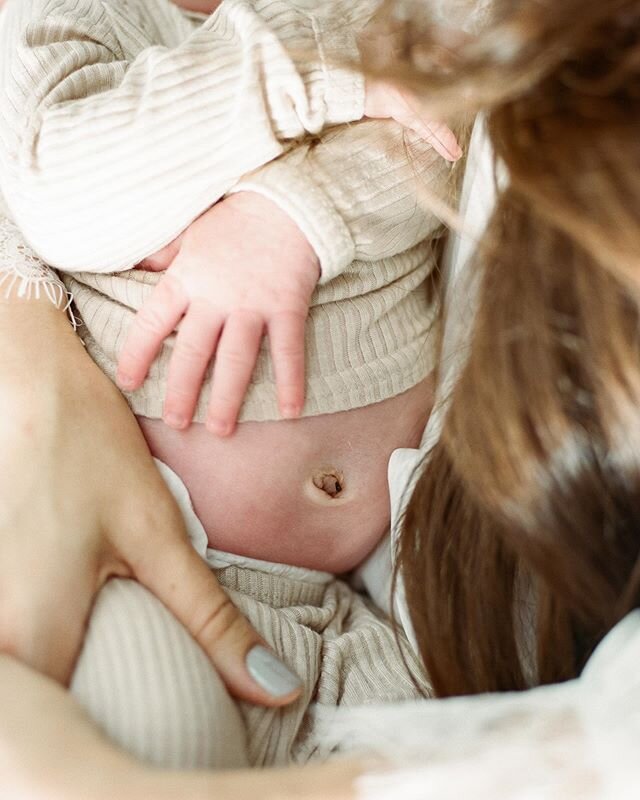
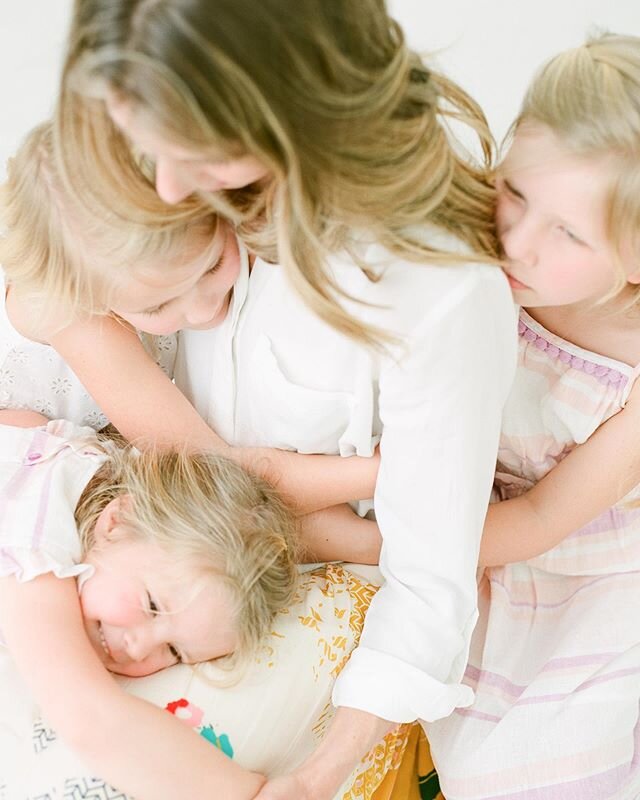
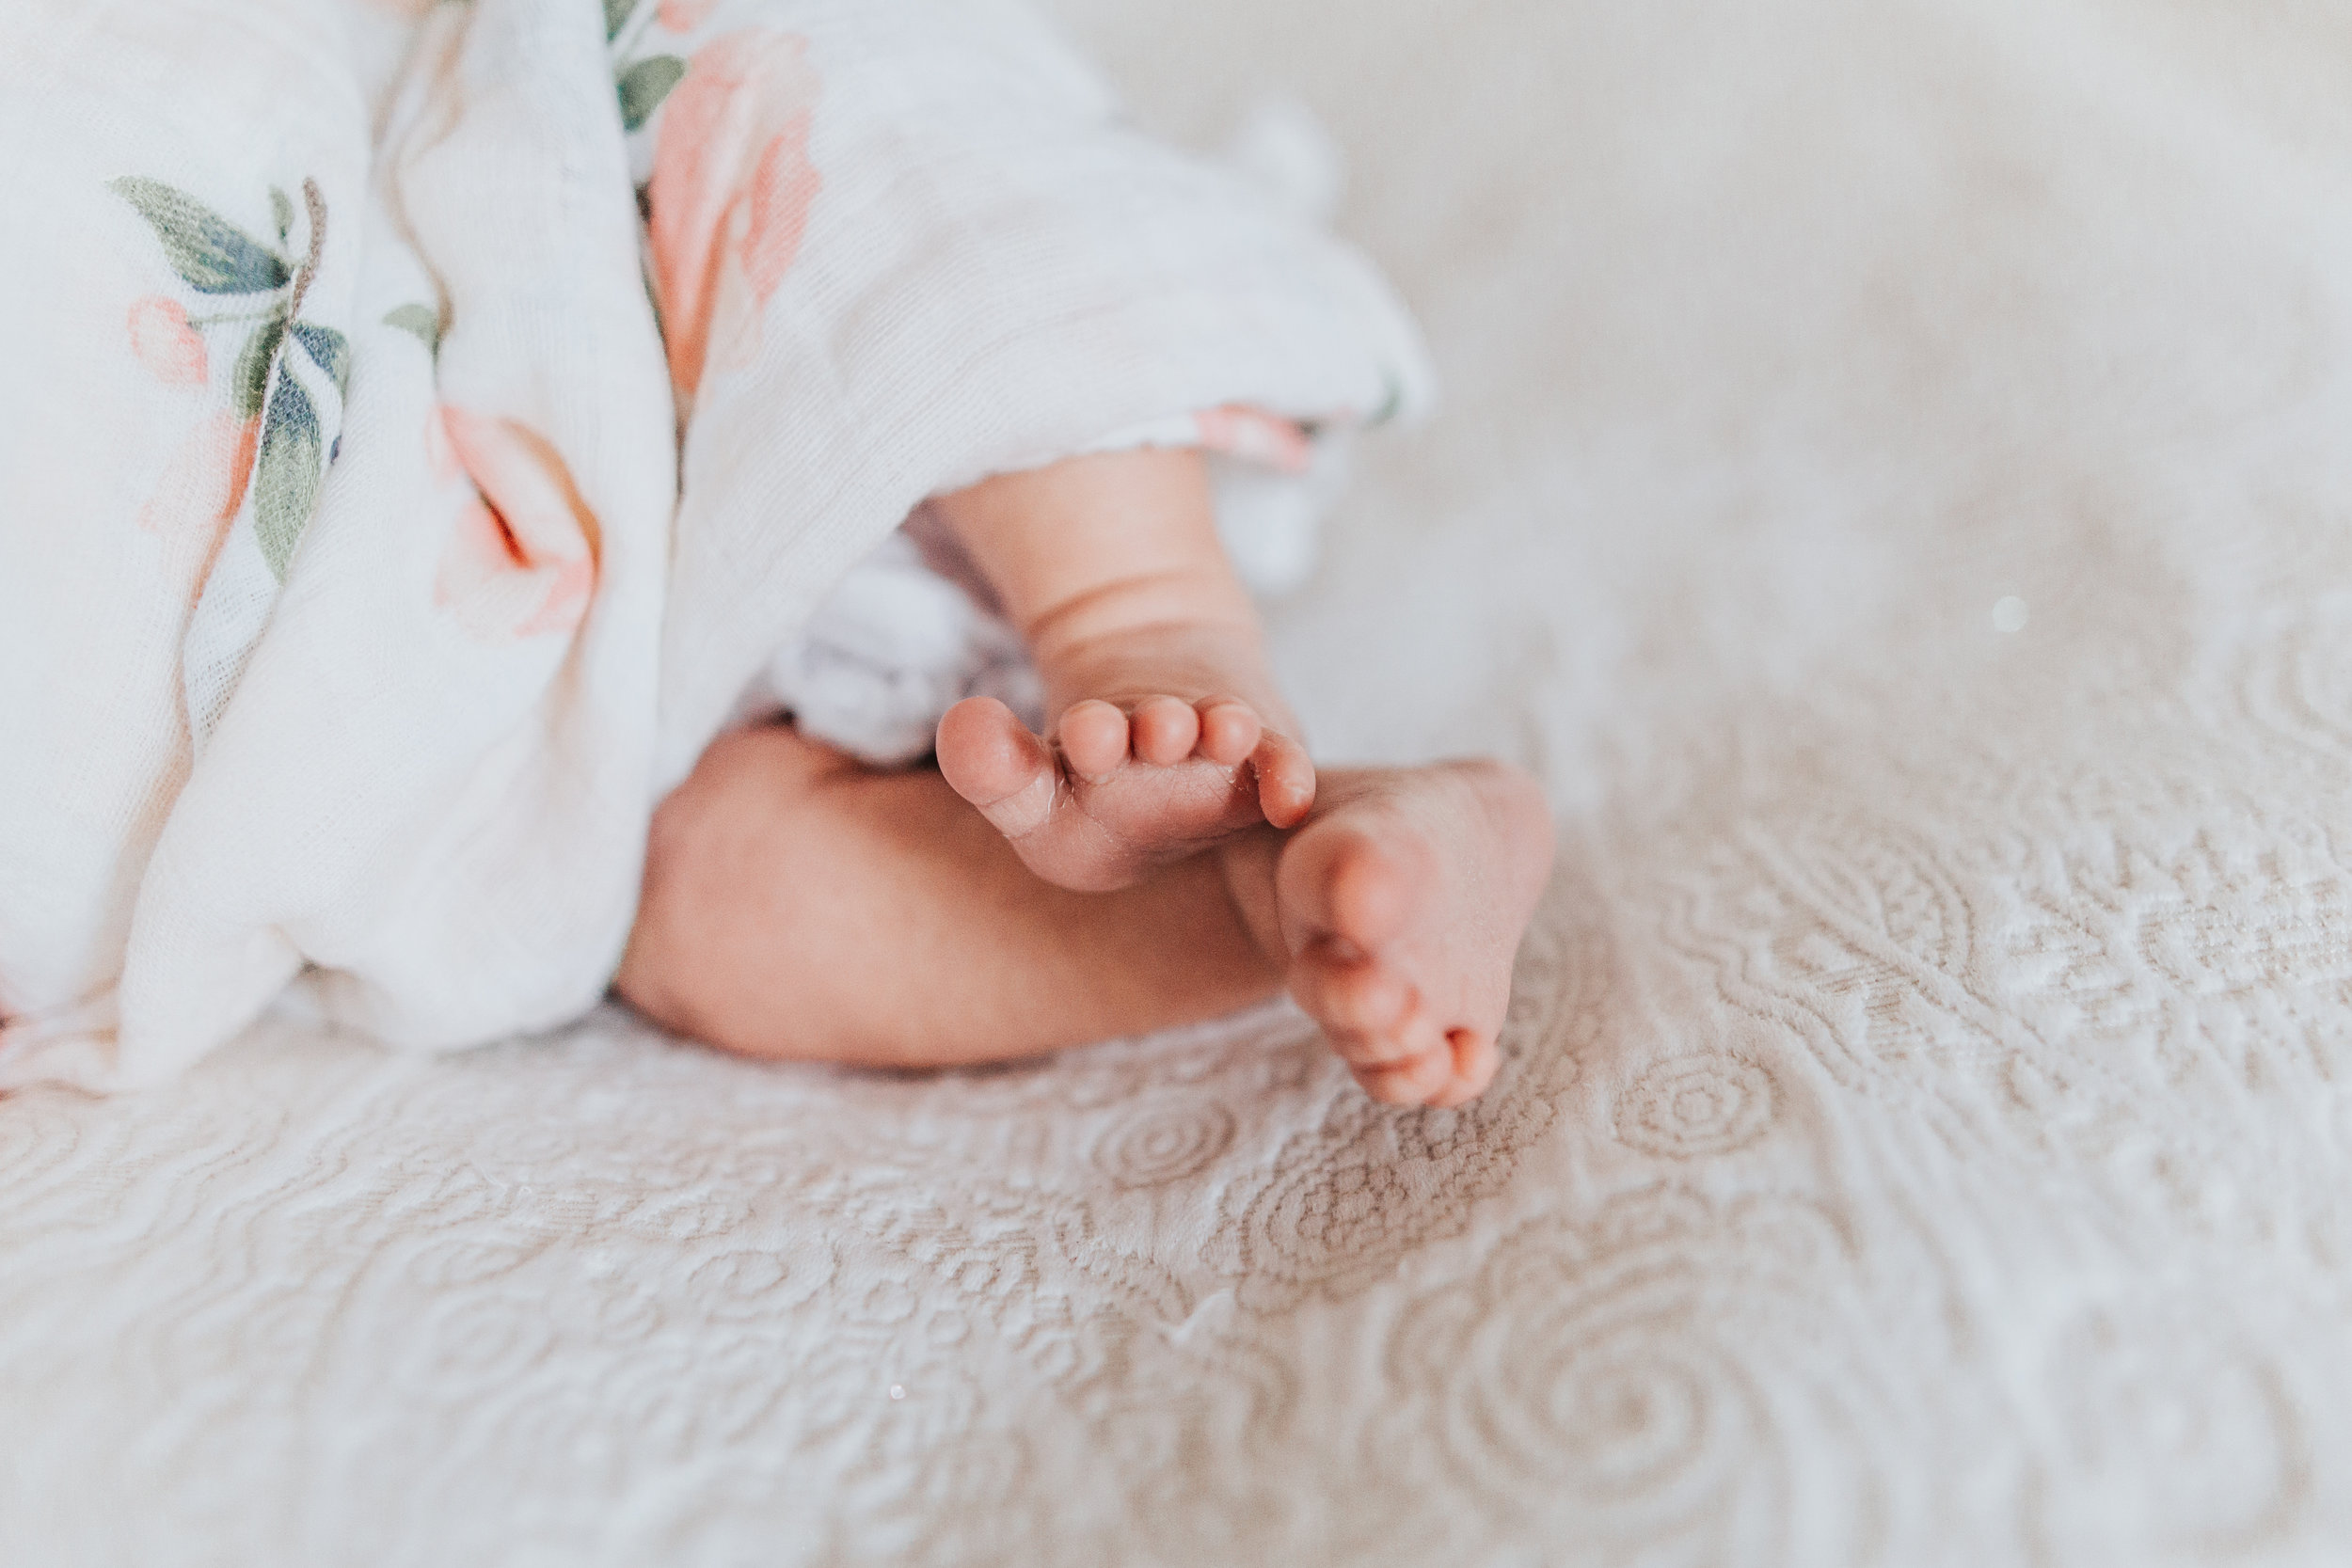
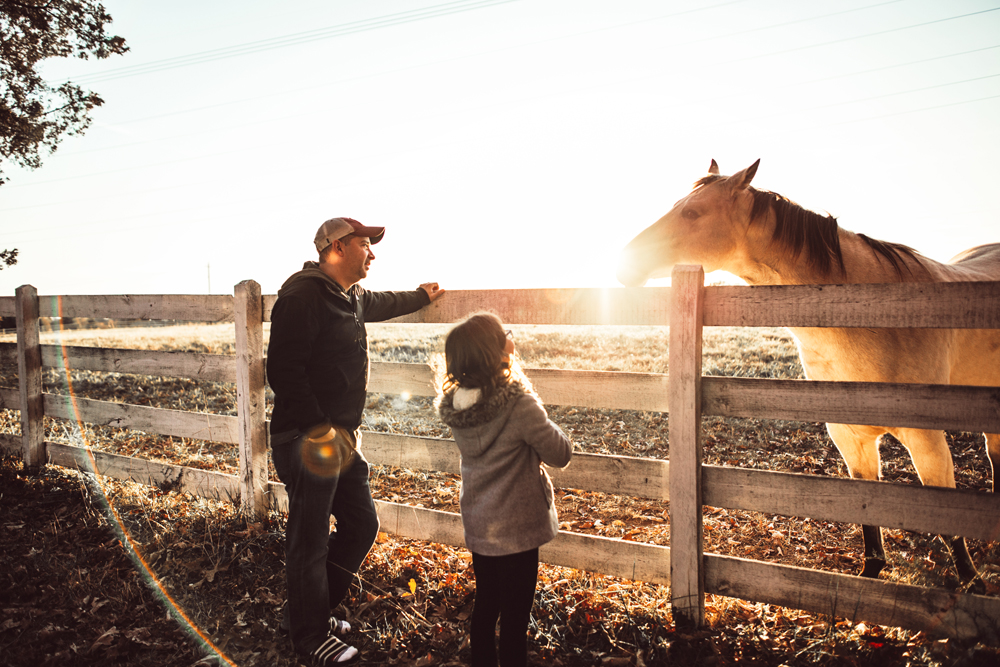
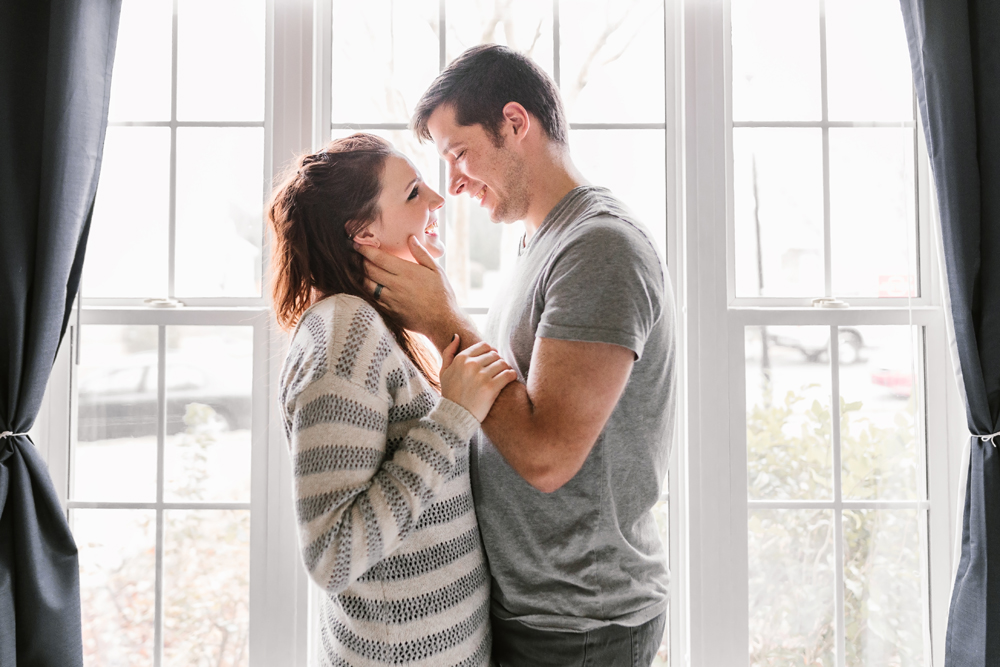
I never tire of spending the day with a new little one + their sweet family. It really is such an honor to be welcomed into someone's home...a family's new life...and allowed to document those moments together.  

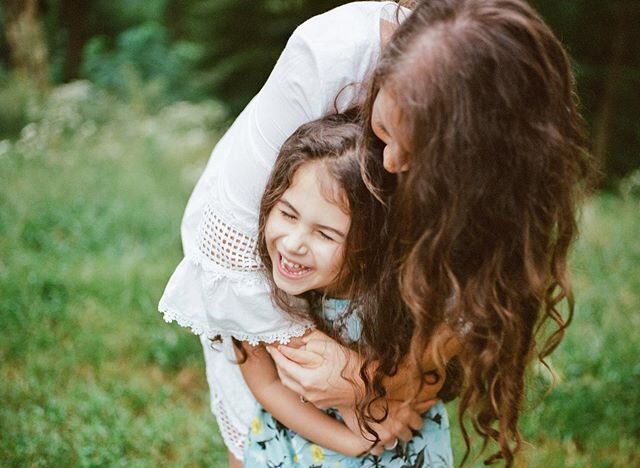
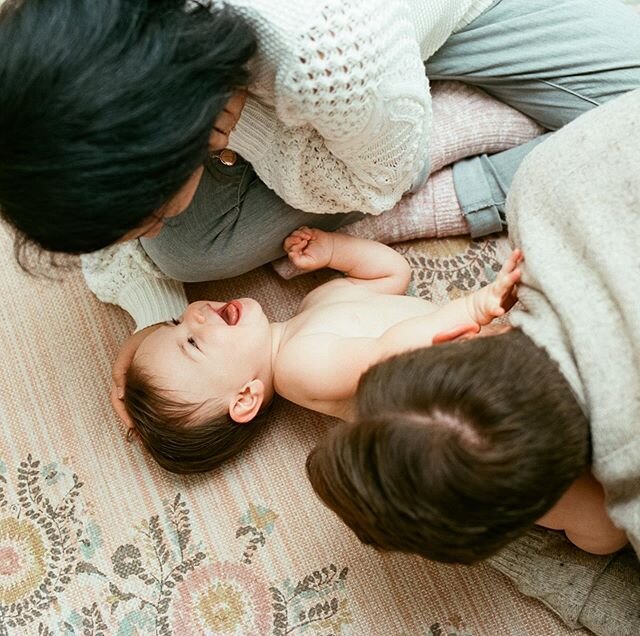
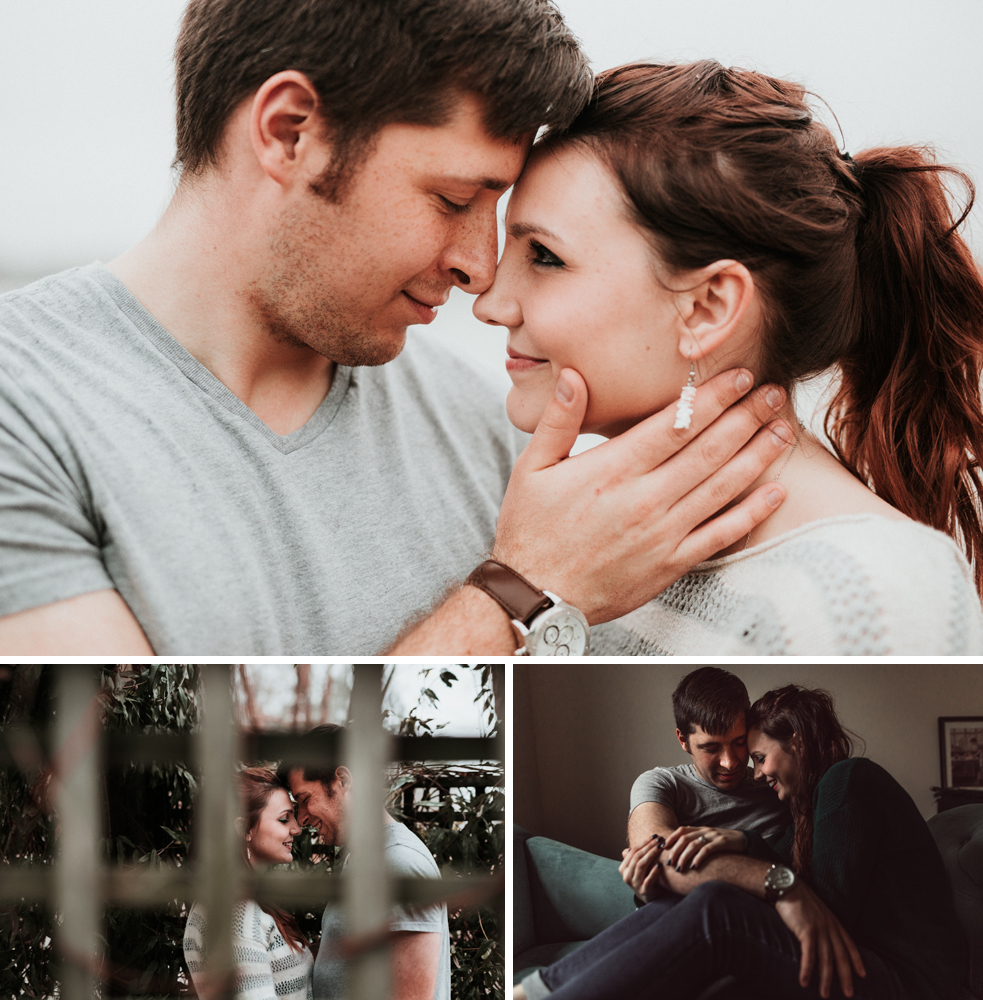
My favorite part of any session is being able to connect with all the mamas and daddies. I always strive to make everyone feel comfortable and at home...not stressed or worried about pictures or certain moments being captured.

Stephanie Bryan Photography - Raleigh Lifestyle Newborn Photographer

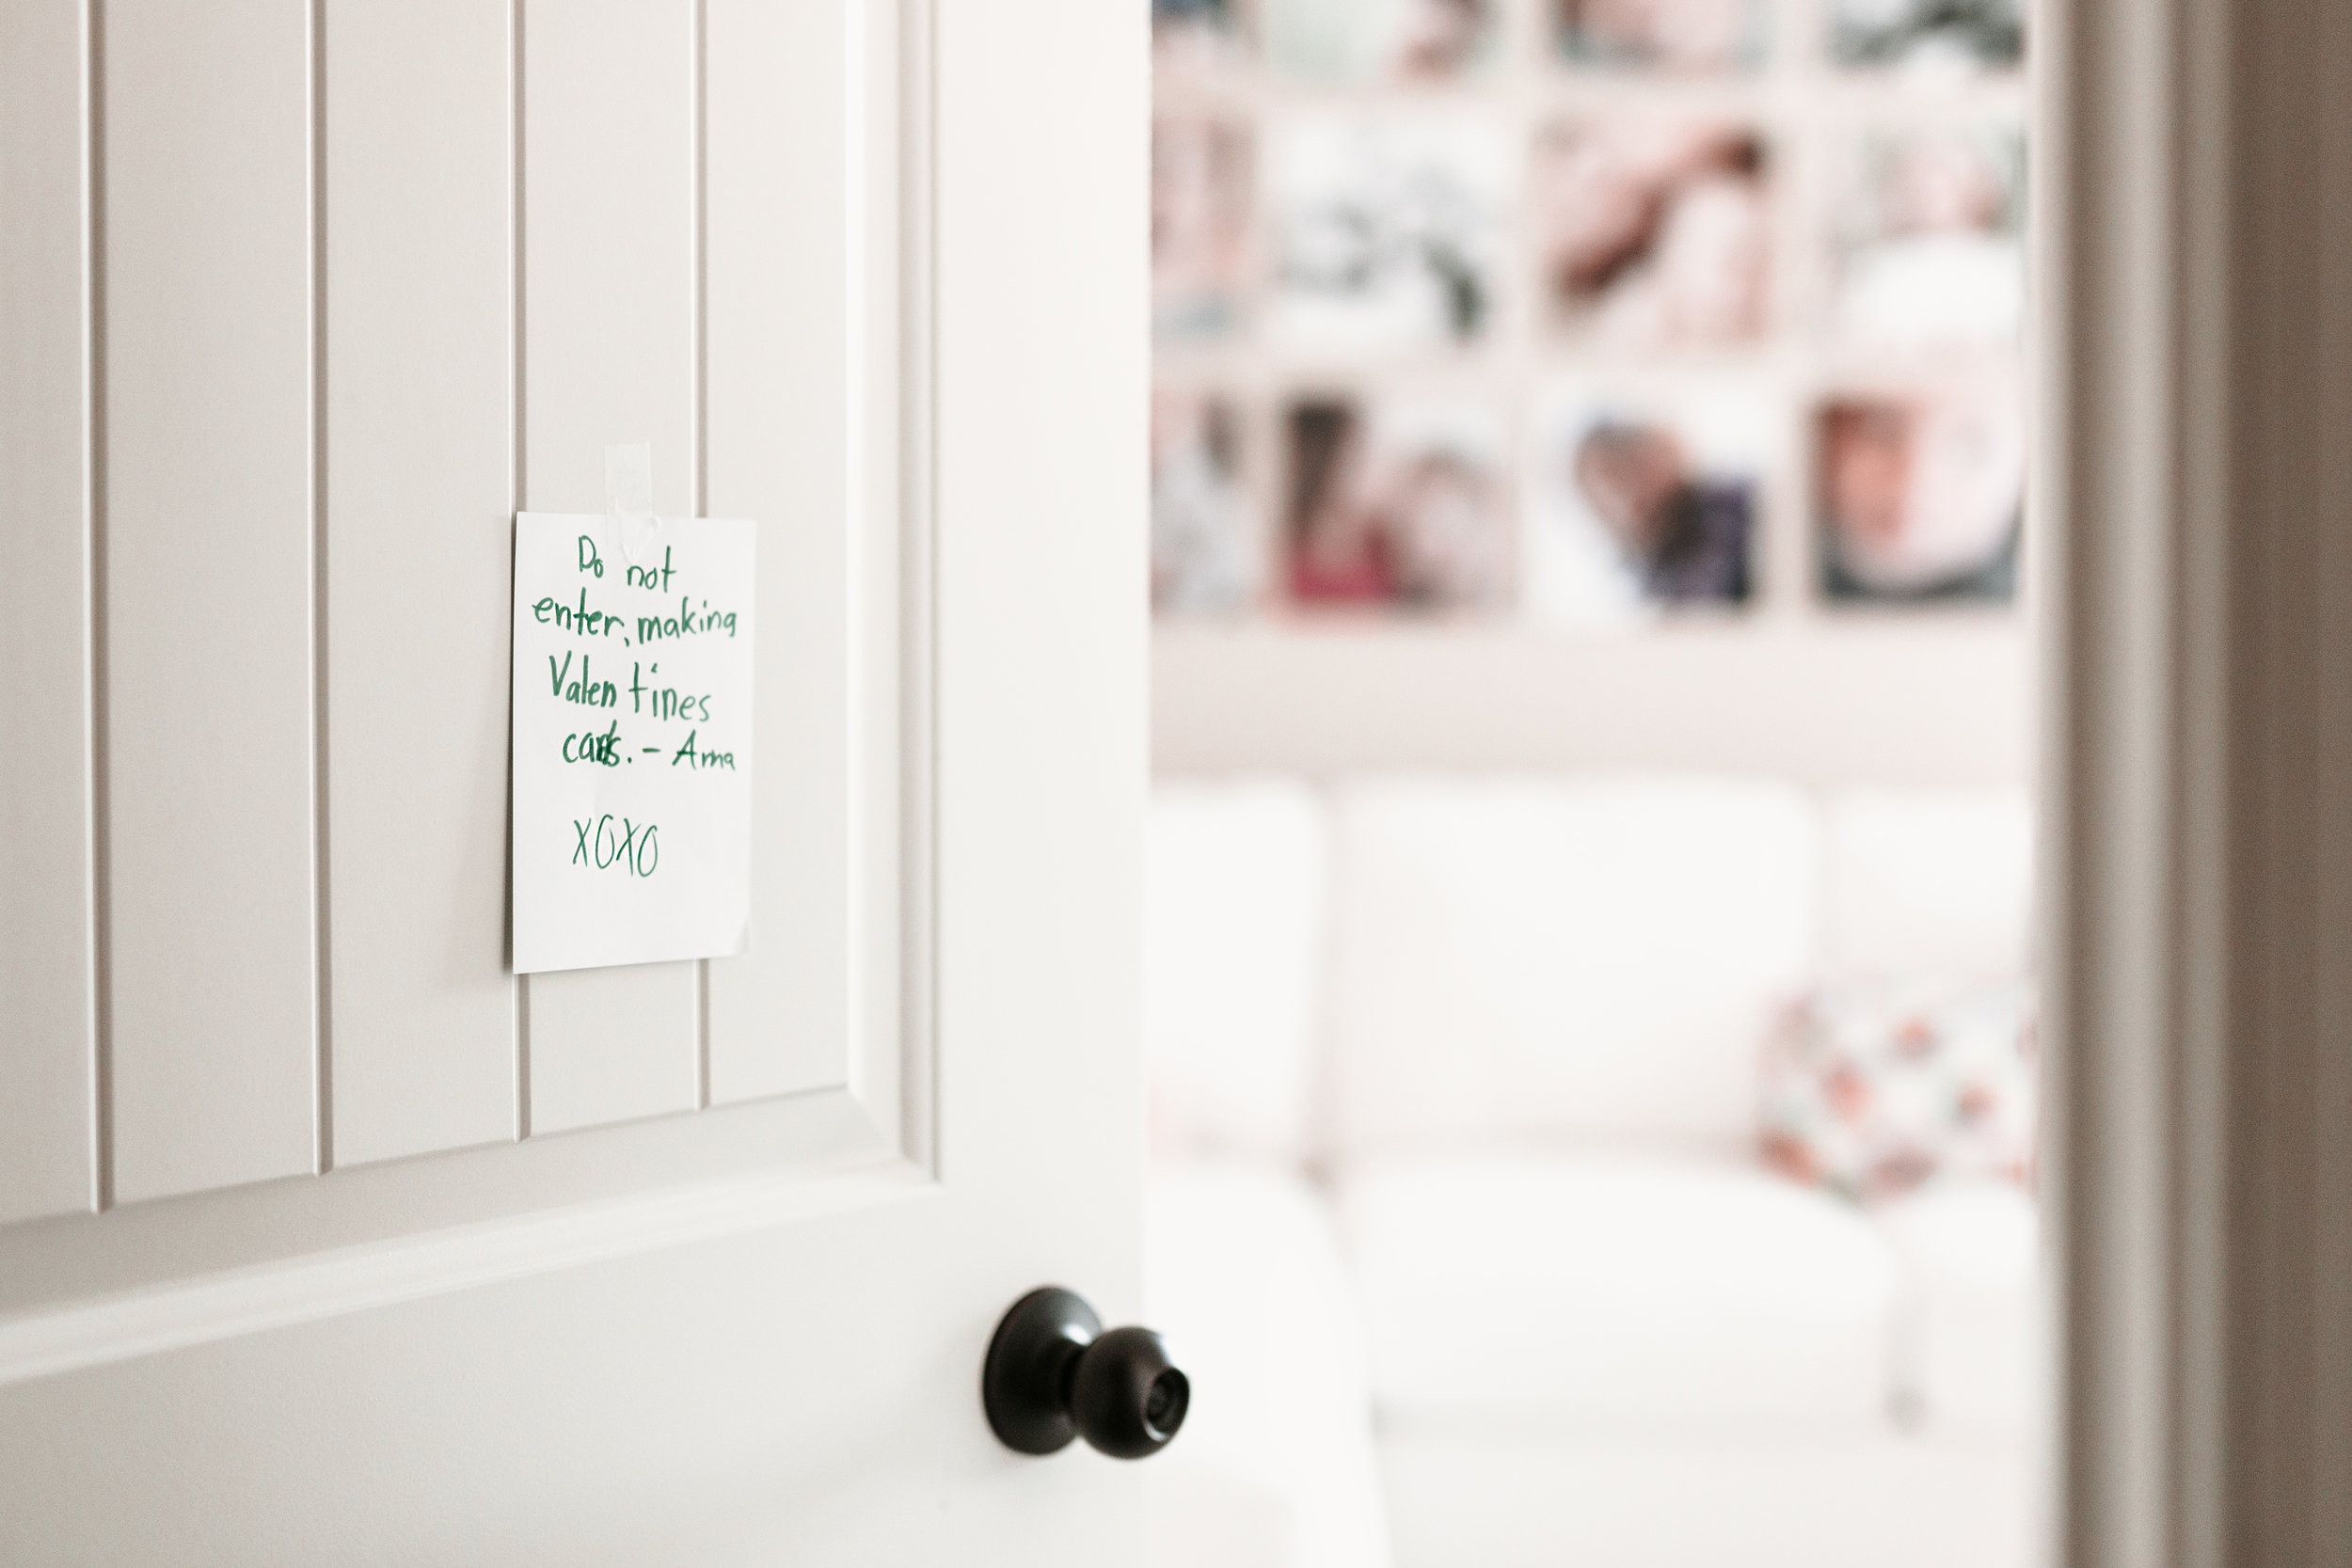
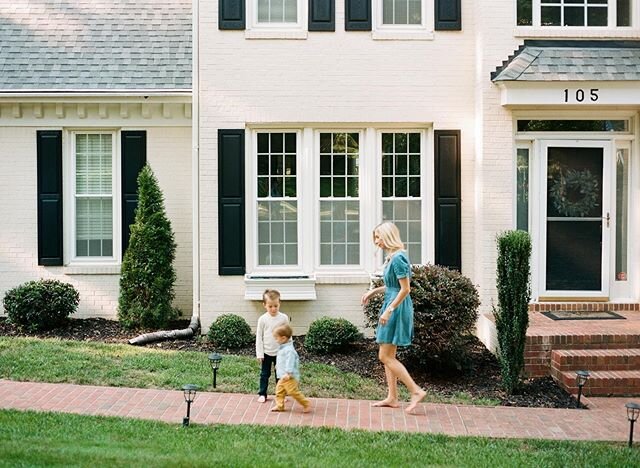
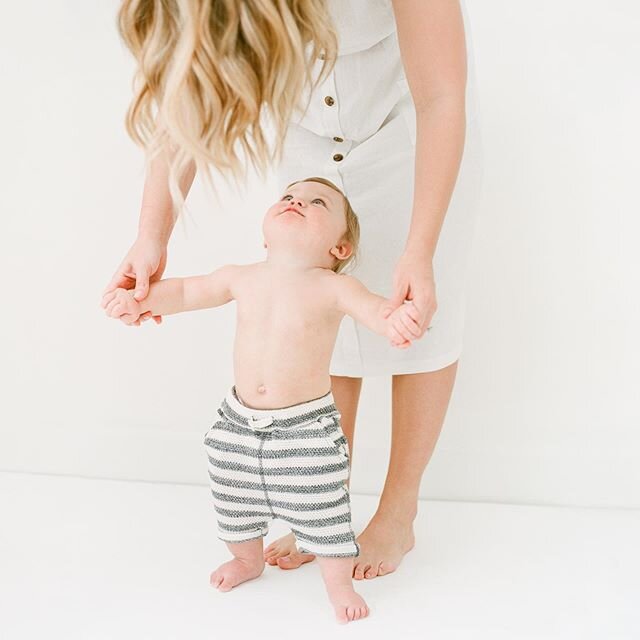
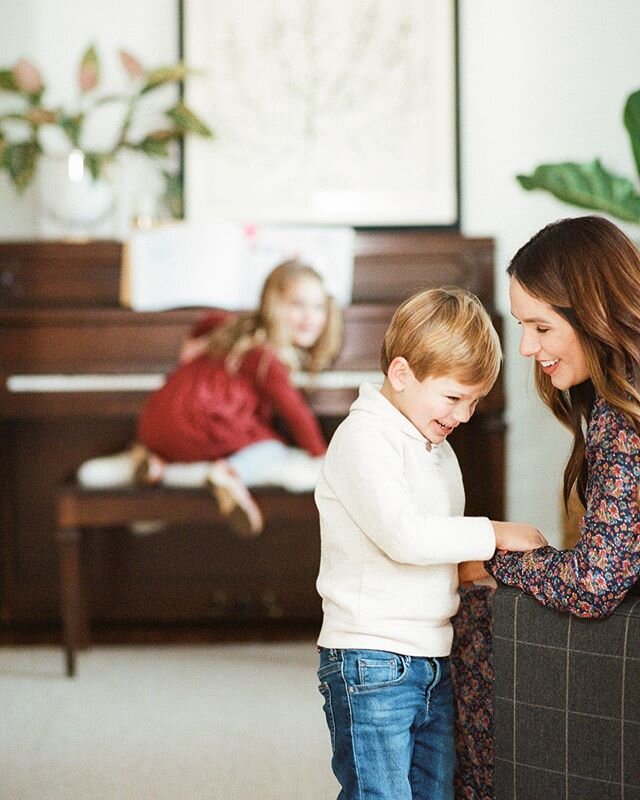
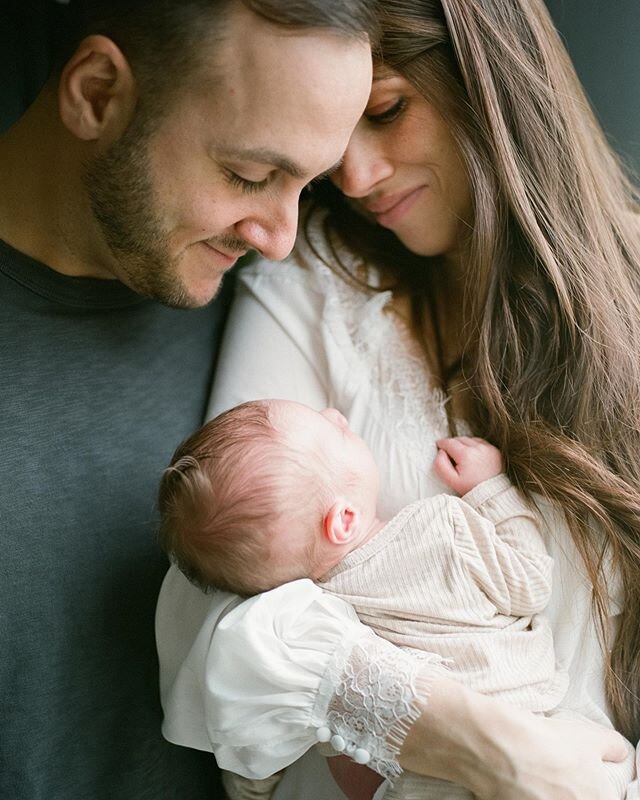
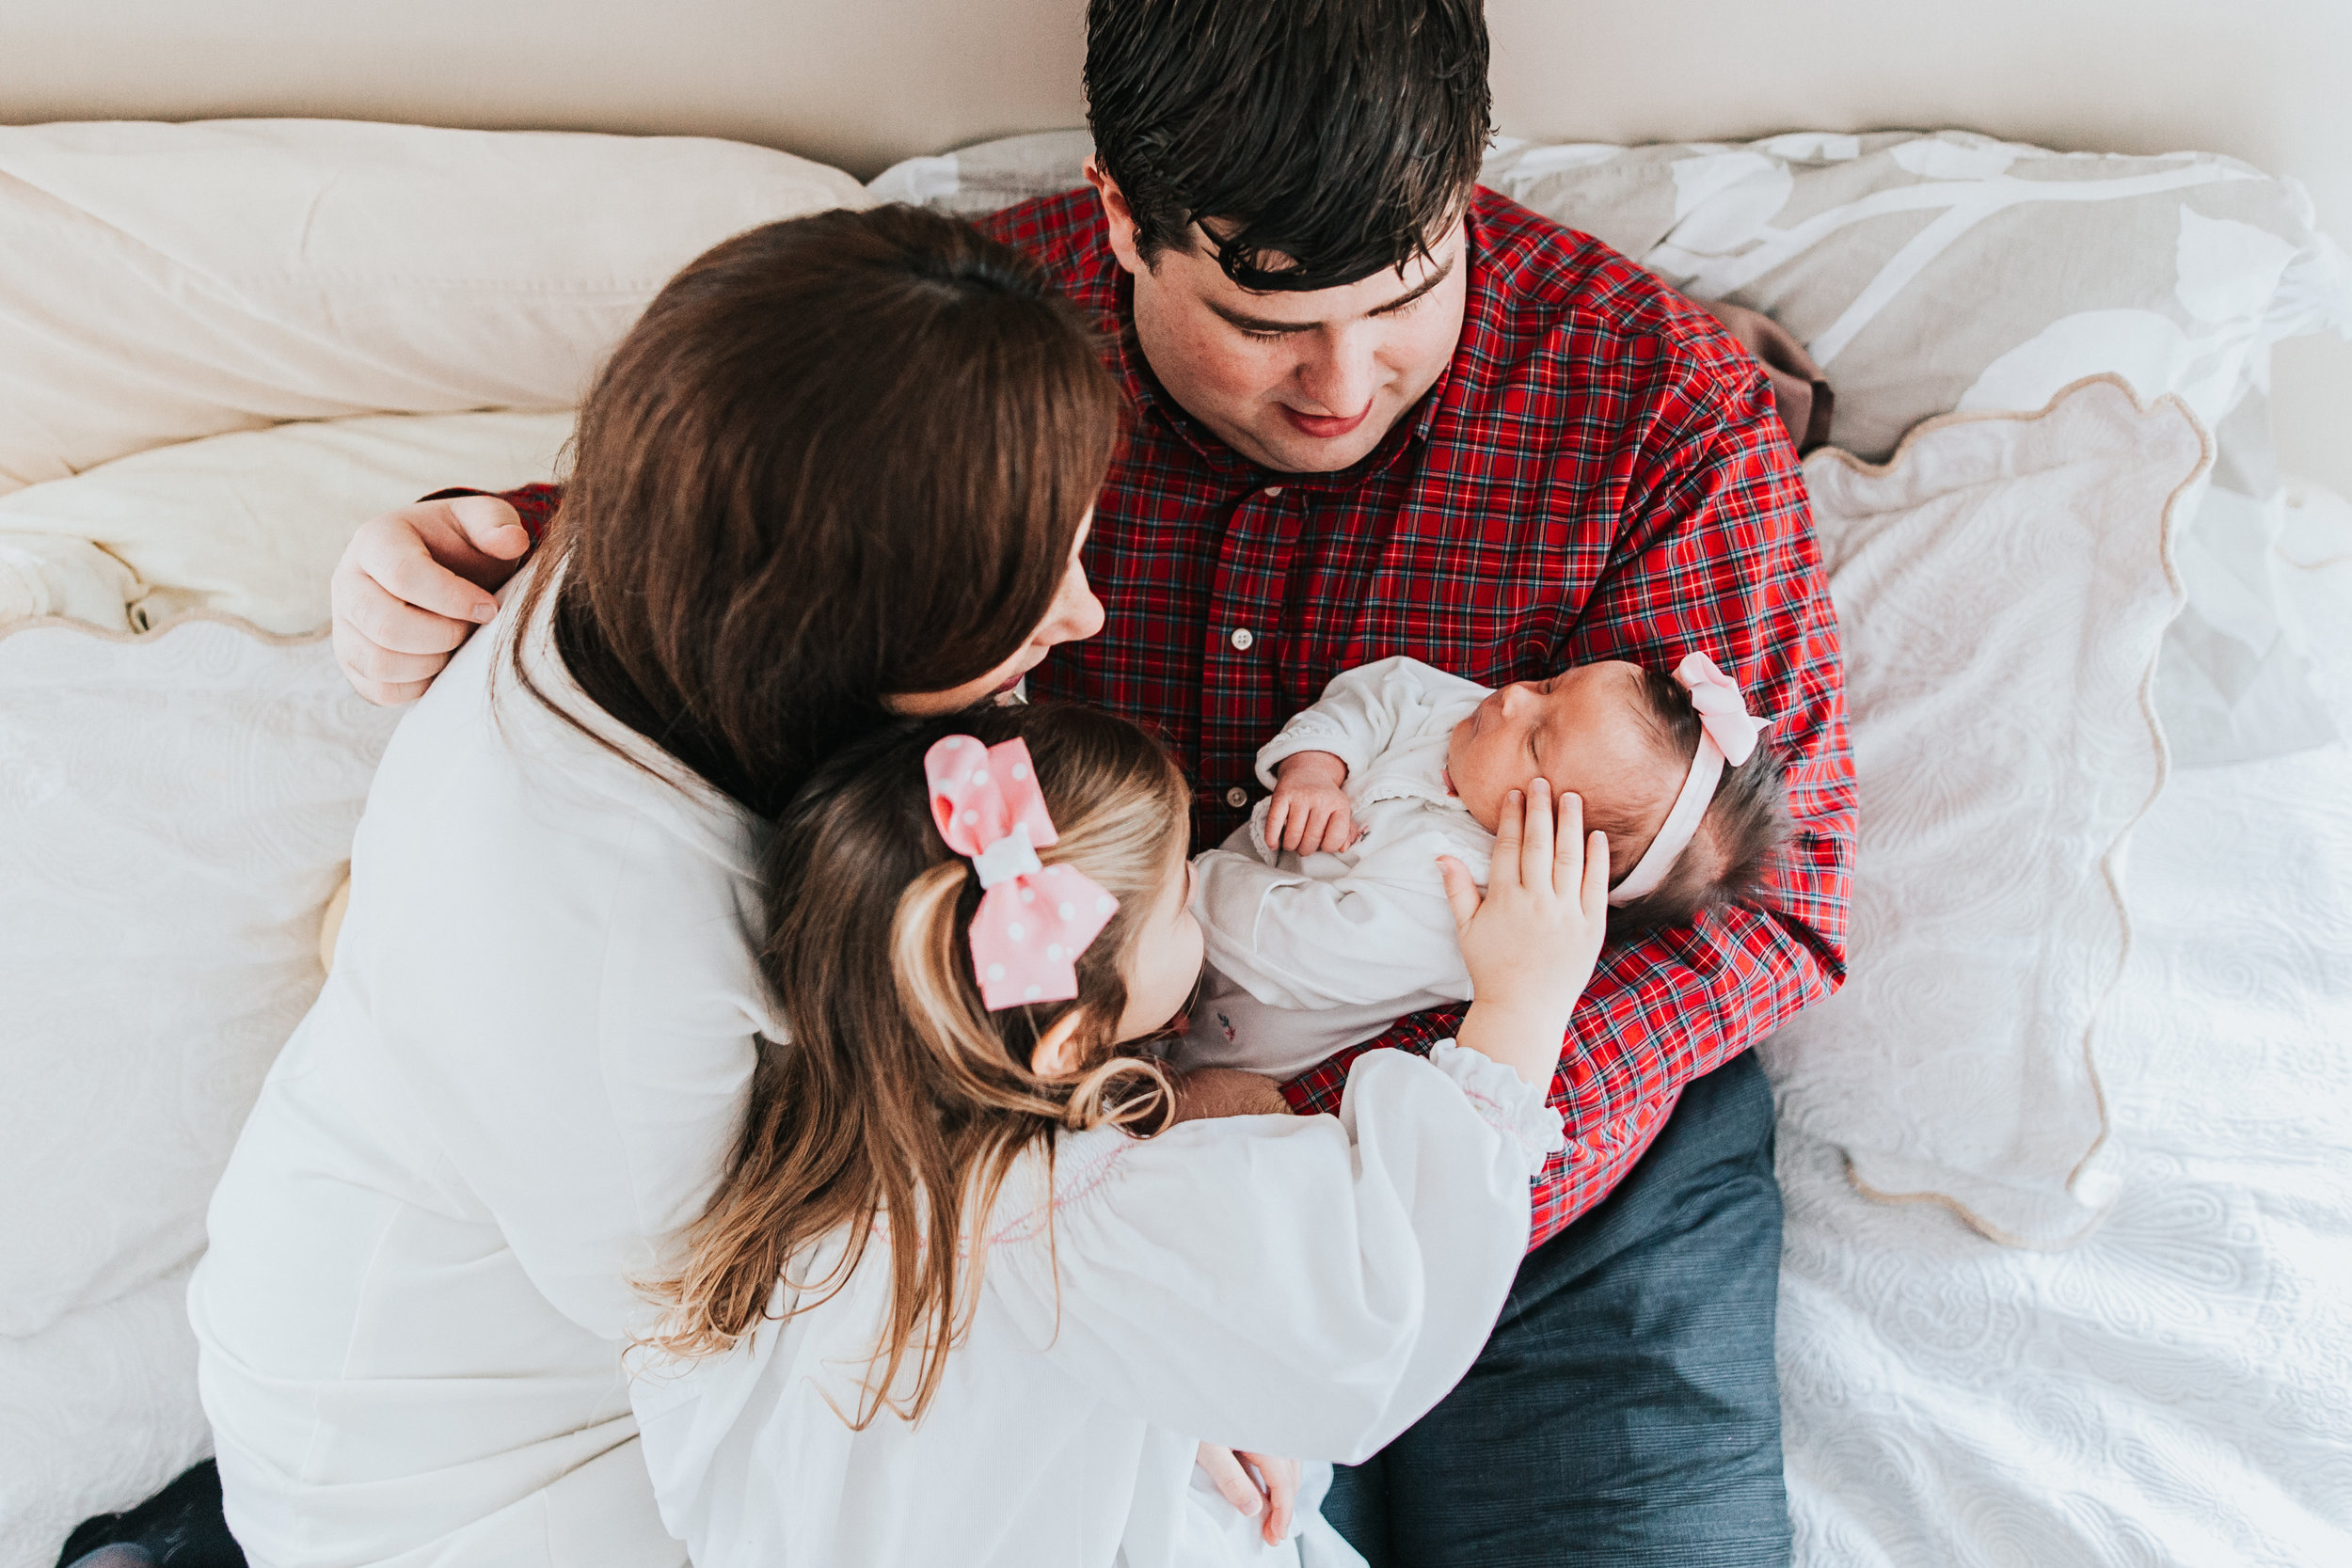
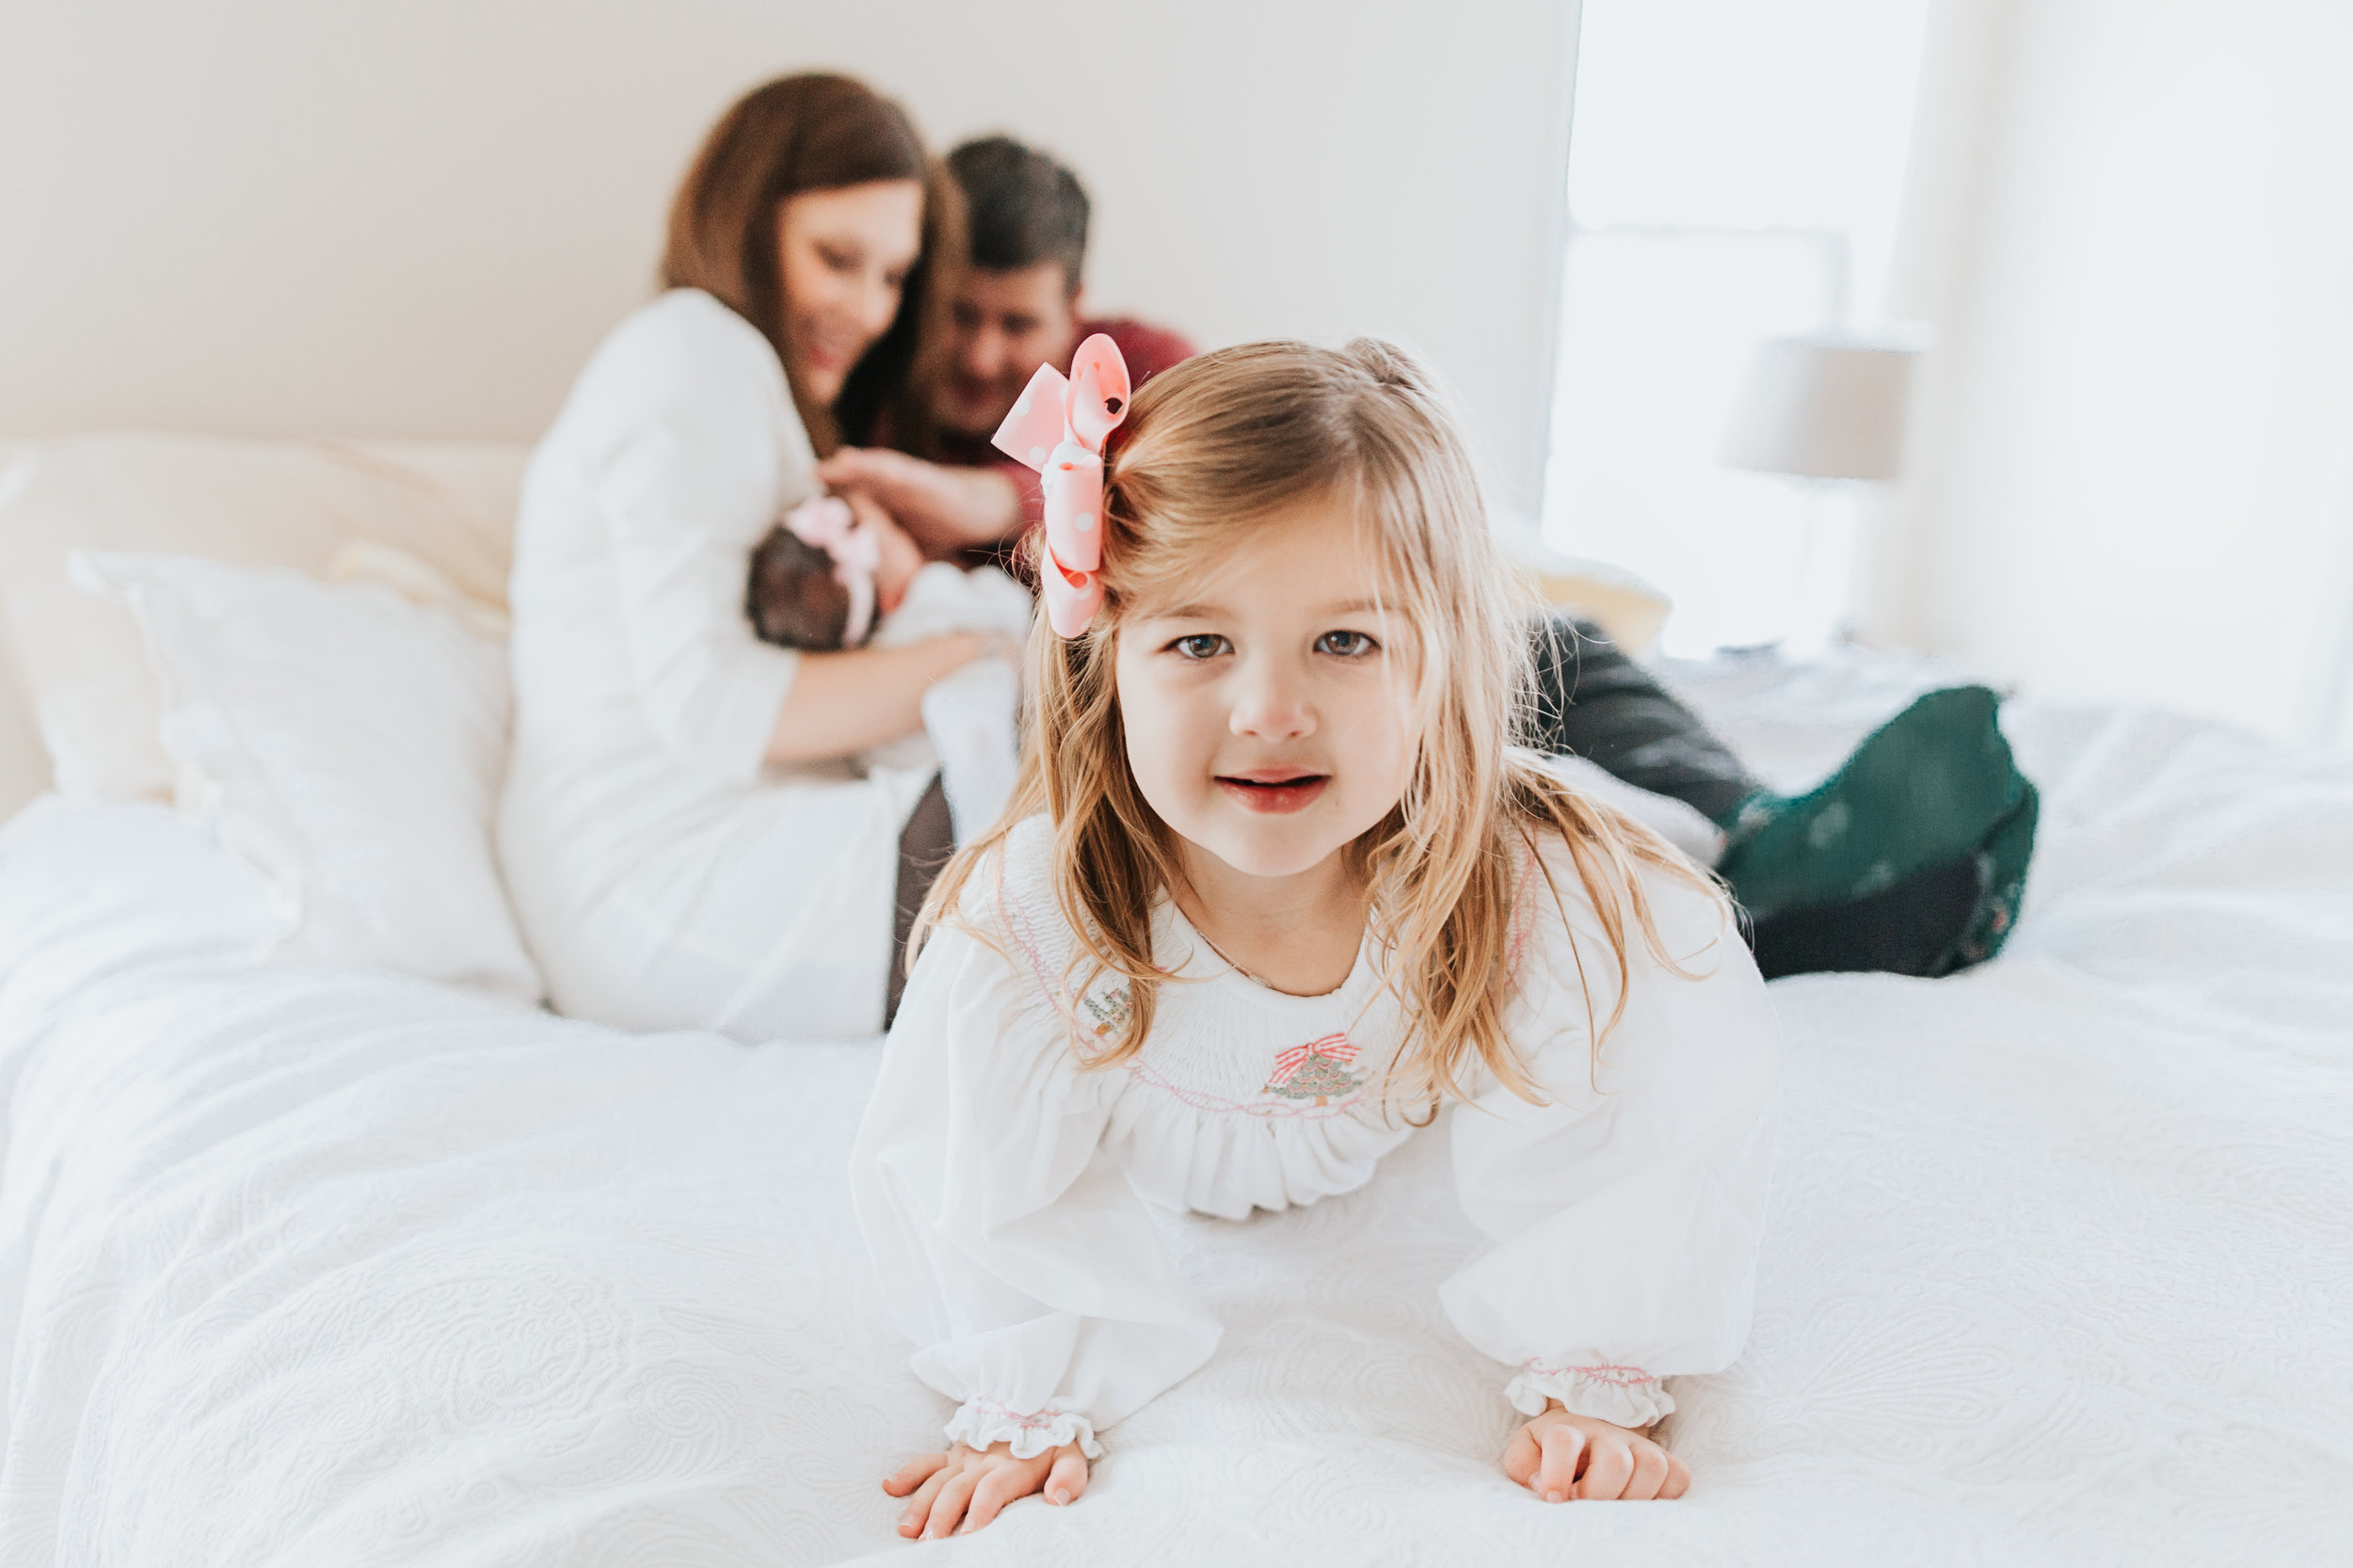
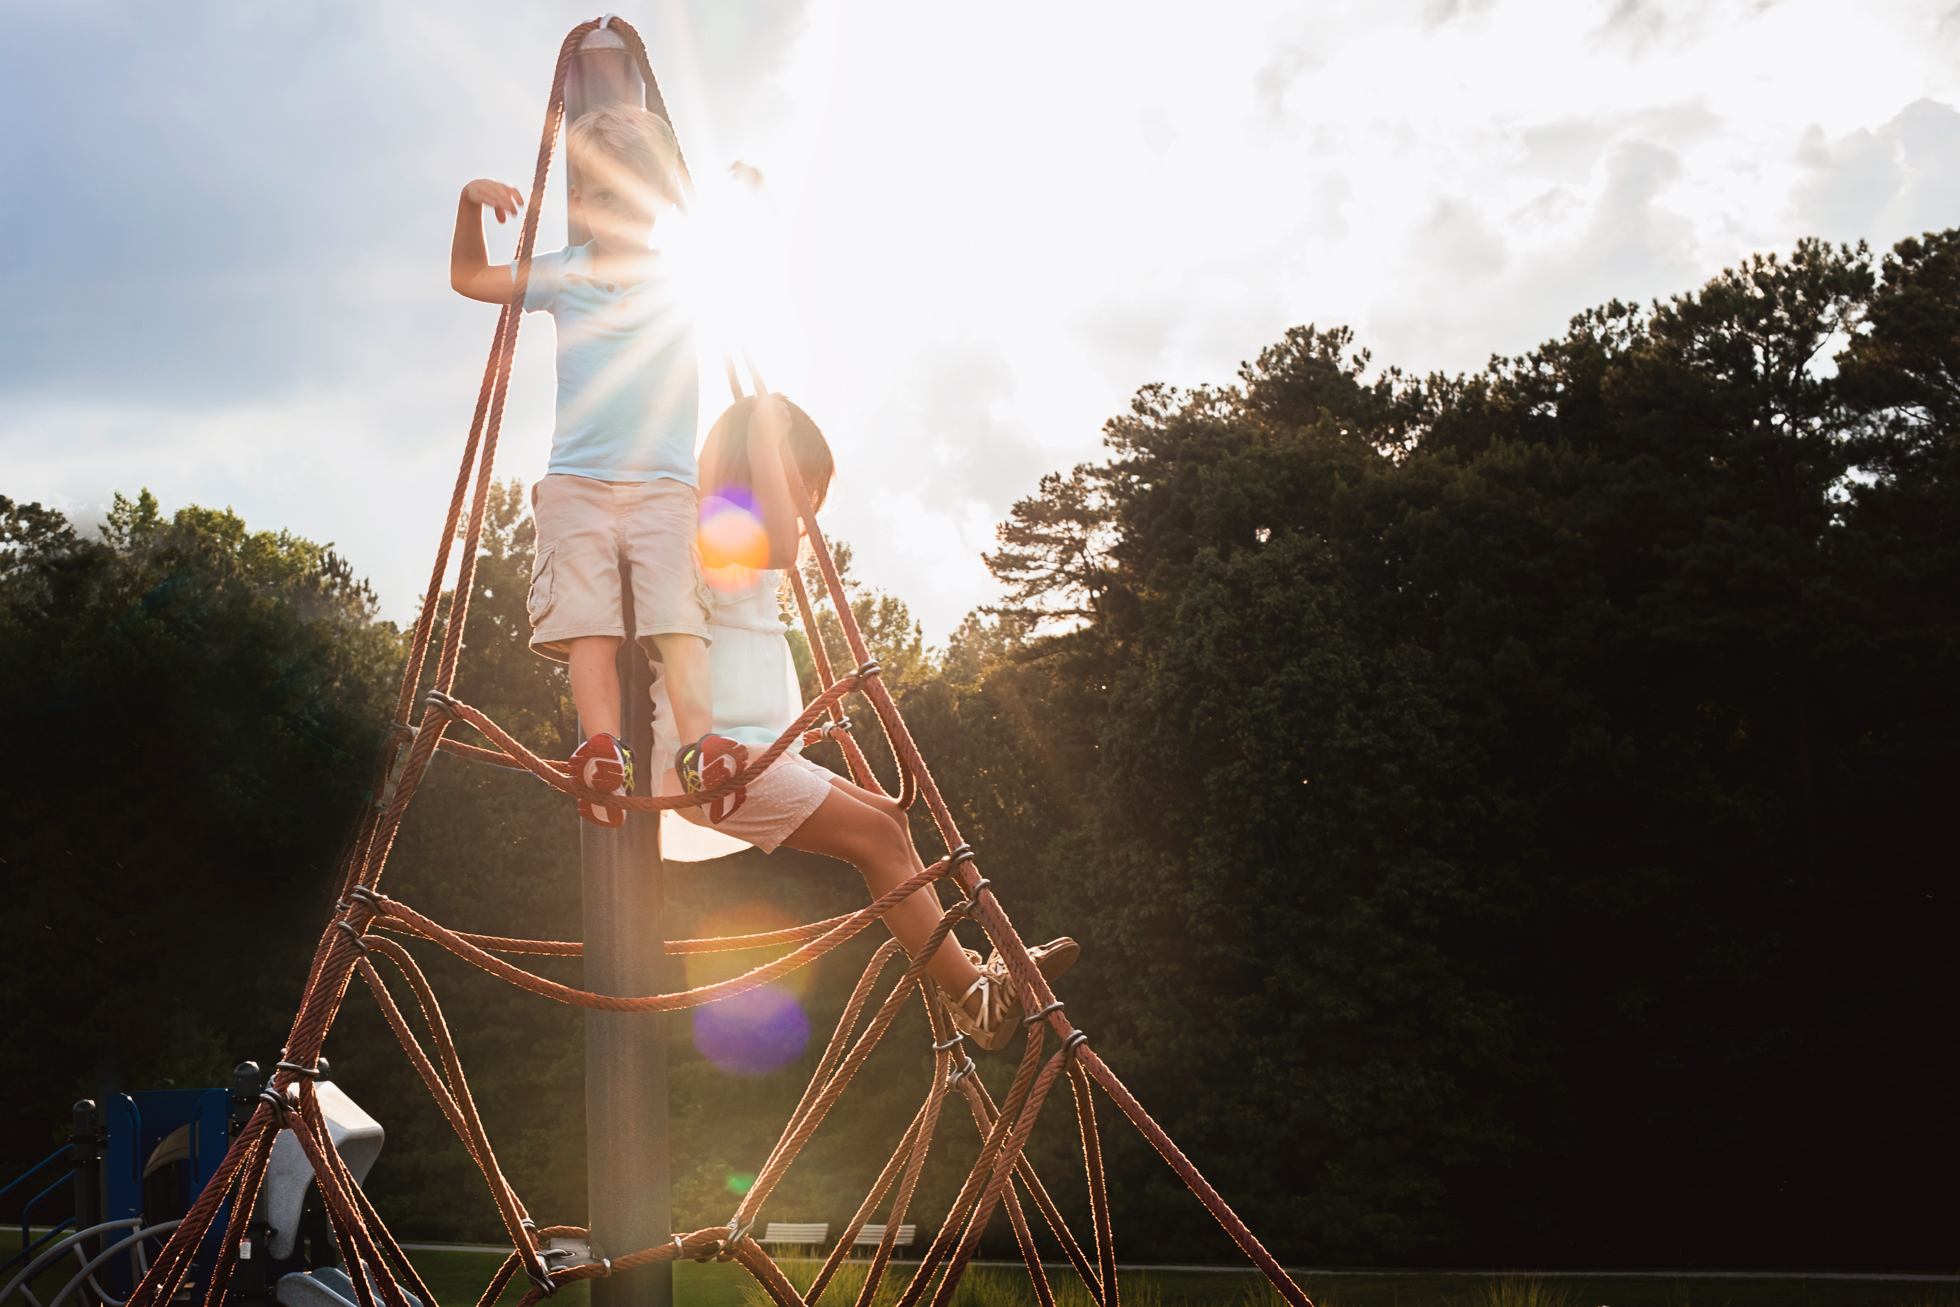
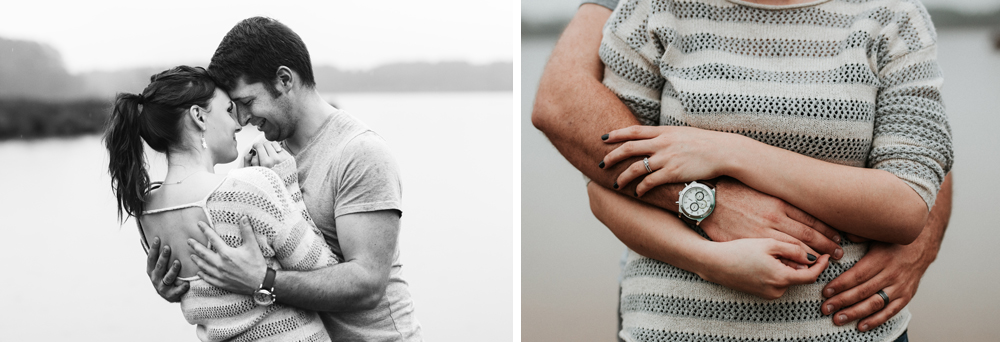
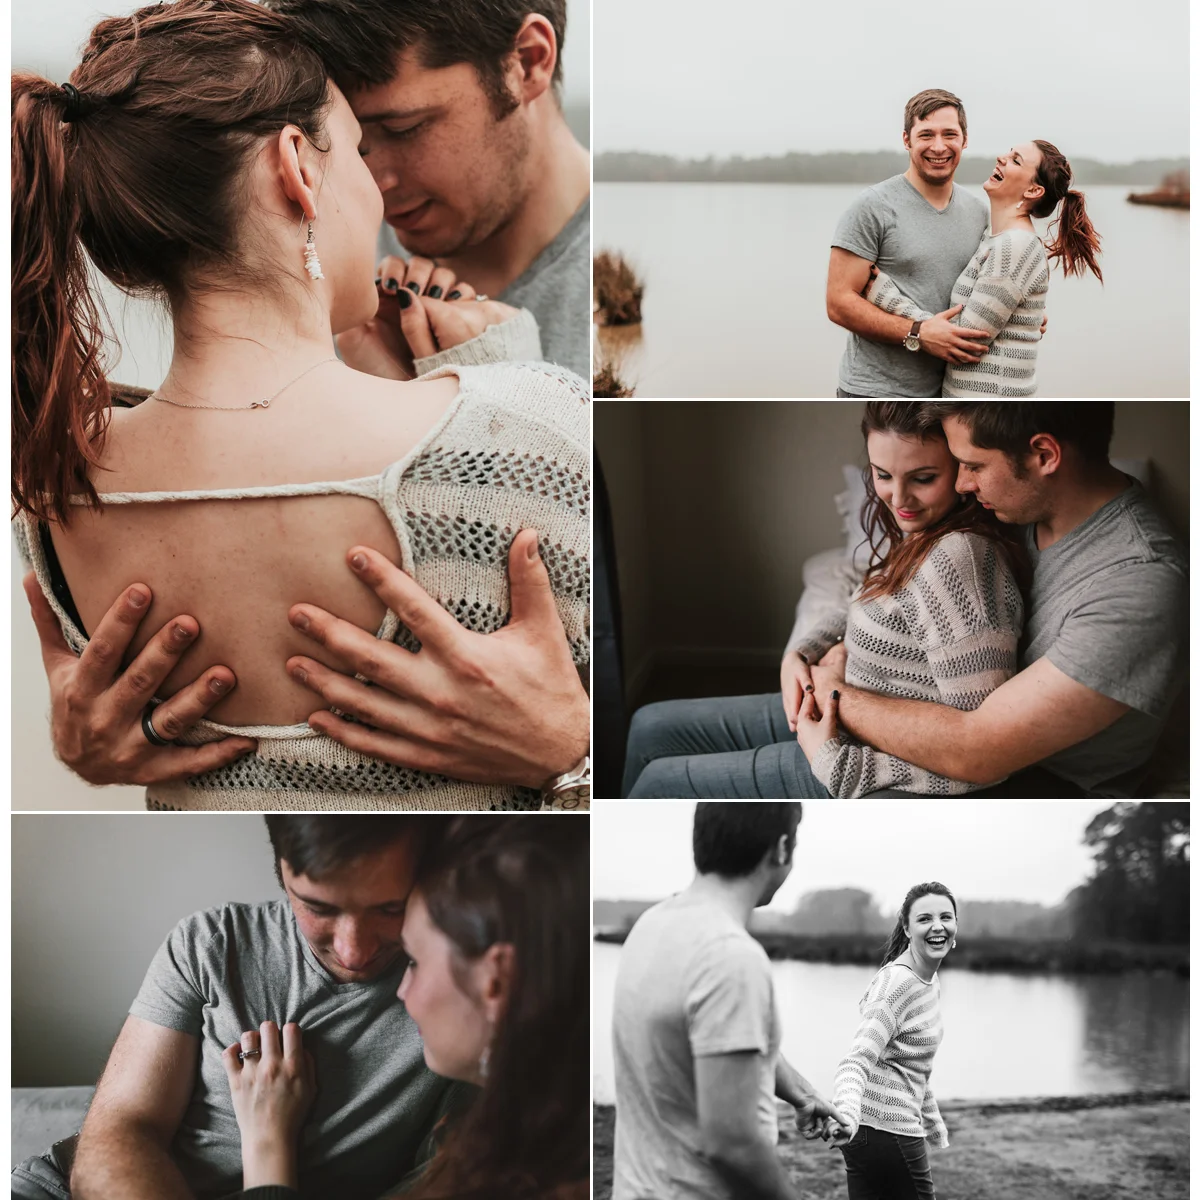
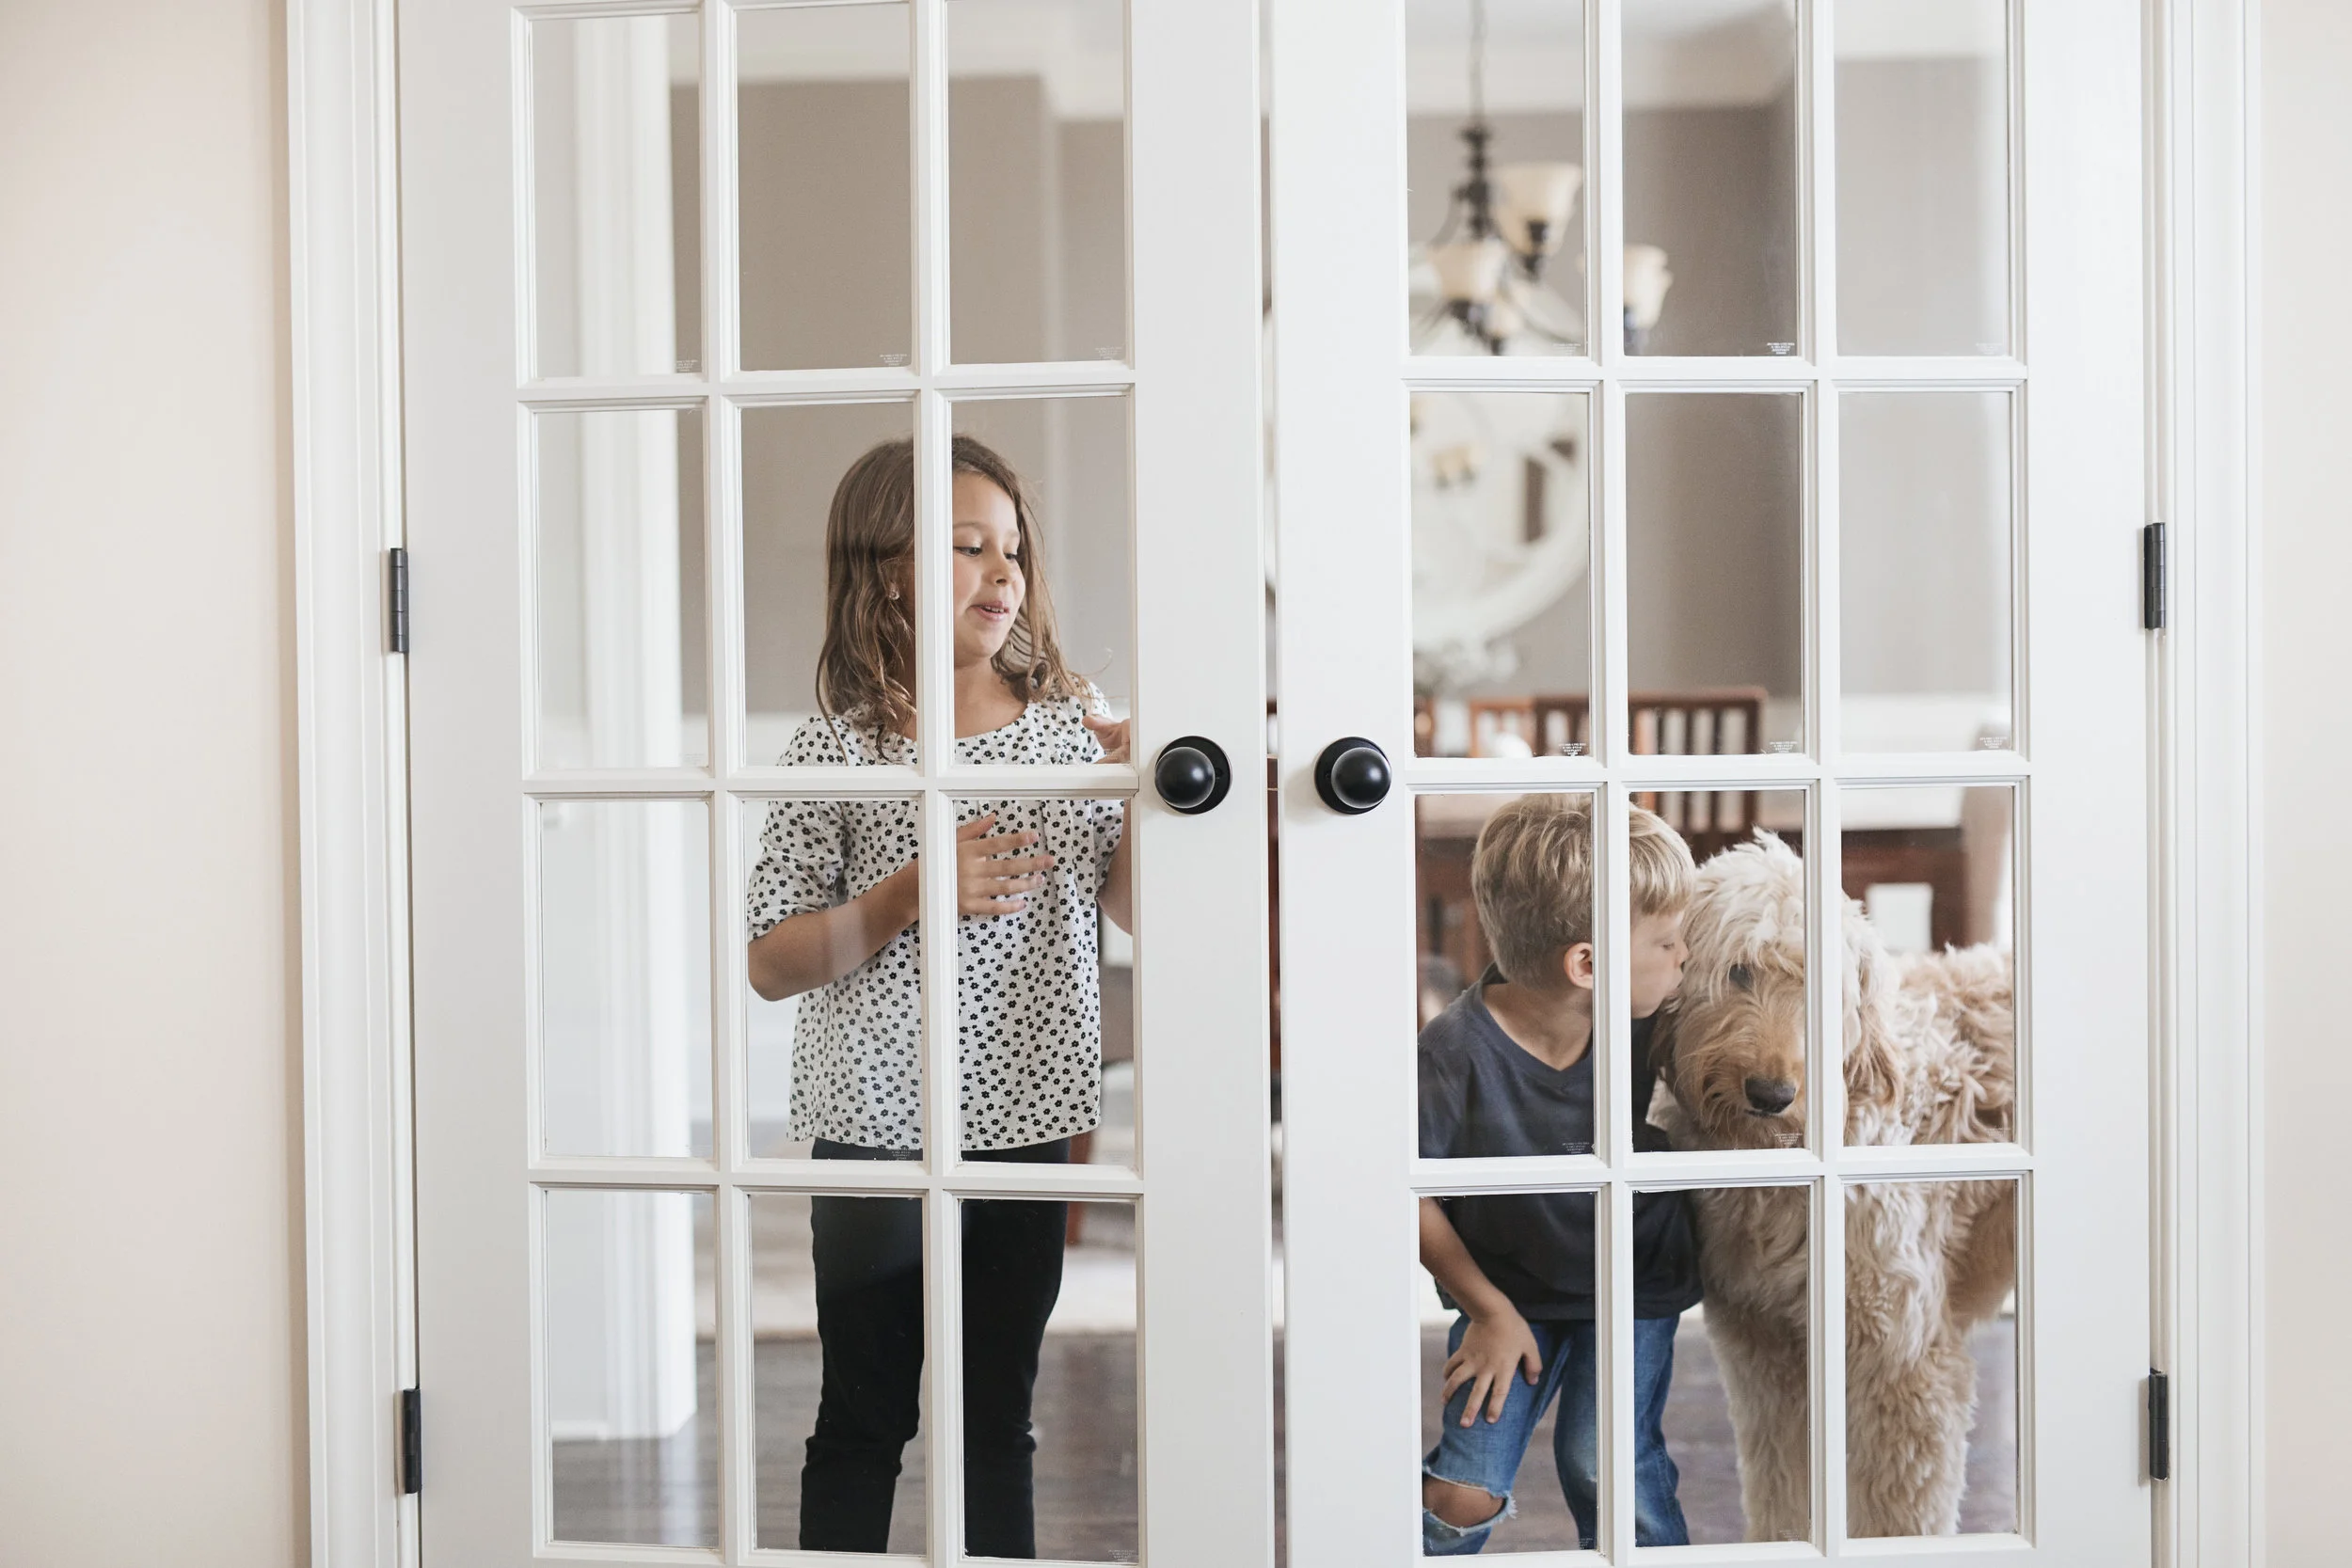
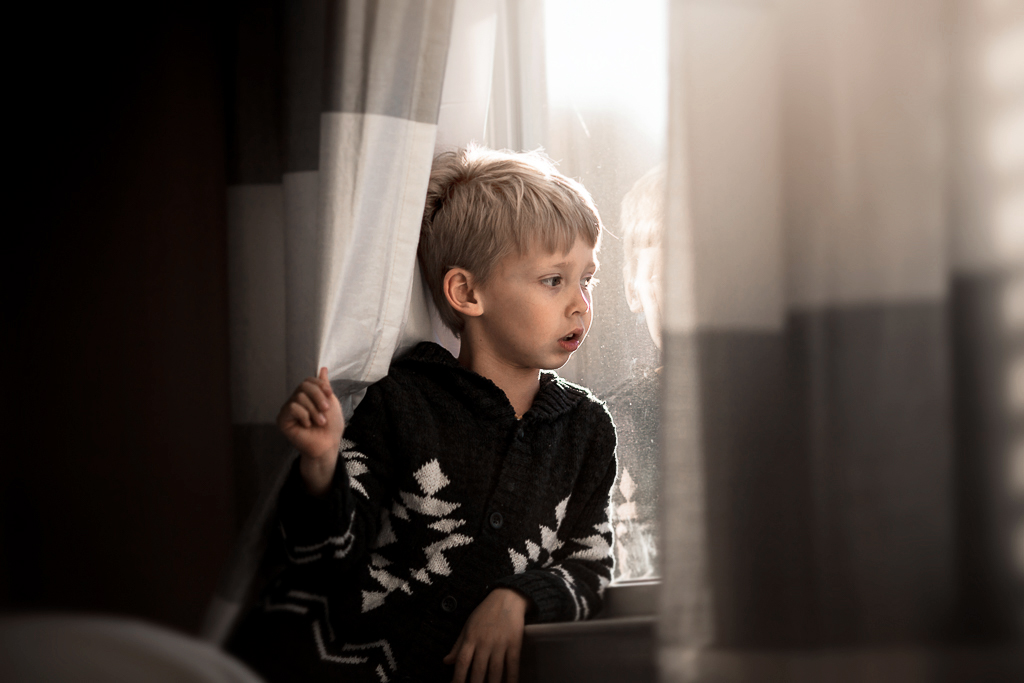
Amelia's mama, Ann, is an amazing photographer, so naturally she was completely at ease with our session. We cuddled baby Amelia, chatted, chased her sweet son around the house and snapped some pictures. It was my very favorite way to start any Saturday!

Stephanie Bryan Photography - Raleigh Lifestyle Newborn Photographer

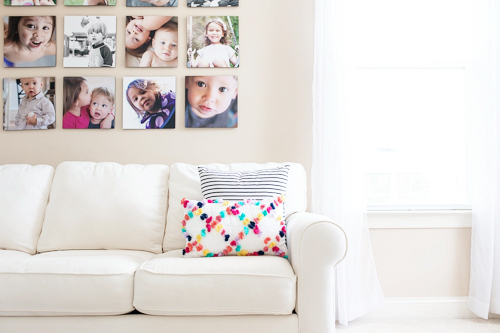
Thank you so much, Tobler family, for allowing me to capture a glimpse of your wonderful life together with sweet baby Amelia. xo

Tags: lifestyle newborn photography
Comment

The Bloom Collective - Light Graffiti

March 04, 2017 in personal photography

The Bloom Collective pushed me out of my comfort zone this month and it was absolutely wonderful. The theme for our challenge was "light graffiti", which is basically light painting or light drawing (and yep - I totally had to google that when we got our assignment).

_MG_8015copy.jpg

After reading a few articles about light graffiti, I decided on using glow sticks with my kids to try to create certain patterns or shapes. I can't tell you how excited my two were to dress in all black, turn out the lights and play around with glow sticks. A majority of our images turned out to be a hot mess, but there were a few surprises here and there. 

I think the anticipation of WHAT we made was as exciting as actually drawing with the glow sticks. 

Have you ever tried this technique before??? It was really fun and the kids loved it for sure! Anything I can do to encourage their love of photography is a win-win for me!!  Be sure to stop by The Bloom Collective to see the rest of the inspiring images! 

Comment
Stephanie Bryan Photography - How to make the move to manual mode

How to make the move to manual mode

March 03, 2017 in tutorials

1. Learn the ins and outs of ISO, aperture, shutter speed and exposure compensation.

You HAVE to start here! Study these babies and know how they work together. Learn what is effected when you change one of the settings. Read, research, google, watch videos and keep studying. The more you know, the faster you'll grasp manual mode!

Click on the images below to be taken to the corresponding blog posts and read, read, read! 

IMG_4285.jpg
IMG_4534_1.jpg
stephaniebryanphotography_understanding_exposure_compensation.jpg
stephaniebryanphotography_whatisshutterspeed.jpg

2. Set your camera to manual mode.

Now that you have a good understanding of what the settings are and WHAT they can do, put that baby in manual (or mode "M") and play around. Practice and practice some more. It's the best way to learn for sure! (Look - I can rhyme!).

3. Pay attention to the available light.

Always. Always pay attention to the light. Where it is. Where it's falling. Where you want it. How much there is. Light will make or break your photo. Promise.

4. Adjust your settings.

Everything you've read and learned about ISO, aperture, shutter speed and exposure compensation is going to come into play here. Adjust your settings to maximize the light available. I recommend starting with your aperture first and adjusting your exposure and ISO as needed to keep your shutter speed high enough to prevent motion blur. 

Example: I have my aperture WIDE OPEN (f 1.8). ISO is set to 100, shutter speed is 1/20 and my exposure meter is showing my subject/focal point is underexposed by 2 stops (the cursor is at -2 on my light meter). In this case, I would incrementally increase the ISO the get my shutter speed to 1/200 with my exposure meter at either 0 or +0.5. I will likely have to bump my ISO up to maybe ISO 400 or 640 depending on my available light. 

5. Practice without an end result in mind.

I definitely don't recommend trying to figure out manual mode at a special event, family gathering or anything important you want to capture. Instead, grab a baby doll or a stuffed animal, plop him in a chair and practice in manual mode. Move around your house, go outside for a walk and practice some more. If you followed along with the blog posts, I suggested first trying out shutter priority mode (TV mode - Canon, S mode - Nikon) and aperture priority mode (AV mode - Canon, A mode - Nikon) before switching to manual mode. Trying out these modes will help give you a good grasp on WHAT each of these functions do and how changing them can change your available light and resulting image.


So are you excited yet? If you are snap happy, manual mode will CHANGE your life. I guarantee manual mode will make your photos 100% better. The freedom manual mode gives you as far as creativity and growth is concerned is amazing!! Promise!!  


looking for more inspiration + tips?

Tags: photography tips
2 Comments
stephaniebryanphotography_understanding_exposure_compensation.jpg

Understanding Exposure Compensation

March 02, 2017 in tutorials

If you're just stopping by, we are working through the three aspects of the EXPOSURE TRIANGLE this week on the blog to help you better understand your camera and how to make it work for you! Be sure to read about ISO, aperture and shutter speed if you haven't already!


The three "elements" of the exposure triangle are aperture, shutter speed and ISO. Learning these settings and how to make them work for you are key to mastering manual mode and getting the photos results you want. Every time I pick up my camera, I am assessing these settings and my light. I am constantly changing and adjusting these settings and once you have a good grasp on manual mode, you will be too!

A "sidekick" to these settings is exposure compensation, and just like aperture, shutter speed and my ISO, I am constantly checking out my light (exposure) meter and adjusting as need be. 

What is exposure compensation?

In basic terms, exposure compensation is YOU telling your camera whether to make your photo brighter or darker. The exposure/light meter is visible through the viewfinder, as well as on the menu screen of your camera. You will see it represented as a number line graph. The cursor underneath the graph tells you how your subject (or focal point) is exposed with your current camera settings. At "0", your camera is telling you your focus point is properly exposed; at -2, your camera is saying your photo will be underexposed; and at +3, your camera is telling you your subject will be overexposed. 

How to use exposure compensation?

You adjust exposure compensation by moving the dial on the top portion/plate of your camera behind the shutter button (usually close to your settings display screen). Dialing it to the left will decrease exposure, while dialing it to the right will increase the exposure. 

I probably adjust my exposure compensation more than any other setting on my camera. I am constantly keeping my eye on the cursor and as I move with my subject, I am assessing how my subject (focal point) is exposed. If the cursor starts to fall too far to the left (meaning my image is likely going to be underexposed), I try to increase it to be "neutral" (0), or slightly overexposed (+0.5). As you increase and decrease your exposure compensation meter, your shutter speed is affected. Increasing exposure decreases shutter speed; while decreasing exposure increases shutter speed. I always keep a good eye on my shutter speed as I'm changing my light meter and will adjust my ISO (to compensate for my shutter speed) if need be. The key to understanding all of these settings (exposure compensation, shutter speed, aperture, ISO) is that THEY ALL WORK TOGETHER! You have to know what happens to one setting if you change it and vice versa.

Why should you use exposure compensation?

So if you understand ISO, shutter speed and aperture and know how to change them to affect your images, you are probably wondering why you would even need to use your exposure compensation meter, right? The simple answer is that light can be tricky and your camera may not always know which aspect of light you are wanting to be exposed. Even if all of your other settings are perfect for your lighting situation, your subject may not be properly exposed. 

When to use exposure compensation?

Always. Yep. Always use your exposure meter as you are shooting to make sure your subject or focal point is properly exposed. The above photos show darker, more dramatic light and I relied SOLEY on my exposure meter for them all. I metered off my daughter/son's face for them all and adjusted my exposure to make sure they were properly exposed (while also keeping an eye on my other settings to make sure everything was a-okay!). If I would have metered for the background in these images (which was really dark), my kids would have been way overexposed. 

Same thing for the two photos below. Since my son/daughter were backlit I had to meter off their faces to make sure they were properly exposed. If I would have let my camera just meter for me, it would have likely picked the bright background, making my subjects underexposed. And if you read my "How to take better backlit photos" post, you know that I always like to overexpose my backlit photos by 1-2 stops to make sure my subjects are bright!

Adjusting exposure compensation can also help retain the details of the sky. For the silhouette photo of my kids, I metered for the sky (which was brighter than my kids) making my kids underexposed, but keeping the clouds in the sky apparent. If you shoot in RAW (which you totally should - read why here!), you can bring back the exposure to your subjects and have a totally different image. 

_MG_6755 copy.jpg

So go practice taking a few shots by JUST adjusting your exposure meter and see what happens! It's a game changer for sure!! 

looking for more inspiration + tips?

Tags: photography tips
5 Comments
Stephanie Bryan Photography - What is aperture?

What is aperture?

March 01, 2017 in tutorials

If you're just stopping by, we are working through the three aspects of the EXPOSURE TRIANGLE this week on the blog to help you better understand your camera and how to make it work for you! Be sure to read about ISO and shutter speed if you haven't already!


What is aperture?

Aperture is my very favorite element of the exposure triangle and learning aperture and how it works will be a game changer for your photography journey. Aperture, for the most part, is the opening of your lens and can vary in size depending on the lens you use and how you manipulate your settings. The WIDER (or larger your aperture is), the more light that's let in. Conversely, the NARROWER (or smaller your aperture is), the less light that's let in. As you can see in the chart below, a wide aperture is usually around f 1.8 - f 2.0. A narrower aperture is represented by a larger aperture number, so f 13 or f 16. (It's kind of confusing, right? Just remember a larger aperture is a smaller number and a smaller aperture is a larger number. Whew.)

How does aperture affect my images?

Just like with shutter speed, changing the aperture of your lens can change the light available to your camera. The wider (or more open) your aperture is, the more that's let into your camera's sensor. The smaller your aperture is, the less light that's let into your camera. 

Changing your aperture also affects the depth of field of your images. A larger aperture (f 1.8 or so) gives you a shallow depth of field where the front part of your photos is in focus while the background is blurry (think: in focus subject with pretty bokeh background). A smaller aperture (f 11 or so) gives you a larger depth of field and makes objects in your background more in focus (think: everyone and your surroundings are in focus).

I captured the two photos below wide open at an aperture of f 1.8. In the left image, you can see my daughter is in focus while my son in the background is blurry. In the right image, my son's hands and the leaves are in focus, while his cute little toes and the ground is blurred. 

To help give you a better example, I put together a couple sets of images using various apertures. In this first exampleI set up a shot of a drink with a few lemons behind my glass. If you pay attention to the lemons in the background you will see they become more in focus as my aperture decreases (the apertures are listed at the top of each photo).

_MG_0006.jpg
_MG_0009.jpg
_MG_0010.jpg
_MG_0011.jpg
_MG_0012.jpg
_MG_0016.jpg
_MG_0018.jpg
_MG_0020.jpg

I did the same thing in this series below. The image on the far left was shot at f 2.0. As you can see, there is a shallower depth of field with the front part of the image in focus and background blurry. If you take a close look at the background elements in the middle (f 4.0) and right (f 11) photos, you will see the difference in depth of field and detail. 

_N0A1216.jpg
_N0A1219.jpg
_N0A1226.jpg

Getting creative with aperture

As I mentioned previously, changing your aperture can really step up your creative game when it comes to photography! By opening your aperture all the way, you can decrease your depth of field and create beautiful bokeh and blurry, dreamy backgrounds. By closing your aperture, you can capture beautiful landscapes and sunbursts. The possibilities are endless and part of the fun is just playing around to see what you get!

IMG079.jpg

A lot of photographers never change their aperture and prefer to shoot wide open (f 1.8-2.0) all the time. Since the majority of my work is indoors, I usually start with a wide open aperture to allow in as much light as possible. Almost all of my lifestyle newborn session have been captured with an f-stop of 1.8 because I wanted to maximize the light available without compromising my shutter speed or having to really bump up my ISO (remember how they are all inversely related???).

That being said, I definitely think each lens has a "sweet spot" when it comes to sharpness and the only way to figure out how your lens handles each f-stop is to try it out and practice, practice, practice. I definitely think my Canon 135L is amazingly sharp at it's lowest aperture (f 2.0), while my Sigmas are sharper around f 2.2 (even though you can stop them down to f 1.4). 


I recommend changing your camera settings to "aperture priority" (AV mode on Canon, A mode on Nikon) and snapping away! In the aperture priority mode, you have full control over your f-stop while your camera adjusts your shutter speed and ISO accordingly. Line up a few toys and take a few shots to see what you think! Then keep practicing some more!

Yay! So if you've been following along with these posts, you now know ALL about aperture, ISO and shutter speed , right? You may not know exactly HOW to use them quite yet, but you are ahead of the game when it comes to finally making that jump to manual mode. 


looking for more inspiration + tips?

Tags: photography tips
Comment
Stephanie Bryan Photography - What is shutter speed?

What is shutter speed?

February 28, 2017 in tutorials

We're working towards manual mode on the blog this week and if you read the post about ISO, you know that there are THREE settings of your camera which work together to create the exposure triangle - ISO, shutter speed and aperture. These three areas work inversely ALL.THE.TIME in your camera so learning them and how they affect your images is crucial! Today we're going to get nice and cozy with shutter speed and learn what it is, as well as how to use it for your images!


What is shutter speed?

Shutter speed is how faster the shutter of your camera opens and closes to let light in and capture an image.  A slow shutter speed means your shutter is open for a longer period of time, while a faster shutter speeds indicates a quick open/close of the camera's shutter. 

Shutter speed is measured in seconds and fractions of seconds. A shutter speed of 1" means your shutter is open for 1 second of time, while a speed of 1/100 means your shutter is open for "one one-hundredth of a second". 

_MG_7911copy.jpg

How does shutter speed affect your images?

Knowing and controlling your shutter speed helps you capture the movement or motion of a photo. A high shutter speed can basically "freeze" an object in motion. A lower shutter speed can show motion blur, or the actual movement of an object. 

I'm constantly chasing my kids around trying to get a decent photo and since I really don't want their movements or motion to be blurred, I try to keep my shutter speed around 1/250. Depending on how fast your subject is, though, 1/250 might still result in a blurry hand/leg, etc.. If I am photographing a still subject, I keep my shutter speed around 1/80 or 1/100 to account for any camera shake or movement I may do when I press my shutter.

Remember - changing your shutter speed is going to change how much light you let in to your photo (aka - exposure), so a longer shutter speed (30") is going to let in more light and a shorter shutter speed (1/250) is going to let in less light. 

Getting creative with shutter speed

Adjusting your shutter speed can dramatically change your images. Both of the photos below were taking on a merry-go-round and they are vastly different. The first photo was taken at 1/30 second as my daughter whipped around (I also did some panning here to try to keep her in "somewhat" focus). The bottom photo was shot at a shutter speed of 1/500, and as you can see, my son is in focus and is "frozen" in his movement. 

There are so many fun effects you can achieve by changing your shutter speed (water drops from a sprinkler, splashes from the tub, blur of moving cars, twinkly lights) and the best way to figure out how to make your shutter speed work for you is to just play around! I recommend changing your camera settings to "shutter priority" (TV mode on Canon, S on Nikon) and snapping away! In the shutter priority mode, you have full control over your shutter speed while your camera will adjust your aperture and ISO accordingly. 

Ok! So now you should have a pretty basic understanding of both shutter speed and ISO and how to make them work for you! Next up is aperture! 


looking for more inspiration + tips?

Tags: photography tips
Comment
Stephanie Bryan Photography - Understanding ISO + how to make it work for you

Understanding ISO + how to make it work for you

February 27, 2017 in tutorials

When it comes to taking better photos, learning your camera and how it works is crucial. Auto mode is easy and can seem really comfortable if you've been there a while. Tackling the ins and outs of your camera can seem scary, but figuring out how to make the different settings can give new life to your photos, as well as your photography journey as well.

My very first camera was a Canon Rebel T1i and I shot in auto mode like a champ. And I loved my photos. They are still some of my favorites not because of the quality or lighting, but because of the memories. But as I shot more and more, I started to wonder why my photos were darker or didn't have that "pop" that I was looking for. So I researched some and decided to take a photography class at our local college. The class was all about manual mode and was an EPIC fail. I left so confused and overwhelmed and swore I would never figure out my camera. I put down my camera for a few weeks and when I finally picked it back up, I decided I would just teach myself. And that I did. I'm a very visual learner so I watched and read as much as I could. I tinkered with my camera and settings and I snapped a zillion photos. 

If you are trying to switch out of auto mode, you HAVE to understand the three principles of the exposure triangle - ISO, aperture and shutter speed to make the move to manual mode. They all work together to give you a properly exposed, in focus, crisp and clear image. Today I'm going to try to help you understand ISO and how to make it work for you! Aperture, shutter speed, exposure compensation and some tips for manual mode are coming to the blog shortly so stay tuned!


What is ISO?

The ISO (International Standards Organization) of a camera controls how sensitive your camera's sensor is to light. The lower your ISO, the less sensitive your sensor is to light; and the higher your ISO, the more sensitive it is to the available light. The ISO on your camera most likely starts at ISO 100 and increases incrementally. Some higher end cameras have a crazy high ISO setting (102,400), but most cap off around 6400 or 12,800. 

How does ISO affect my images?

The best way to think about ISO is to consider what light is available in your setting. The MORE light you have available, the LESS your ISO should be. Conversely, the LESS light you have available to you, the HIGHER your ISO will be. So if you are outdoors on a sunny day, there is plenty of available light, so your sensor doesn't need to be as sensitive to light. Your ISO should most likely be around 100. If you're taking night photos or are in low light, your ISO will be higher - around 3200 or so because there isn't tons of available light, so your camera needs to be MORE sensitive to what light there is. Below is a "rough" idea of how ISO changes with the time of day and place of shooting location. 

stephaniebryanphotograph_learningiso

As your ISO increases (which means you have less available light for your camera), the more "grain" or noise you will see on your images. Grain isn't necessarily a bad thing at all, but just keep in mind that the sharpness and clarity of your image is affected the more grain/noise you have in your image. All cameras handle light differently and some of the higher end cameras don't have a detectable speck of grain at ISO 6400. Others start to show grain around ISO 1000 or so. My advice is to learn your camera and how far you can push it! 

_MG_9961.jpg
_MG_9962.jpg
_MG_9963.jpg
_MG_9965.jpg
_MG_9966.jpg
_MG_9967.jpg

The above images show a difference in ISO for indoor photos. I didn't change any settings on my camera other than my ISO for these shots and they are all SOOC (straight out of camera). As you can see, ISO 100 and ISO 200 are way too dark and underexposed for this setting. ISO 1000 is way too bright, and if you look closely, you will notice that a lot of the "details" of the image are blown out and undetectable (because the camera was too sensitive to light and the image was overexposed).

And let me just take a sec to remind you that ISO is just ONE of your camera settings you need to learn. ISO, aperture and shutter speed all work inversely together. When you change one of them, you inversely change another. 

Taking a test shot and adjusting your ISO is a great way to determine how much light is available for your images/session. I keep the above "chart" in mind, adjust my ISO accordingly and take a test shot to see what works. From there, I will either raise or lower or ISO (while also paying close attention to the aperture and shutter speed settings). I always want the LOWEST ISO possible for my images and client sessions. I find that most of my indoor photos are usually around ISO 800, but I've definitely had sessions where the homes were dark and I had to bump by ISO up to 3200!


stephaniebryan_.jpg

And that's a look at ISO. The most important take away is that the ISO is your camera's sensitivity to light! Being mindful and aware of the available light and then adjusting your ISO accordingly is the first step in understanding manual mode!!

So are you confused yet?? I know I was when I first read about ISO! Don't worry! I promise the more your practice and learn your camera, the easier all of this gets! You'll be an ISO (and aperture and shutter speed) pro in no time! Stay tuned for additional posts about aperture and shutter speed! 


looking for more inspiration + tips?

Tags: photography tips
2 Comments

He, She + Me - February

February 25, 2017 in personal photography

HE: begs to be homeschooled every.single.day • painted his nails yellow + was proud of it • tells people he wants to be a proctologist when he grows up just to see their reaction • refuses to sleep under his sheets • gets a kick out of annoying his sister all day, every day • is a professional trampoline jumper • calls nachos “tiny tacos” and begs for them at every meal • still has a crazy game of tag going on with dad • is the ultimate homebody • can’t fall asleep without a lullaby 

SHE: has a tender heart • is starting a book club at her school • counts down the days until the next full moon so her fairy will visit • sings so much we’ve dubbed her our live-in Pandora station • is always excited about something • groans and moans whenever we want to watch a new movie + then declares it her absolute favorite when we’re done • is upside down (in a handstand) more than right side up • sleeps with seven books, three lovies, four pillows + a handful of stuffed animals 

ME: keeping perspective + a laid-back approach to my project 365 + blogging almost every day and loving it • addicted to my Kindle + everything historical fiction • on day 24 of Whole 30 • living on frozen grapes + pickles wrapped in turkey • instagram > Facebook (always) • planning our family valentines date • grateful 


Project Mama + Me is a monthly project created to remember all the little bits + pieces of our everyday. Follow #projectmamaandme on Instagram.


I’m working on our family’s big ole 2019 album today and as I’ve been going through all of my photos (usually crying and getting lost in memories wondering how my babies grew up so much in just one year 😩😭....), I notice that so m
You had me at baby belly.....💕 And if you wanted to snag a motherhood session, there are just TWO spots left! I’m counting down the days until I get to spoil all you amazing mamas.
Motherhood portrait sessions are live and over half of the spots have sold out already! 💕 I love my mamas and babies (of all ages) so very much. Our children are our hearts and soul. But being a mama is hard work. It's work that's selfless and usual
Woohoooo! Coming tomorrow - registration for the 4th Annual Motherhood Sessions. There is absolutely nothing better than getting mamas and her babies in front of my camera. I love these sessions with my whole heart. Sessions will take place in the st
Belly laughs are the best. 💕
There’s just no place quite like home.
Baby love. 💕
Gimme all the baby giggles. 💕
follow
Tags: personal
Comment
Stephanie Bryan Photography - My favorite lens for lifestyle newborn sessions

My favorite lens for lifestyle newborn sessions

February 24, 2017 in tutorials

Lifestyle sessions offer a glimpse into the raw + real life of a family. Capturing moments and memories with a documentary approach will always be my favorite way to photograph and being invited into someone's home is always an honor. I love being in a place where people feel the most comfortable...where they can kick their shoes off and jump on the bed. And when you add a brand new baby to the mix, well, that's just the icing on the cake.

The thought of going into someone's house and photographing them as a family used to scare the begeezus out of me (and to be honest, I still kind of get butterflies whenever I walk up to the door). But the more I shot in other's homes, the more comfortable I became. I've learned how to make my camera work for me in small spaces + I always come armed with my 24mm lens! 

stephaniebryan_woodfamily-51.jpg
stephaniebryan_woodfamily-14.jpg
stephaniebryan_woodfamily-36.jpg
stephaniebryan_woodfamily-10.jpg

My go-to lens for in-home sessions is the Sigma Art 24mm lens. This wide angle lens gives me space to get creative and always allows enough room to get everyone in the frame. It's just magical. I promise.

I'm also pretty short (5'1"), so I struggled with being able to get above my clients with both my 35mm and 50mm lenses. I was always toting around a stool, looking for something to stand on and even just hovering/shooting/praying with other lenses (not really ideal, right?).

Like all wide angle lenses, the 24mm does have a little vignetting around the edges of the images, but it's nothing that can't easily be corrected in post-processing. 

If you're an in-home photographer (and you probably are even if you just capture your kids at home), I couldn't recommend the 24mm lens more! It's been a game changer for all of my lifestyle sessions, especially my newborn sessions!


looking for more inspiration + tips?


follow on instagram

I’m working on our family’s big ole 2019 album today and as I’ve been going through all of my photos (usually crying and getting lost in memories wondering how my babies grew up so much in just one year 😩😭....), I notice that so m
You had me at baby belly.....💕 And if you wanted to snag a motherhood session, there are just TWO spots left! I’m counting down the days until I get to spoil all you amazing mamas.
Motherhood portrait sessions are live and over half of the spots have sold out already! 💕 I love my mamas and babies (of all ages) so very much. Our children are our hearts and soul. But being a mama is hard work. It's work that's selfless and usual
Woohoooo! Coming tomorrow - registration for the 4th Annual Motherhood Sessions. There is absolutely nothing better than getting mamas and her babies in front of my camera. I love these sessions with my whole heart. Sessions will take place in the st
Belly laughs are the best. 💕
There’s just no place quite like home.
Baby love. 💕
Gimme all the baby giggles. 💕
Tags: photography tips
Comment
Stephanie Bryan Photography - 5 tips for better backlit photos

5 tips for better backlit photos

February 23, 2017 in tutorials

If you follow along with me here or on Instagram, you probably know that I have a love affair with sun flares, backlight and everything related to sunrises/sunsets. Light is magical and finding the ways light can enhance a photo is always at the front of my mind when I'm shooting for both personal and client sessions. Light can dramatically change the look of a photo and learning how directional light can effect a photo is a must for any photographer. With the right lighting, you can take a plain, boring photo to a new level. My favorite two types of directional light are side lighting and backlighting, but if I had to pick a favorite, I would go with backlighting every single time. It's just magical!

Backlighting occurs when the main source of light is behind your subject (usually the sun in my case) and it typically creates a magical, hazy, glowing background, as well as rim light around your subject. Backlighting can be super tricky, however, and even though I practice ALL THE TIME, I still have those moments where I feel like I just can't create a good image to save my life. Patience and a lot of practicing can definitely help you achieve this dreamy effect! 


If you've been wanting to try out backlighting, here are a few suggestions to help you out! 

1. Shoot in manual

If you are shooting in auto, you are likely going to have quite a bit of trouble capturing backlit images. The "auto" settings of your camera are wanting to focus on your midtones and your photo will most likely turn out underexposed, dark and muddy. Shooting in manual gives you full control of your settings and let's you adjust as needed.

2. Shoot in raw

This pretty much goes along with shooting in manual, but I highly recommend shooting in RAW if you want to up your "backlit photos" game. Shooting in RAW is going to give you the flexibility you need to edit certain elements of your backlit photos while preserving others. (And if you need more convincing to shoot in raw, check out my 5 Reasons You Should Be Shooting in Raw post).

IMG_2084-2.jpg

3. Spot meter for your subject

Check out your manual and change your camera settings to "spot metering" before attempting backlit photos. Spot metering is going to allow you to expose for your subject.

Tip- I recommend overexposing 1-2 stops when shooting in backlighting. Since your background is so much lighter than your subject, it's easy to get an underexposed subject (which will just make your post-processing more complicated).. 

4. Filter the sun

Depending on where the sun is and how high/low it is will change the overall look of your photos. If the sun is still pretty high in the sky, try filtering it through trees, behind your subject or shoot looking down so only part of the sun flare/glow is in your frame. Experimenting with where the sun is vs. your subject can always create interesting sun flares and haze. Try placing your subject to the right of your screen with the sun leaking into the left of your frame. Or maybe filter the sun behind your subject and try to have just a little "flare" peeking out.  

5. Practice, practice + then practice a ton more

When it comes to backlighting, practice, practice and more practice will help you learn your camera and how to adjust the settings to control the end result. Try moving all around your subject to see the different effects the lighting has on your photo. If you are getting too much sun flare and haze, try shooting from the side or looking down to decrease the effect. Experimenting is part of the fun and you're bound to get hooked in no time!


looking for more inspiration + tips?

Tags: photography tips
4 Comments
Stephanie Bryan Photography - 3 tips for taking silhouette photos

3 tips for taking silhouette photos

February 22, 2017 in tutorials

Silhouette photos are so visually interesting. Just like images with large amounts of negative space, silhouette photos help to draw your attention to the subject/story at hand. Believe it or not, taking silhouette photos are so easy! Here are my 3 tips for taking awesome silhouette photos!


1. Put your subject in front of your light source + expose for the light

To get a silhouette image, you need have your subject between you and the light source. I love capturing silhouettes at sunset, so the setting sun is typically the light source behind my subjects.   You can also place your subject in the shade with the sun behind them, or even use ambient lighting placed behind your subject to achieve a silhouette image. When you are metering for light in silhouette images, always make sure you meter for your light source (sun, lamp, window) instead of your subject. Your brighter light source will help to make your subjects silhouetted or shadowed against your light source.

2. Look for non-distracting backgrounds

If your subject is walking through thick trees at sunset, it's probably going to be pretty hard to discern your subject from the background and capture a good silhouette subject. It would definitely make for an awesome silhouette photos, but if you are wanting to capture your subject, then looking for a non-distracting or open background is going to help your subject pop. 

3. Get low and shoot looking up

Here in Raleigh, we aren't surround by big open fields, mountains and hills. It's relatively flat around my neck of the woods, so getting low is a must to help create an "open background". When I'm trying to capture a silhouette image, I always try to place my subjects up above me and then I either crouch down or lay down on the ground and shoot looking up (and yes. I seriously do lay down on the ground to capture a photo). 

The best part about silhouettes is that you really don't have to wait for sunset to create a image. I'm always on the lookout for moments where I can capture a silhouette. Big windows and darker rooms are perfect for creating that look! Remember, all you really need is to place your subject between you + the light source! So go out and have fun! See if you can capture a silhouette! 


looking for more inspiration + tips?

Tags: photography tips
Comment
Stephanie Bryan Photography - 5 ways to get out of a creative rut

5 ways to get out of a creative rut

February 21, 2017 in tutorials

If you've ever had a creative block, you probably know they are no fun at all. It feels like the days and weeks drag on forever and sometimes you truly convince yourself you will never do anything creative again. Creative blocks are like a downward spiral and you can easily get sucked into just being "in a rut". I find myself stuck in a creative funk a few times a year and I've been through them enough to know that I WILL get out of this and I WILL be creative again. When I'm lacking inspiration and motivation, one of these little strategies usually will work for me and maybe they will work for you as well! 


1. Try something new

A lot of my favorite images have actually come from being in a rut and deciding to try something new. Grab a prism, ziploc bag or copper pipe and play around. Maybe experiment with macro photography or low-lighting. Think of something you've never tried before and give it a go. 

Stephanie Bryan Photography - 5 ways to get out of a creative rut

2. Go on a walk

Fresh air and sunshine are good for the soul. Take a walk around a park and just observe. Bring your camera if you feel like it, but remember that you aren't there for a photo or perfect image.

3. Pick up a photography book

Books are a great way to spark your creativity. Pick up a new photography book or magazine and be inspired by all of the eye candy. Mark a few favorites and study them to figure out what you love most about those images. Is the light, shadows, composition? Make a list of your favorites + a few new things you might want to try! 

4. Start a new photography project

If you don't try to get out of a rut, you can easily just stay in it for what feels like forever. Misery loves company, right? Instead of waiting to just be creative again, get creative! Don't set the bar too high. Pick something fun, easy, simple and achievable! Maybe try a photo-a-day project for a week. Or maybe decide to capture the sunset for five days. Anything you try will be way better than wallowing in a rut.

5. Step away + take a breath

Sometimes you just have to put down the camera and step away.  You can't force creativity and if you're not inspired at all, then you probably need to take a little break. It's good to put the camera down every so often and just "be". Be present. Be aware. Be grateful. Take the time you need to recharge your batteries and then pick up your camera when you're ready!


looking for more photography tips + inspiration?  


follow on instagram

I’m working on our family’s big ole 2019 album today and as I’ve been going through all of my photos (usually crying and getting lost in memories wondering how my babies grew up so much in just one year 😩😭....), I notice that so m
You had me at baby belly.....💕 And if you wanted to snag a motherhood session, there are just TWO spots left! I’m counting down the days until I get to spoil all you amazing mamas.
Motherhood portrait sessions are live and over half of the spots have sold out already! 💕 I love my mamas and babies (of all ages) so very much. Our children are our hearts and soul. But being a mama is hard work. It's work that's selfless and usual
Woohoooo! Coming tomorrow - registration for the 4th Annual Motherhood Sessions. There is absolutely nothing better than getting mamas and her babies in front of my camera. I love these sessions with my whole heart. Sessions will take place in the st
Belly laughs are the best. 💕
There’s just no place quite like home.
Baby love. 💕
Gimme all the baby giggles. 💕
Tags: photography tips
2 Comments
stephaniebryanphotography_homephotographytips.jpg

5 tips for photographing your home

February 20, 2017 in tutorials

Home is where the heart is and you should photograph it! Just like so many other things of life, our home speaks to the here and now. It's a glimpse into your life and days. 

Here are my top 5 tips for photographing your home! Enjoy + then grab your camera and get snapping!

stephaniebryan_livingwithkids-23.jpg

1. Use a tripod + timer/remote

If you want nice bright photos, well then, dust off that tripod and set it up. Using a tripod will allow you to slow down your shutter speed while keeping your exposure high enough for well lit photos! 

2. Turn off the lights + open up blinds/curtains

Natural light is always best for photographing inside your home. Try to let in as much light as possible. Lamp light and overhead ceiling lights give off a color cast that will drive you bonkers in post-processing. 

3. Move the clutter

You don't have to go crazy and clean your house all day to photograph it. Just move piles of laundry to the side and straighten up counters. Less is more when it comes to images.

stephaniebryan_housetip1.jpg

4. Set your exposure to ISO 100 or 200 + overexpose by +1

A lower ISO will keep your photos crisp and sharp (but if you love a ton of grain, then by all means, bump up that exposure!). Since you are using a tripod for your images, you can keep your ISO pretty low. I also recommend overexposing by at least 1 stop for bright and light photos! 

5. Set your f-stop

For full room photos, I like to set my f-stop between f5.6-6.3. This ensures that I will get a good image full of detail. For close up or detail shots with a blurred background, use a wide open f-stop, such as f1.8. 


looking for more photography tips + inspiration?    


follow on instagram

I’m working on our family’s big ole 2019 album today and as I’ve been going through all of my photos (usually crying and getting lost in memories wondering how my babies grew up so much in just one year 😩😭....), I notice that so m
You had me at baby belly.....💕 And if you wanted to snag a motherhood session, there are just TWO spots left! I’m counting down the days until I get to spoil all you amazing mamas.
Motherhood portrait sessions are live and over half of the spots have sold out already! 💕 I love my mamas and babies (of all ages) so very much. Our children are our hearts and soul. But being a mama is hard work. It's work that's selfless and usual
Woohoooo! Coming tomorrow - registration for the 4th Annual Motherhood Sessions. There is absolutely nothing better than getting mamas and her babies in front of my camera. I love these sessions with my whole heart. Sessions will take place in the st
Belly laughs are the best. 💕
There’s just no place quite like home.
Baby love. 💕
Gimme all the baby giggles. 💕
follow
Tags: photography tips, everyday
Comment

Bethany + Peter | Raleigh Lifestyle Photographer

February 17, 2017 in families

"There are many paths in life. But the longest of them all is the path to the heart. If you resist this path, you will take lifetimes to find it again. If you surrender and embrace it, you'll be home."

I seriously can't get enough of this session. I met Bethany through a local Raleigh creative group and I was tickled pink when she invited me into her home and let me capture her with her sweet husband, Peter.

These two know the drill, man. It was kind of like I wasn't even there. They were so sweet to each other and I loved being a fly on the wall while they chatted and cuddled.

They were even brave enough to venture out in the drizzle with me. Nothing says cozy like a chilly, dreary day. 

Thank you, Bethany and Peter, for letting me spend a few hours with you. You all are the best.

Let me capture you with the love of your life. For session inquires, please contact me at stephanie@stephaniebryanphoto.com or via my contact page.


I’m working on our family’s big ole 2019 album today and as I’ve been going through all of my photos (usually crying and getting lost in memories wondering how my babies grew up so much in just one year 😩😭....), I notice that so m
You had me at baby belly.....💕 And if you wanted to snag a motherhood session, there are just TWO spots left! I’m counting down the days until I get to spoil all you amazing mamas.
Motherhood portrait sessions are live and over half of the spots have sold out already! 💕 I love my mamas and babies (of all ages) so very much. Our children are our hearts and soul. But being a mama is hard work. It's work that's selfless and usual
Woohoooo! Coming tomorrow - registration for the 4th Annual Motherhood Sessions. There is absolutely nothing better than getting mamas and her babies in front of my camera. I love these sessions with my whole heart. Sessions will take place in the st
Belly laughs are the best. 💕
There’s just no place quite like home.
Baby love. 💕
Gimme all the baby giggles. 💕
follow
Tags: lifestyle family photography
Comment

5 tips for better indoor photos

February 16, 2017 in tutorials

Photographing our life in our home is my very favorite way to capture our everyday. We are all self-proclaimed homebodies over here so we spend a lot of time at home. Taking photos indoors can definitely be tricky and learning how to maximize the light and areas within your home is a must. I truly believe magic can happen in any home or place, so if you're shaking your head saying there's no way to get good photos in your home, then I'm here to tell you  you're wrong (and what to do to make those magical photos happen). Here are my 5 tips for better indoor photos.


1. Study the light in your home

Before you even pick up your camera, take a week or so to learn the light in your house. Figure out which way your house faces and then determine which rooms get the best light and when. Walk around and peek in each room throughout the day. As soon as you "spot" the light, you'll know it! Keep a little cheat sheet of your house until you know the light pattern inside and out.

For me, I know the front of our house faces northwest so the sun rises at the back of our house and sets in the front. I kind of just keep this in my back bottom and try to utilize the space of our home based on the light. If, for example, my daughter is getting ready to do her homework, I might suggest she sits at our dining room table (because the sun is setting behind her and I can get a fun sun flare). 

2. Know your camera settings

Even if you have a super well-lit home, you're likely still not going to have as much light as you would have outside. Know your camera settings and how to make them work for you. I tend to shoot wide open (aka - using a large aperture like f1.8-2.2) + bump up my ISO to make sure my shutter speed stays about 1/150 or 1/200. Some times my ISO creeps up to 1000-1200, which might bring more grain into my photo, but will ensure my subjects and any movement in my photos isn't blurred. 

4. Turn off any indoor lights

Unless you are purposely shooting with ambient lighting, I highly recommend turning off any indoor lights. Indoor lighting gives off a warm, yellow color cast and can add harsh shadows and unwanted colors to your subjects and surroundings. 

I always turn off ALL the lights when shooting indoors - lamps, closet lights, overhead lights, hall lights. Your family might think you're crazy, but I promise it will be worth it!

4. Push the piles of clutter to the corner

Life is messy and we all have piles of laundry, toys, etc. scattered throughout our homes. That's part of life and should be photographed as well. But if it doesn't tell or add to the story you're trying to tell, then push the clutter out of the frame. It doesn't mean your life is "picture perfect"...it just means that the laundry piles or stacks of books has nothing to do with your son and daughter tickling each other. 

5. Look for interesting compositions

Once you start looking at your home, I promise you will never see or photograph in it the same. I am always on the lookout for interesting compositions, leading lines, textures and more when I capture an image. Interesting compositions can take an average image to an extraordinary image! I love to frame my subjects and feel like it really helps to tell the overall story of our day. I'm always peeking in at my kids through door frames, windows, mirrors, etc. Get creative and have fun!


looking for more inspiration + tips? 

Tags: photography tips
2 Comments

5 reasons you should be shooting in RAW

February 15, 2017 in tutorials

If I'm honest, a few years ago I kind of didn't even know what people meant when they said "RAW" files. I knew they weren't talking about my JPEG files, but I really had no idea what it meant to shoot in RAW. I mean, it took me forever to teach myself manual mode, so branching out to RAW files seemed waaaay too scary. Sound familiar?

Let me be the first to tell you that RAW definitely DOES NOT equal scary. It equals AMAZING and if you have been on the fence about switching from JPEG to RAW, then I am here to convince you to go for it.

So what is a RAW file anyway? In a nutshell, a RAW file is an unprocessed image. It's the image as seen by the camera's sensor and it has not been processed by the camera. 

So why should you shoot in RAW?

1. You are in full control

When you shoot in JPEG, you let your camera do all of the work. Your camera reads the image, the light, the shadows, the colors, and then decides what goes, what stays, what should change. In RAW, the camera's sensor reads the image as is and then YOU can adjust where you feel necessary. 

By shooting in RAW, you have full control over your image. Did you blow out your sky because you wanted your subject properly exposed? No problem - you can fix that in Lightroom or Photoshop. Did you accidentally underexpose your subject? No worries - you can fix your exposure in post-processing. Basically, when you shoot in RAW, you are able to choose what details need to be tweaked or restored. You are given full creative rights to your photo and you can make it pop in whatever ways you desire!

2. Fix over or under-exposed photos in a snap

Since your photos haven't been compressed by the camera, you can easily fix underexposed or overexposed photos. It seriously only takes one second to fix an improperly exposed image. 

3. Appropriately adjust your white balance

I try to set my white balance prior to my shot, but sometimes I forget or sometimes the moment happens so quickly I don't have the time to change my settings. Just like exposure, you can easily adjust the white balance in either Lightroom or Photoshop.

4. Save the detail in your images

When you shoot in JPEG and your camera interrupts and compresses the image, you loose the detail of your photo. With a RAW file, you can easily tweak and sharpen the image (or parts of the image) to your liking.

5. Original file is untouched

When you shoot in RAW, the original data is never changed. All of the adjustments or edits you make to the file are just telling the post-processing program (Lightroom or Photoshop) how to read the file. Once your edits are complete, the new file is usually saved as either a JPEG or TIFF file, but you will always have the original version.


looking for more photography tips + inspiration?


follow on instagram

I’m working on our family’s big ole 2019 album today and as I’ve been going through all of my photos (usually crying and getting lost in memories wondering how my babies grew up so much in just one year 😩😭....), I notice that so m
You had me at baby belly.....💕 And if you wanted to snag a motherhood session, there are just TWO spots left! I’m counting down the days until I get to spoil all you amazing mamas.
Motherhood portrait sessions are live and over half of the spots have sold out already! 💕 I love my mamas and babies (of all ages) so very much. Our children are our hearts and soul. But being a mama is hard work. It's work that's selfless and usual
Woohoooo! Coming tomorrow - registration for the 4th Annual Motherhood Sessions. There is absolutely nothing better than getting mamas and her babies in front of my camera. I love these sessions with my whole heart. Sessions will take place in the st
Belly laughs are the best. 💕
There’s just no place quite like home.
Baby love. 💕
Gimme all the baby giggles. 💕
Tags: photography tips
2 Comments

Lightroom Tips + Tricks

February 14, 2017 in tutorials

The first day I downloaded and opened Lightroom I swore I would NEVER open it again. I was SO confused and really had NO idea where in the world to even begin. I watched a TON of videos for Lightroom tutorials and read as much as I could to figure this program out. And when I got stuck, I googled it and kept on learning. I by NO MEANS consider myself even a teeny bit of an expert when it comes to Lightroom. Everything I've learned is through a process of trial and error and I'm still learning. I've tinkered and tweaked the sliders enough to "kinda" know what they can do for my photos. I say "kinda" because it is literally a trial and error a lot of the times. There are certain tools I use on almost every photo! My go-to Lightroom tools are:

  • Lens correction - I apply this on every single photo to remove vignetting and distortion.
  • Radial filters  - Radial filters are amazing because you can apply them to just one aspect of your image. I love to use radial filters to lift shadows, correct exposure on a certain area and/or decrease highlights.
  • HSL panel - I spend most of my editing time in the HSL panel. I've found this panel to be most helpful when it comes to correcting skin tones and the coloring of images. 
  • Sharpening/noise reduction - I use these tools to make the image pop a little more (sharpening), while also smoothing the skin (noise reduction).
  • Brushes - Like radial filters, local brushes are great at apply one editing tool to a certain aspect of your photo. My go-to brushes are: iris enhancing + teeth whitening. 


I'm very much a visual learner and I always do better by "seeing" than reading, so I thought I would do a quick editing video to show you how I use my favorite Lightroom tools, as well as to share with you some of my Lightroom tips and tricks. Here's a before + after of the photo I will be editing in Lightroom. Enjoy!

stephaniebryan_lightroom1.jpg
_MG_6738-2copy.jpg

Lightroom is an amazing editing program and I know I barely even skimmed the surface of the wonderful editing tools available. It amy seem overwhelming and daunting when you first open an image and start editing, but I promise it gets easier the more you play around and practice. As I mentioned, most of my "processes" have been developed just from trial + error and I'm sure I will continue to modify, change and grow as I continue learning more about this program! 

What about you? Do you use Lightroom to edit? What are you favorite tricks? 


looking for more inspiration?

Tags: photography tips
6 Comments

Around our clocks - 12pm

February 13, 2017 in personal photography

Happy Monday, friends!
The "Around Our Clocks" blog circle continues and today we are all sharing a glimpse at what our 12:00pm looks like. Noon during the week is pretty dull and boring. Both kids are at school in the middle of class and Scott and myself are usually just working away at our computers. The weekends, however, are a totally different story, so I chose to document 12pm on a Saturday. We LOVE being outside and our weekends typically consist of us checking out our local parks and getting some fresh air. The kids pretty much chase each other around most of the time, and as you can see, the weekends involve lots of exploring and adventuring. 

Thanks so much for stopping by today! To continue on the "Around Our Clocks" blog circle, click on over to Anna-Liisa Nixon Photography, South Florida Documentary Family Photographer and see what her 12pm looks like! 


follow on instagram

Gallery Block
This is an example. To display your Instagram posts, double-click here to add an account or select an existing connected account. Learn more
Aenean eu leo Quam
Cursus Amet
Pellentesque Risus Ridiculus
Porta
Etiam Ultricies
Vulputate Commodo Ligula
Elit Condimentum
Aenean eu leo Quam
Cursus Amet
Pellentesque Risus Ridiculus
Porta
Etiam Ultricies
10 Comments

3 reasons to take your camera everywhere

February 13, 2017 in tutorials

Yes I'm that crazy lady in Target snapping photos of my kids running down the aisles. Why? Because it's my life. Target is my life. Running errands is my life. Chasing two kids around everywhere is my life.

Pulling out the BIG camera in public does feel weird. I admit it. But I still do it. No one even blinks an eye if you pull out an iPhone and snap away on the side of a road, but as soon as someone pulls out the big deal in a store it's all eyes your way. But the thing is...they aren't looking at you. They are looking at what you are photographing. Big camera = big deal to a lot of people, so just go about your business and snap those photos of your kids being kids. 


Here are the top 3 reason you NEED to bring your camera with you wherever you go.

1. Life doesn't just happen in the comfort of your home.

If you're like me, you probably feel like you spend more time out running around than you do at home. That's your life and you should document it. Library stops, Target runs, dinners out. Don't be afraid to capture all of the moments of your day and life. 

2. You'll appreciate the little things.

With your camera in hand, you start to see things differently. You see light and shadows; you see hand holding and happiness. You notice lines and framing. Ultimately, you start to appreciate the little things that you may normally overlook.

stephanie bryan photography - take your camera

3. You will capture moments you would have otherwise missed.

Have you ever been out and about and wish you would have had your camera? Yep. Happens to me all the time. I've never brought my camera and wished I would have left it at home. There are so many moments I've captured just because I had my camera. 


looking for more photography tips + inspiration?


Screen Shot 2017-04-27 at 12.28.26 PM.png

follow on instagram

I’m working on our family’s big ole 2019 album today and as I’ve been going through all of my photos (usually crying and getting lost in memories wondering how my babies grew up so much in just one year 😩😭....), I notice that so m
You had me at baby belly.....💕 And if you wanted to snag a motherhood session, there are just TWO spots left! I’m counting down the days until I get to spoil all you amazing mamas.
Motherhood portrait sessions are live and over half of the spots have sold out already! 💕 I love my mamas and babies (of all ages) so very much. Our children are our hearts and soul. But being a mama is hard work. It's work that's selfless and usual
Woohoooo! Coming tomorrow - registration for the 4th Annual Motherhood Sessions. There is absolutely nothing better than getting mamas and her babies in front of my camera. I love these sessions with my whole heart. Sessions will take place in the st
Belly laughs are the best. 💕
There’s just no place quite like home.
Baby love. 💕
Gimme all the baby giggles. 💕
follow
Tags: photography tips
1 Comment
januaryinphotos.jpg

January in photos + some thoughts

February 12, 2017 in personal photography

A Project 365 is scary and daunting, but I'm determined to make it work for me this year. I'm trying to keep the BIG PICTURE in mind, which is to document our everyday. The in-between moments. The small snippets of our life.

It doesn't sound like much, but a photo a day is harder than you would think. This project has definitely been more challenging than I had imagined. We are usually up and out the door before the sun is all the way up and then are creeping back home as the sun is setting. That doesn't leave much "time" for well-lit photos. I've had to rely more on ambient lighting than I ever had before, but you know...it's working out just fine. Our life doesn't just occur when the lighting is nice and pretty and perfect and capturing those moments is what this project is all about. I'm learning to make the most of the time I have and am trying to appreciate all of the little ins + outs of our day. 

You can keep up with my Project 365 by clicking the "Project 365" at the top of my site, or by following this link. 

2 Comments
Prev / Next