If you're just stopping by, we are working through the three aspects of the EXPOSURE TRIANGLE this week on the blog to help you better understand your camera and how to make it work for you! Be sure to read about ISO and shutter speed if you haven't already!
What is aperture?
Aperture is my very favorite element of the exposure triangle and learning aperture and how it works will be a game changer for your photography journey. Aperture, for the most part, is the opening of your lens and can vary in size depending on the lens you use and how you manipulate your settings. The WIDER (or larger your aperture is), the more light that's let in. Conversely, the NARROWER (or smaller your aperture is), the less light that's let in. As you can see in the chart below, a wide aperture is usually around f 1.8 - f 2.0. A narrower aperture is represented by a larger aperture number, so f 13 or f 16. (It's kind of confusing, right? Just remember a larger aperture is a smaller number and a smaller aperture is a larger number. Whew.)
How does aperture affect my images?
Just like with shutter speed, changing the aperture of your lens can change the light available to your camera. The wider (or more open) your aperture is, the more that's let into your camera's sensor. The smaller your aperture is, the less light that's let into your camera.
Changing your aperture also affects the depth of field of your images. A larger aperture (f 1.8 or so) gives you a shallow depth of field where the front part of your photos is in focus while the background is blurry (think: in focus subject with pretty bokeh background). A smaller aperture (f 11 or so) gives you a larger depth of field and makes objects in your background more in focus (think: everyone and your surroundings are in focus).
I captured the two photos below wide open at an aperture of f 1.8. In the left image, you can see my daughter is in focus while my son in the background is blurry. In the right image, my son's hands and the leaves are in focus, while his cute little toes and the ground is blurred.
To help give you a better example, I put together a couple sets of images using various apertures. In this first exampleI set up a shot of a drink with a few lemons behind my glass. If you pay attention to the lemons in the background you will see they become more in focus as my aperture decreases (the apertures are listed at the top of each photo).
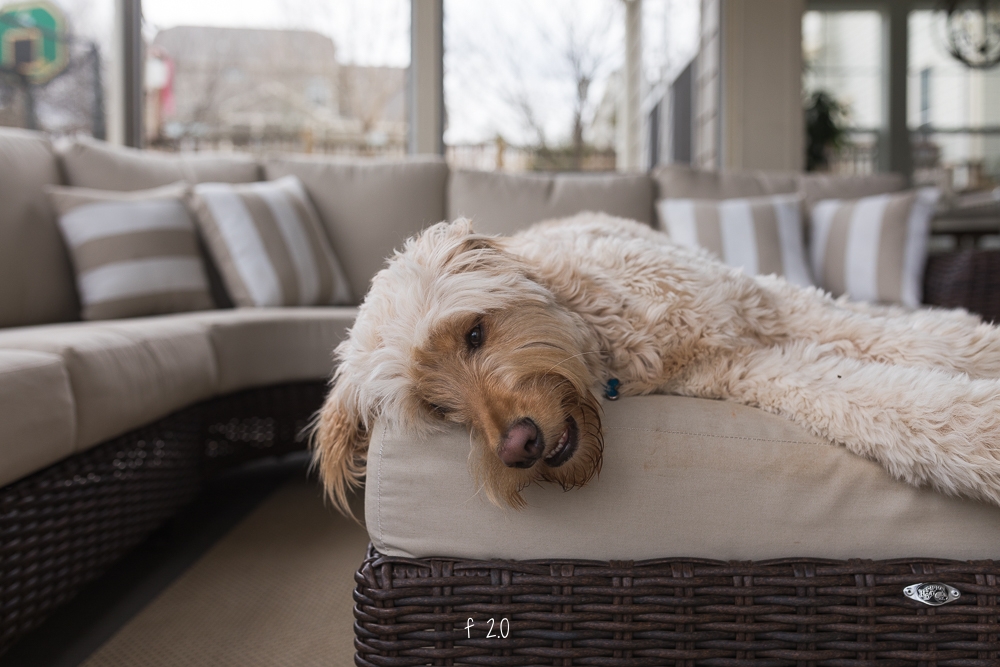
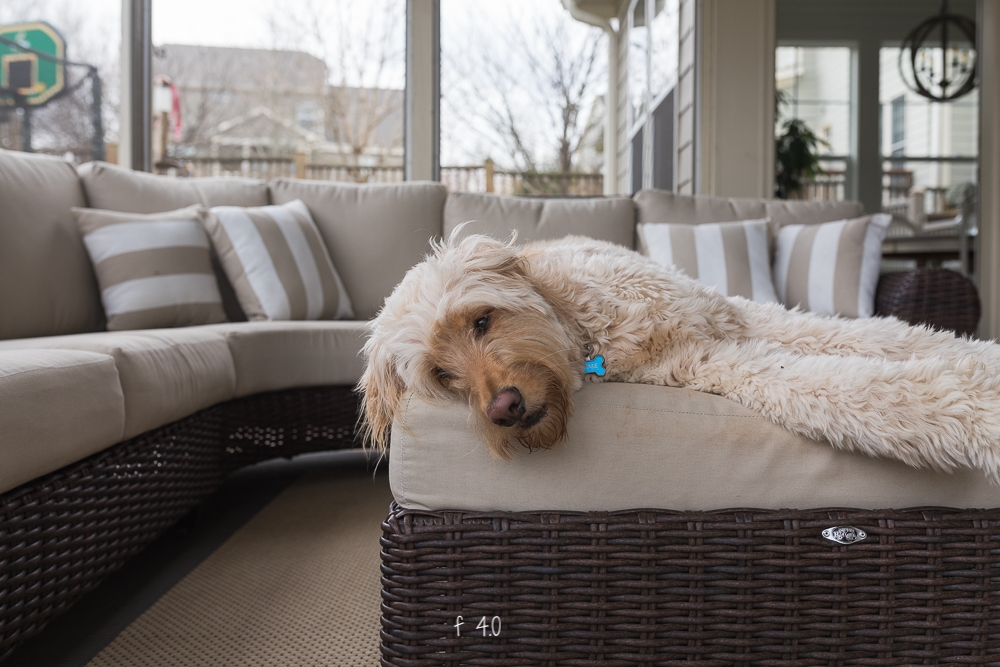
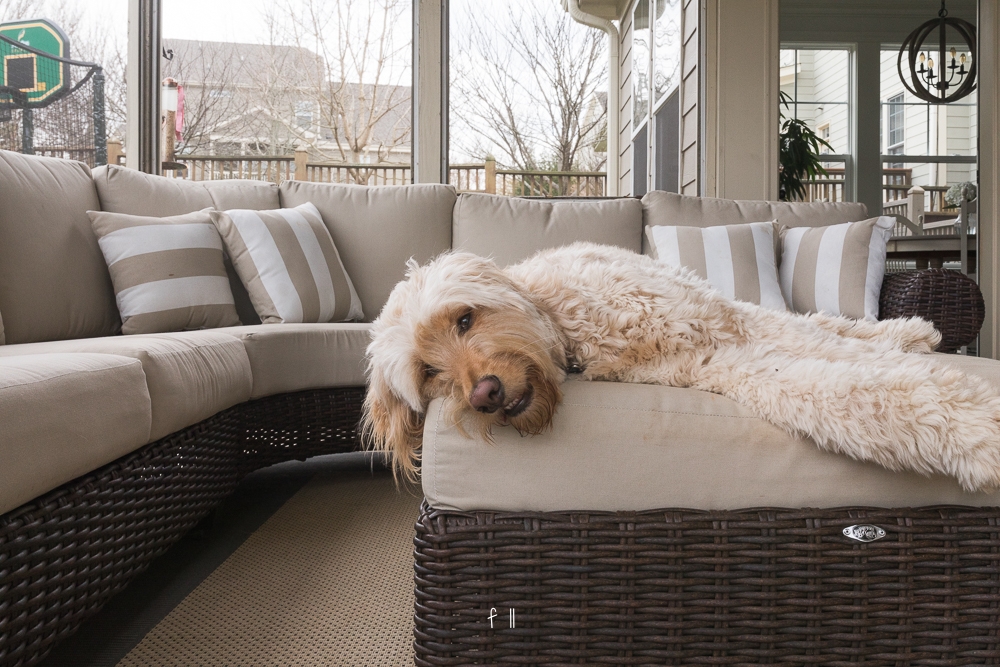
I did the same thing in this series below. The image on the far left was shot at f 2.0. As you can see, there is a shallower depth of field with the front part of the image in focus and background blurry. If you take a close look at the background elements in the middle (f 4.0) and right (f 11) photos, you will see the difference in depth of field and detail.
Getting creative with aperture
As I mentioned previously, changing your aperture can really step up your creative game when it comes to photography! By opening your aperture all the way, you can decrease your depth of field and create beautiful bokeh and blurry, dreamy backgrounds. By closing your aperture, you can capture beautiful landscapes and sunbursts. The possibilities are endless and part of the fun is just playing around to see what you get!
A lot of photographers never change their aperture and prefer to shoot wide open (f 1.8-2.0) all the time. Since the majority of my work is indoors, I usually start with a wide open aperture to allow in as much light as possible. Almost all of my lifestyle newborn session have been captured with an f-stop of 1.8 because I wanted to maximize the light available without compromising my shutter speed or having to really bump up my ISO (remember how they are all inversely related???).
That being said, I definitely think each lens has a "sweet spot" when it comes to sharpness and the only way to figure out how your lens handles each f-stop is to try it out and practice, practice, practice. I definitely think my Canon 135L is amazingly sharp at it's lowest aperture (f 2.0), while my Sigmas are sharper around f 2.2 (even though you can stop them down to f 1.4).
I recommend changing your camera settings to "aperture priority" (AV mode on Canon, A mode on Nikon) and snapping away! In the aperture priority mode, you have full control over your f-stop while your camera adjusts your shutter speed and ISO accordingly. Line up a few toys and take a few shots to see what you think! Then keep practicing some more!
Yay! So if you've been following along with these posts, you now know ALL about aperture, ISO and shutter speed , right? You may not know exactly HOW to use them quite yet, but you are ahead of the game when it comes to finally making that jump to manual mode.
looking for more inspiration + tips?
